I have installed countless tiles in bathrooms and kitchens over the years, and one question keeps coming back: should I use backer board or drywall under my tile?
In this article, I share my real-world experience comparing these two materials so you can make the smartest choice for your project.
I cover their strengths, weaknesses, and practical differences from someone who has dealt with both on actual job sites. By the end, you will know exactly when to pick one over the other and how to avoid common mistakes that cost time and money.
| Feature | Backer Board | Drywall |
| Primary Use | Tile and stone installations | General walls and ceilings |
| Water Resistance | Excellent, cement-based or fiberglass | Poor without special green board |
| Strength Under Tile | Very high, prevents cracking | Low, can flex and crack grout |
| Weight | Heavier | Much lighter |
| Installation Speed | Slower, needs special screws | Faster with standard drywall screws |
| Cost | Higher upfront | Lower upfront |
| Mold Resistance | High | Low unless treated |
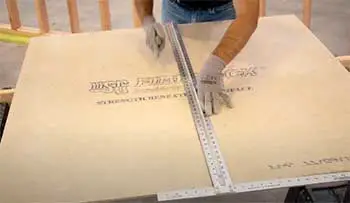
| Cutting Method | Score and snap or grinder | Utility knife, easy |
| Best For | Wet areas, floors, showers | Dry interior walls |
Key Differences Between Backer Board And Drywall
- Material Composition: Backer board uses cement or fiberglass reinforced materials while drywall relies on a gypsum core sandwiched between paper faces
- Moisture Handling: Backer board shrugs off water exposure whereas drywall absorbs it and breaks down
- Strength and Rigidity: Backer board provides a rock-solid base that prevents movement while drywall remains relatively flexible
- Weight Considerations: Backer board weighs significantly more per sheet than standard drywall
- Installation Techniques: Backer board needs special screws and seam treatment while drywall uses standard methods
- Cost Structure: Backer board costs more initially but saves money through durability while drywall appears cheaper upfront
- Suitable Applications: Backer board excels in wet and tiled areas while drywall dominates dry interior spaces
- Cutting and Handling: Drywall cuts effortlessly while backer board requires more robust tools and creates different dust
- Long-Term Performance: Backer board maintains integrity for decades in tough conditions while drywall needs protection from moisture
- Sound and Thermal Properties: Some backer board versions offer better sound dampening while drywall provides basic insulation value
- Repair Difficulty: Drywall patches easily in dry areas while backer board repairs in wet zones demand more care
- Load-Bearing Capacity: Backer board supports heavy tile loads without flexing while drywall struggles with the same demands
These differences show up clearly on every job. I evaluate each room based on expected moisture levels and traffic before deciding which material to reach for.
Understanding Backer Board In My Projects
I first started using backer board when I realized how badly regular drywall failed under tile in humid bathrooms.
Backer board comes mainly in cement-based versions or lighter fiberglass versions. The cement ones feel rock-solid once installed.
I remember one shower renovation where I chose cement backer board because the homeowner wanted floor-to-ceiling tile. That board handled the constant moisture without any issues years later.
Key features that stand out to me include its rigid structure that minimizes movement. When you walk on a tiled floor installed over backer board, you feel almost no flex at all. Many brands add a smooth surface that accepts thinset mortar extremely well, creating a strong bond with your tile.
Some modern versions come with built-in moisture barriers or fiberglass mesh that adds extra toughness against cracking.
I always appreciate how backer board stays dimensionally stable. It does not swell or warp like some materials when it gets damp. That stability translates directly into longer-lasting tile jobs.
In one kitchen floor project, I installed large-format porcelain tiles over backer board on a wood subfloor. Three years on, not a single cracked grout line appeared, even with heavy foot traffic and occasional spills.
Also Read: Differences Between Drywall Trowel And Concrete Trowel.
Key Features of Backer Board Worth Knowing
- Rigid cement or fiberglass core that resists bending and cracking
- Moisture-resistant formulation that prevents swelling or disintegration
- Compatible with standard thinset mortars for strong tile bonding
- Available in multiple thicknesses from ¼ inch to ½ inch or more
- Often reinforced with fiberglass mesh for added tensile strength
- Pre-scored or easy-break designs on some brands for cleaner cuts
- Lightweight fiberglass versions reduce strain during installation
- Built-in water barriers on premium cement boards
- Smooth or textured surfaces optimized for different tile types
- Fire-resistant properties in many formulations
- Dimensional stability that prevents warping with humidity changes
- Impact resistance that protects against accidental bumps in showers
I always check these features against my specific project needs. A shower wall might call for one type while a kitchen backsplash needs another.
Pros of Backer Board That I Have Experienced
- Superior moisture resistance keeps mold and mildew at bay in showers, tubs, and kitchens
- Excellent rigidity reduces tile cracking and grout failure over time
- Creates a solid base that feels premium underfoot or under hand when tiled
- Works beautifully with both floor and wall tile installations
- Resists impact damage better than drywall in high-traffic wet zones
- Maintains structural integrity even if minor leaks occur behind the tile
- Accepts thinset mortar exceptionally well for reliable tile adhesion
- Available in different thicknesses to match your specific needs
- Provides a professional finish that homeowners notice and appreciate
- Reduces callbacks for repairs compared to drywall under tile
- Offers better sound dampening in some thicker versions
- Handles temperature changes without expanding or contracting much
In my experience, the peace of mind alone makes backer board worth considering. I no longer worry about a bathroom tile job failing because of hidden moisture problems. That reliability saves me time and protects my reputation with clients.
Cons of Backer Board I Have Learned the Hard Way
- Heavier material makes carrying and lifting sheets more tiring on big jobs
- Higher material cost adds up quickly on large wall or floor areas
- Requires special corrosion-resistant screws instead of regular drywall screws
- Cutting takes more effort and creates more dust than drywall
- Needs careful handling to avoid cracking the edges before installation
- Installation takes longer because of the added steps for taping seams
- Heavier weight can stress weaker floor structures if not planned properly
- Limited flexibility makes it harder to fit around complex curves
- Some brands feel rougher on the hands during handling
- Mistakes in cutting are more expensive to fix due to higher cost per sheet
- Requires learning a slightly different installation technique
I once tried rushing a backer board install on a tight deadline and ended up with a few chipped edges that needed patching. That taught me to slow down and respect the material. The extra time invested upfront still pays off, but you cannot treat it exactly like drywall.
Understanding Drywall And My Experiences With It
Drywall has been my go-to for standard interior walls for as long as I can remember.
It is lightweight, affordable, and incredibly easy to work with when you are not planning to tile over it.
I have hung thousands of sheets in bedrooms, living rooms, and offices.
The paper-faced gypsum core cuts cleanly with a simple utility knife, and finishing the seams goes quickly once you get the hang of mudding and taping.
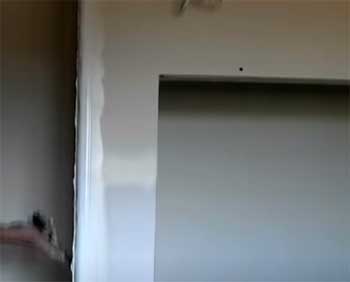
Key features include its smooth surface that paints beautifully and its availability in different thicknesses like ½ inch and ⅝ inch. Standard drywall works great in completely dry areas. I like how forgiving it feels during installation compared to more rigid materials. You can often adjust sheets slightly even after screwing them in place.
In non-wet areas, drywall delivers speed and cost savings that are hard to beat. I completed an entire house interior in record time using standard drywall because the homeowners wanted a fast, budget-friendly renovation.
The walls looked perfect after painting, and the project stayed well under budget.
Also Read: Differences Between TEC And RedGard Waterproofing Membranes.
Key Features of Drywall That Matter
- Lightweight gypsum core for easy lifting and positioning
- Paper facing that accepts paint and joint compound perfectly
- Standard sizes that fit most 16-inch or 24-inch stud spacing
- Tapered edges that make seamless joint finishing easier
- Available in fire-rated, moisture-resistant, and impact-resistant versions
- Quick installation with common power screwdrivers
- Smooth surface ideal for level 4 or 5 drywall finishes
- Good acoustic properties in standard residential applications
- Recyclable material that appeals to eco-conscious builders
- Consistent thickness across sheets for uniform walls
- Flexible enough to conform slightly to minor framing issues
- Wide availability and competitive pricing from multiple manufacturers
These features make drywall the default choice for most non-tiled interior work I encounter.
Pros of Drywall From Real Job Sites
- Very lightweight and easy for one person to handle on most walls
- Lower material cost makes it budget-friendly for large areas
- Cuts quickly and cleanly with basic tools
- Installs faster than backer board with standard screws
- Creates smooth walls ready for paint or wallpaper
- Widely available at every home improvement store
- Flexible enough to fit minor irregularities in framing
- Easier to repair small holes or damage
- Produces less dust during cutting compared to cement board
- Works excellently for ceilings where weight matters
- Accepts standard joint compound for seamless finishes
- Allows faster overall project completion in dry spaces
Drywall shines when moisture is not a factor. I still choose it for most interior partitions because the advantages in speed and ease cannot be ignored.
Cons of Drywall I Have Seen Too Often
- Poor water resistance leads to swelling and crumbling if exposed to moisture
- Flexes under tile, causing cracked grout and loose tiles over time
- Mold grows easily behind tile if any water gets through
- Not strong enough for floor tile installations on its own
- Requires special green board version for even moderate moisture areas
- Can sag over time on ceilings if not properly supported
- Loses structural integrity when wet, leading to expensive repairs
- Creates soft spots that show through tile as uneven surfaces
- Needs extra layers or reinforcement for heavy tile loads
- Performs poorly in bathrooms, kitchens, and laundry rooms
- Repairs in wet areas often involve full replacement rather than patching
I learned this lesson painfully on an early bathroom job where I used regular drywall behind tile to save money. Within two years, the homeowner called me back because tiles were popping off and mold appeared. That mistake cost more in the long run than using proper backer board from the start.
- When I Choose Backer Board Over Drywall?
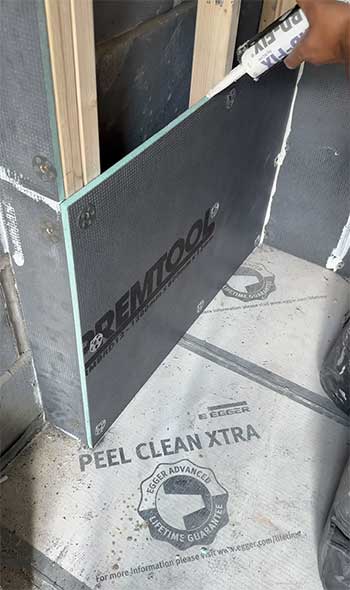
I reach for backer board every time a project involves tile in areas that see water. Showers, tub surrounds, kitchen backsplashes near sinks, laundry rooms, and even some outdoor covered areas get backer board from me now. I also use it on floors where I want large tiles without worrying about deflection.
The extra cost and effort disappear once I see the finished job holding up beautifully years later. If your project has any chance of regular moisture exposure, I recommend you seriously consider backer board.
- When Drywall Makes More Sense for Your Project?
Drywall remains my first choice for bedrooms, living rooms, hallways, offices, and any space that stays consistently dry. I also use it on ceilings where weight savings matter and where I will not apply tile.
For quick cosmetic updates or budget renovations without wet zones, drywall delivers excellent results without over-engineering the job. You save time and money while still getting smooth, paintable walls that look professional.
- My Practical Installation Tips For Both Materials
I always check the substructure first. For backer board, I make sure joists or studs can handle the extra weight. I use the manufacturer-recommended screws and space them properly to avoid cracking.
With drywall, I focus on proper screw depth so I do not break the paper face. In both cases, I stagger seams and pay close attention to corners. Taking time to plan the layout prevents headaches later.
I also recommend wearing proper dust protection because cutting either material creates particles you do not want to breathe.
You should test-fit sheets before final fastening. I have avoided several mistakes by dry-fitting first. For backer board, I apply thinset or construction adhesive in some cases for even better bonding to the substrate.
With drywall, proper taping and mudding technique separates amateur from professional results.
Also Read: Is Sentinel Cement Foam Board Worth It?
Frequently Asked Questions (FAQ)
Yes, backer board offers much greater strength and rigidity, especially under tile loads, while drywall flexes more easily.
You should use the specific screws recommended by the manufacturer and follow proper spacing to avoid damaging the board.
Properly installed backer board can last decades, often matching the lifespan of your home when used in suitable conditions.
Cement board is heavier, more expensive, harder to cut, and requires special fasteners compared to standard drywall.
Wrapping Up
After handling both backer board and drywall on many different projects, I have learned that neither material is universally better. You need to match the product to the actual conditions your walls or floors will face. I choose backer board when durability and moisture resistance matter most because I have seen it protect tile installations for years.
You will likely appreciate the long-term performance if you pick it for wet areas. On the other hand, drywall gives me speed and affordability where moisture is not an issue, letting me finish projects faster and keep costs down.
I encourage you to evaluate your specific space honestly. Consider the expected moisture levels, the type of finish you want, your budget, and how long you expect the installation to last. Taking a few extra minutes to decide correctly at the beginning saves you from expensive repairs later.
Whether you go with backer board for tough conditions or drywall for standard dry walls, proper installation makes all the difference. I hope my experiences help you feel confident in your choice so your next project turns out exactly the way you want it to.