
I’ve spent years sorting through building materials for my own renovation projects, and the vapor barrier versus vapor retarder question kept coming up every time moisture control entered the conversation.
This piece lays out the practical differences, key traits, strengths, and drawbacks so you can pick the option that protects your walls without creating new problems.
| Feature | Vapor Barrier | Vapor Retarder |
| Permeance rating | 0.1 perm or lower | Greater than 0.1 perm up to about 10 perms |
| Moisture movement | Nearly complete block | Slows but allows limited passage |
| Typical materials | 6-mil polyethylene, foil-faced products, certain rigid foams | Kraft-faced fiberglass, smart membranes, latex paints, some rigid foams |
| Climate preference | Cold, heating-dominated regions | Mixed or warm-humid regions |
| Drying potential | Very low | Moderate to high |
| Risk of trapped moisture | Higher if installed on wrong side | Lower |
| Cost range | Generally lower for basic sheet goods | Varies; specialty membranes cost more |
| Installation precision required | High | Moderate |
Key Differences between Vapor Barriers and Vapor Retarders
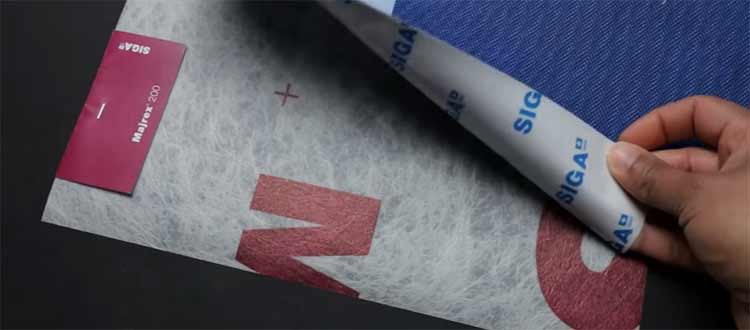
- Permeance numbers decide the category I measure performance by the perm rating because that single number tells me how much water vapor can pass through a square foot of material in an hour under standard conditions. Anything at or below 0.1 perm qualifies as a barrier in most building codes. Anything above that and still under roughly 10 perms falls into the retarder group. That gap looks small on paper, yet it changes how a wall assembly behaves over decades of seasonal moisture swings.
- Direction of moisture control Barriers sit on the warm-in-winter side of the insulation and stop indoor humidity from reaching cold surfaces where it can condense. Retarders still slow that movement but leave enough openness for the assembly to dry toward the interior if exterior moisture somehow gets in. I learned this distinction the hard way after seeing a closed-cell foam wall that refused to dry after a roof leak.
- Climate-driven choice In regions with long heating seasons and low outdoor humidity, the barrier approach keeps indoor moisture where it belongs. In places that swing between heating and cooling or stay humid most of the year, a retarder reduces the chance of moisture getting locked inside the cavity. Local code language often reflects this reality, even when the terms get used loosely on job sites.
- Ability of the wall to dry A true barrier creates a one-way street. Once moisture enters from the exterior or from plumbing leaks, escape routes shrink. Retarders keep multiple drying paths open. That single trait has saved more assemblies than any other detail I have tracked.
- Material flexibility and thickness Barriers tend to be continuous sheets or coatings with almost zero porosity. Retarders come in a wider range of forms, including paints, kraft facings, and variable-permeance membranes that change behavior with humidity levels. Thickness alone does not decide the rating; density and chemical makeup matter more.
- Code classification language Building codes often label Class I vapor retarders (0.1 perm or less) as the barrier category and reserve Class II and Class III for materials that slow rather than stop vapor. Understanding that language prevents arguments with inspectors and keeps the assembly legal.
Key Features of Vapor Barriers
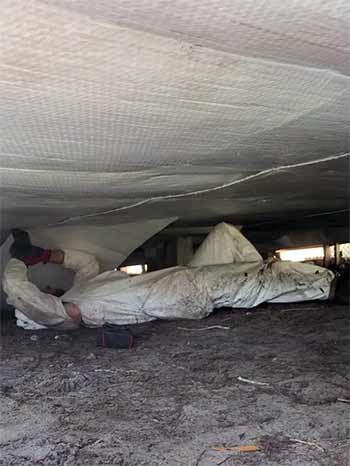
- Extremely low permeance The defining trait is a rating of 0.1 perm or lower. Six-mil polyethylene sheet commonly tests around 0.06 perm, which means almost no vapor crosses it under normal pressure differences. Foil-faced polyisocyanurate boards and certain rubberized membranes reach even lower numbers. That near-zero passage is the feature I rely on when indoor humidity stays high through winter.
- Continuous sheet or coating application Most barriers install as large sheets taped at seams or as sprayed coatings that form an unbroken film. Overlaps of six inches or more plus approved tape keep the system intact. Any puncture from electrical boxes or plumbing needs careful sealing because even small holes raise the effective permeance of the whole plane.
- Placement on the warm side Correct location sits toward the interior in cold climates so that indoor moisture never reaches the dew point inside the insulation. I always check the climate zone map before deciding which face of the wall receives the barrier. Wrong-side placement turns the product into a moisture trap rather than a protector.
- Compatibility with insulation types Barriers work with fiberglass batts, cellulose, and open-cell foam as long as the warm-side rule is followed. Closed-cell foam sometimes serves as its own barrier when installed thick enough, which simplifies the stack. I still verify the manufacturer’s claimed permeance rather than assume.
- Durability under normal building loads Once protected from ultraviolet light and physical damage, polyethylene and foil products last the life of the structure. They resist most household chemicals and stay flexible enough to handle minor framing movement without cracking.
- Low material cost for basic options Standard poly sheeting remains one of the cheapest moisture-control layers available. That affordability makes it attractive for large floor areas or simple wall builds where budget pressure is high.
Pros of Vapor Barriers
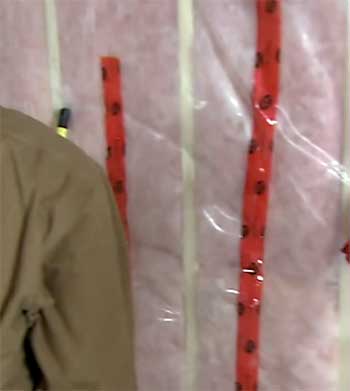
- Near-total stop of interior moisture drive In cold winters the barrier keeps water vapor from reaching cold sheathing or roof decks. Condensation risk drops dramatically, which protects insulation R-value and framing from long-term wetness. I have measured indoor humidity levels that stayed comfortable without the wall cavities turning damp.
- Predictable performance year after year Once installed correctly, the low permeance stays consistent. Temperature swings and aging do not open new pathways the way some coatings can. That reliability simplifies long-term moisture modeling for the whole building.
- Simple material list for basic builds A roll of polyethylene, tape, and a staple gun cover most wall and ceiling needs. No special primers or humidity-sensitive membranes are required, which keeps the learning curve short for crews new to the detail.
- Effective under high indoor humidity loads Houses with frequent cooking, showers, or indoor drying of laundry benefit from the tight seal. The barrier handles the elevated vapor pressure without letting moisture accumulate in the insulation.
- Cost control on large surface areas Covering an entire basement floor or attic ceiling stays inexpensive with standard poly. The savings add up quickly on bigger projects compared with specialty membranes.
- Compatibility with vapor-impermeable exterior claddings When the outside of the wall uses materials that also resist drying, the interior barrier becomes the primary control layer and works in balance with the cladding.
Cons of Vapor Barriers
- High risk of trapping exterior moisture Any water that enters from rain, foundation seepage, or roof leaks has almost no escape path once the barrier is in place. I have seen assemblies stay wet for months because the interior plane refused to let vapor leave.
- Strict installation demands Seams, penetrations, and edges must stay airtight. A single unsealed electrical box or torn sheet raises the effective permeance and defeats the purpose. Quality control on the job site becomes non-negotiable.
- Limited usefulness in mixed or warm climates Air-conditioning seasons create reverse vapor drive. Outdoor humidity tries to move inward, and the barrier can force condensation onto the back of the interior finish. Many codes therefore restrict or prohibit barriers in those zones.
- Reduced drying capacity after construction Even minor construction moisture left in lumber or concrete can stay locked in. The wall takes far longer to reach equilibrium, increasing the chance of early mold or fastener corrosion.
- Potential for condensation on the cold side of the barrier If insulation is incomplete or thermal bridging exists, the barrier itself can become the cold surface where vapor condenses. That scenario turns the control layer into a collection plane.
- Difficulty of future repairs Once covered by drywall, fixing a damaged barrier requires opening finished surfaces. The cost and disruption discourage owners from addressing small problems early.
Key Features of Vapor Retarders
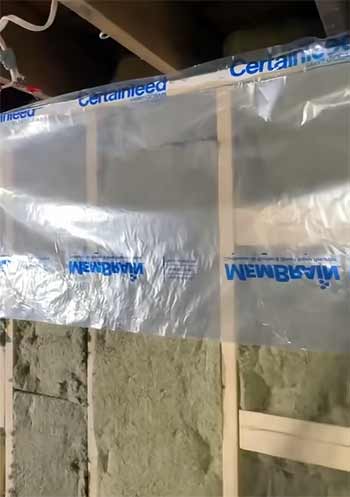
- Controlled permeance range Ratings sit between 0.1 and 10 perms. Kraft paper facings on batts usually land around 1 perm. Certain latex paints measure 2 to 5 perms. Smart membranes can shift from under 1 perm in dry conditions to over 10 perms when humidity rises, giving the wall a self-adjusting quality I find especially useful in mixed climates.
- Multiple product forms Retarders appear as sheet goods, liquid-applied coatings, paint films, and integral facings on insulation. That variety lets me match the product to the substrate without forcing a single solution across an entire house.
- Variable or fixed performance Fixed-permeance products keep the same rating year-round. Variable ones respond to relative humidity, becoming tighter when indoor air is dry and more open when moisture needs to escape. I prefer the variable type in coastal or humid-summer locations because the assembly gains drying capacity exactly when it needs it.
- Integration with interior finishes Many retarders double as the interior face of the wall, such as kraft-faced batts or painted drywall systems. That dual role reduces the number of separate layers and speeds installation on production framing crews.
- Allowance for limited drying Even while slowing vapor drive from inside, these materials still permit outward or inward drying under reverse vapor pressure. That feature has prevented mold growth in several projects I monitored after unexpected water intrusion.
- Code acceptance across climate zones Class II and Class III retarders satisfy requirements in a wider range of zones than strict barriers. Inspectors familiar with the International Residential Code generally accept them without extra documentation when the climate zone matches the product class.
Pros of Vapor Retarders
- Balanced moisture management The moderate permeance slows indoor vapor enough to protect the cavity while still allowing the assembly to dry when conditions reverse. That balance has kept more walls healthy across seasonal changes than any other single approach I have used.
- Wider climate flexibility Retarders perform acceptably in cold, mixed, and even some warm-humid zones when the right class is chosen. One product line can serve multiple projects without constant material changes.
- Easier forgiveness of minor installation flaws Small gaps or imperfect seams raise the overall permeance only slightly. The system still functions because the base rating already sits higher than a barrier. Crews under time pressure make fewer critical mistakes.
- Support for drying after water events Plumbing leaks, storm intrusion, or high construction moisture can leave through the retarder plane. Recovery time shortens dramatically compared with sealed barrier assemblies.
- Integration with smart or variable membranes Modern products adjust permeance automatically. Dry winter conditions tighten the layer; humid summer conditions open it. That adaptive behavior matches real weather more closely than fixed sheets.
- Lower long-term risk of hidden mold Because moisture rarely stays trapped for extended periods, the conditions that feed mold colonies appear less often. Indoor air quality stays more stable over the building’s life.
Also Read: Alternatives To Dricore Smartwall.
Cons of Vapor Retarders
- Incomplete stop of high vapor drive In very cold climates with high indoor humidity, the higher permeance still lets enough moisture through to risk condensation on cold surfaces. Extra ventilation or dehumidification may be needed to compensate.
- Variable performance among products Not every retarder behaves the same. Paint films, kraft paper, and smart membranes differ widely in actual field permeance. I always verify independent test data rather than rely on marketing claims.
- Potential for higher material cost Specialty variable-permeance membranes cost more per square foot than basic polyethylene. On large projects the difference becomes noticeable in the budget.
- Need for climate-specific selection Choosing the wrong class for the location can either under-protect or over-restrict the wall. The decision requires more analysis than simply rolling out a sheet of poly.
- Possible reduction in insulation effectiveness if too open In extreme cold, a Class III retarder may allow enough vapor movement that insulation stays slightly damp and loses some R-value. Monitoring indoor humidity becomes more important.
- Less predictable modeling for complex assemblies Because permeance sits in a range rather than a fixed low number, hygrothermal simulations need more inputs and assumptions. Designers spend extra time confirming the stack will perform.
Climate and Code Considerations That Shape the Choice
Local climate zones drive the decision more than any other factor.
In zones with 5,000 or more heating degree days, barriers remain common on the interior side of walls and ceilings.
In zones that experience both significant heating and cooling, or that stay warm and humid, codes lean toward Class II or Class III retarders.
I always cross-check the latest residential code edition for the project location because language continues to evolve.
Air leakage often moves more moisture than pure vapor diffusion. A continuous air barrier works together with either product.
When the air barrier and vapor control layer are the same material, detailing becomes simpler.
When they are separate, each must be continuous in its own plane.
Practical Installation Lessons from Real Projects
Surface preparation matters. Dust, grease, or uneven framing prevents tape adhesion and creates weak spots. I clean and dry every substrate before rolling out sheet goods.
For liquid-applied retarders the temperature and humidity during application must stay inside the manufacturer’s window or the film never reaches its rated permeance.
Penetrations receive the most attention. Electrical boxes, plumbing lines, and duct boots get sealed with compatible tape or caulk before the finish layer goes on.
In my experience the majority of field failures start at these points rather than in the middle of a clean sheet.
Long-Term Performance and Maintenance Reality
Once the building is closed, neither product needs routine maintenance if installed correctly. The real work happens during the first year when construction moisture leaves the assembly.
I monitor indoor humidity and look for any signs of condensation on windows or cold corners. If those appear, the vapor control layer may need supplemental ventilation rather than replacement.
Replacement later in the building’s life is rarely practical without major renovation. Choosing the right product the first time therefore carries more weight than almost any other moisture-related decision.
Also Read: Differences Between Rockwool And Fiberglass Insulation.
Frequently Asked Questions (FAQ)
Use a barrier in cold climates on the warm side of insulation. Use a retarder in mixed or warm-humid climates where some drying capacity is needed.
Standard 6-mil polyethylene is a vapor barrier because its permeance sits well below 0.1 perm.
They may allow too much moisture movement in very cold climates with high indoor humidity, raising condensation risk.
Avoid barriers in mixed or warm climates and never place them on the cold side of the insulation where they can trap moisture.
Wrapping Up
As I finish this overview I want you to walk away with a clear sense of how each material behaves so you can match the product to your climate, construction method, and long-term goals.
The right choice keeps moisture under control without creating new problems inside the walls.