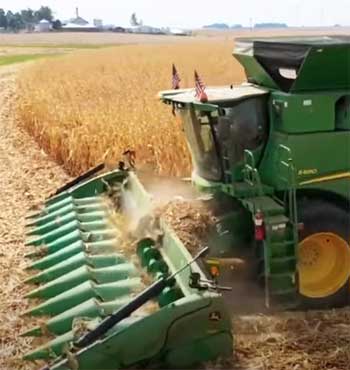
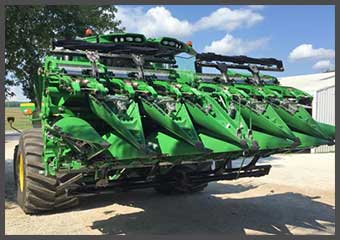
The Yetter Devastator stalk roller is a popular choice among corn and soybean farmers for helping manage crop residues and improve emergence. This heavy-duty roller packs the ground while crimping and sizing residue to create a smooth seedbed for planting.
However, as with any piece of farm equipment, the Devastator isn’t without its potential issues. In this article, we’ll take a detailed look at some of the most common problems growers face with their Yetter Devastator stalk rollers and how to resolve them.
Problems With Yetter Devastator
Here is a list of these issues:
- Bent or Damaged Stalk Roller Bars
- Loose or Damaged Bearings
- Rust and Corrosion
- Bent or Damaged Frame Components
- Issues with the Scrapers
- Issues with the Hydraulic Cylinder
- Roller Dragging or Not Rolling Cleanly
- Excess Vibration and Noise
Let’s talk about them in detail!
Bent or Damaged Stalk Roller Bars

One of the most frequent problems with the Yetter Devastator is bent or damaged roller bars.
The stalk roller consists of a series of heavy angled steel bars welded to a central drum.
As the roller turns, the bars help crimp and size residue.
However, these bars take a lot of abuse as they smash into corn stalks and other debris.
It’s not uncommon for bars to get bent out of shape or even broken off entirely after multiple seasons of use.
Bent bars are problematic because they prevent the roller from turning smoothly and crimping residue evenly. The bars can also vibrate excessively, causing added stress on the roller. If not addressed, damaged bars will continue worsening and eventually require replacing the entire roller.
To fix bent roller bars, first inspect the drum to identify any bars that are visibly deformed. Use a large hammer or mallet to gently pound the bar back into its original angle and orientation.
For bars that are broken or have cracks, they’ll need to be cut off and new bars will have to be welded into place by an experienced repair shop. Avoid makeshift repairs with things like wire or zip ties, as these won’t withstand field use.
Proper maintenance can help minimize bar damage. Be sure to store the roller with the weight off the bars when not in use. Going over rocky soil and field debris like old fence posts also takes a toll, so try to avoid these areas if possible.
Loose or Damaged Bearings
The pivotal component that allows the Yetter Devastator to spin are the heavy-duty bearings mounted on either end of the roller. But these bearings endure tremendous rotational forces and can eventually work loose or become damaged.
Symptoms of bearing problems include difficulty turning the stalk roller, wobbling bars, and loud grinding or squeaking noises while operating.
To inspect the bearings, jack up the roller and grab each end, checking for any looseness or play indicating worn out bearings. There are two tapered roller bearings on each end that can be individually replaced as needed.
Just be sure to use a press for proper bearing installation, as improper installation is a leading cause of premature failure.
Routine lubrication will extend the lifespan of the bearings. Use a grease gun to pump grease through the zerks 2-3 times per season or every 50 hours of operation. And when greasing, be sure to fully pack the cavities between the roller elements. Insufficient lubrication results in excessive internal friction and heat buildup.
Rust and Corrosion
Like any steel implement exposed to the elements, Yetter Devastator stalk rollers can gradually accumulate surface rust and corrosion during off-seasons. This is especially true if not stored properly.
While mostly cosmetic, extensive rusting can lead to pits and patches in the metal that accelerate wear.

To tackle light rust, first brush off loose debris with a wire brush attachment on a power drill.
Then use an angle grinder with a wire cup brush to thoroughly clean rusted areas.
Follow up by spraying rust penetrant, allowing time to soak in before scrubbing again.
Finally, apply a fresh coat of high-quality equipment paint.
For more severe rusting with pitting, grind or sand down to remove corrosion before repainting. Filling pits with auto body filler also helps level things out. And for rollers with extensive rust damage, having the drum sandblasted and powder coated may be the best option for restoring the finish.
Just be aware this can be fairly expensive.
Proper storage goes a long way in preventing rust. Keep the roller out of the elements and humidity when not in use. An added layer of protection is applying fluid film, a corrosion preventative coating, at the end of each season.
Bent or Damaged Frame Components
The main frame holding the Devastator’s roller section commonly sustains damage from rough field conditions over time. The arm braces, weight bracket, drawbar, and other structural parts can bend or crack under enough stress.
Collisions with hidden objects like rocks are a prime culprit. But even normal operation over extremely uneven ground applies loads that gradually take a toll.
Visually inspect the frame for any bent, cracked or broken pieces. Use a straight edge to check arms and supports for true alignment. Bent components will need heat-straightened or reinforced by an experienced repair shop.
Otherwise, continue operating with damaged parts risks further failure.
Adding weights to the roller bracket can also worsen frame issues. Too much tongue weight magnifies bending stress on frame components. Only use the recommended amount of weight for ballast to avoid overload situations.
And consider adding a clevis hitch or heavy-duty pivoting drawbar to relieve some of the sideways torque applied to the main frame while turning.
Issues with the Scrapers
An important yet often problematic component of the Yetter Devastator are the trash scrapers on each end of the roller. These are designed to clean residue off the drum and prevent buildup.
However, the bolted on rubber scrapers frequently come loose or suffer tears after extended use. Trash jamming between the roller and scrapers can also be an issue.
Start by checking for loose scraper mounting bolts that need tightening to prevent further damage from vibration. For tears and holes in the scraper rubber, use adhesive sealant applied from both sides for a temporary fix.
But heavily damaged scrapers will likely need replacing with new ones from Yetter.
Buildup of material between the roller and scraper is possible if the fit is too tight. Adjust the scraper gap width using shims so debris doesn’t get packed in. Just don’t leave the gap so wide that material sneaks past instead of getting scraped. Finding the right setting takes some trial and error.
Issues with the Hydraulic Cylinder
The hydraulic cylinder on the Devastator is critical for raising and lowering the roller into transport or field position. However, leaked seals, stuck cylinders, and bent hydraulic tubes are unfortunately common occurrences after heavy use.
Signs of cylinder problems include difficulty raising or lowering, drifting down from transport position, and fluid leaks. Be sure to inspect seals and tubes closely for any damage or seepage. Replace damaged seals promptly to prevent further issues.
Bent tubes will need straightened or replaced. And keep hydraulic connections free of grime to prevent sticking.
Routinely lubricating cylinder pins and pivot points reduces wear and tear. But avoid overextending the cylinder when lowering the roller completely. This puts excessive stress on the cylinder base.
Also take care not to bottom out the cylinder at full height. Follow recommended practices for smooth cylinder operation.
Roller Dragging or Not Rolling Cleanly
For optimal residue flow, the Devastator roller must turn freely without dragging. But over time, the drum can slip from ideal alignment and end up dragging across the ground. This prevents proper crimping action and strains the frame trying to pull the roller.
Start by checking the parallel arm spacers and hardware that position the roller. If loose, tighten back to spec so the drum sits centered between the arms. The bearings must also be in good condition to minimize resistance.
And ensure the frame isn’t bent, forcing the roller out of parallel.
Excessive buildup of material inside the scraper can also impede rolling. Carefully adjust scraper clearance and check that debris isn’t packing into the sides. Keeping the roller surface clean maximizes turning performance.
Excess Vibration and Noise
It’s normal for the Devastator to exhibit some vibration and noise while pulverizing tough corn stalks. But excessive shaking or loud banging indicates a potential issue.
Unbalanced rotation from damaged bars or frame bending can lead to harmonic vibrations. Bad bearings, hydraulic problems, and loose components also contribute to uncontrolled shaking.
Start by inspecting for any visibly bent or broken parts. Then check bearings and hydraulic fittings for tightness. Any detected flaws will need repairing to restore proper function.
Also have bent frame sections professionally straightened, if possible. Operating with looseness or damage will only lead to accelerated wear and harder failures down the road.
How To Avoid Problems?
While it’s impossible to prevent all problems, proper operation and maintenance goes a long way in minimizing issues with the Yetter Devastator. Here are some key tips:
- Inspect for damage and lubricate on a regular basis
- Operate at optimal field speeds, avoid excessive speeds
- Store roller with weight off bars when not in use
- Limit use in extremely rocky or uneven field areas
- Add weights and tongue accessories to reduce frame stress
- Adjust scraper clearance carefully to prevent buildup
- Touch up paint and prevent rust buildup during off-season
Following the maintenance procedures in the owner’s manual is highly recommended. And be sure to complete all repairs promptly before problems have a chance to worsen. With proper care, a Yetter Devastator roller will deliver many years of dependable performance in crop residue management.
Conclusion
While an invaluable tool for sizing and crimping residue, the Yetter Devastator stalk roller isn’t impervious to problems after years of heavy-duty fieldwork. Bent bars, damaged bearings, rust, and frame issues are among the most common problems owners face.
But with routine inspection, maintenance, and proper operation, these issues can be minimized or corrected before causing major downtime. And completing repairs promptly the moment problems arise will keep your Devastator rolling smoothly for seasons to come.
By understanding the typical weak points and following good care practices, farmers can keep this rugged roller crimping and smashing stalks for years of dependable service.
