Walabot DIY wall scanners by Vayyar Imaging are innovative devices that let you see through walls to detect objects like studs, pipes, and wires hidden behind drywall, concrete, stucco, and other materials.
The company currently offers two main DIY models – the Walabot DIY 2 and Walabot DIY Plus/Plus X. But what exactly sets these wall scanners apart?
In this comprehensive guide, we dive into a detailed feature-by-feature comparison of the Walabot DIY 2 and Plus X to highlight the key pros, cons, similarities, and differences between these models.
Whether you’re trying to pick the right Walabot for home renovation projects or just want to learn more about their capabilities, you’ll find all the details you need here.
A Brief Comparison Table
| Feature | Walabot DIY 2 | Walabot Plus X |
| Price | $99 | $329 |
| Detection Capability | Wooden studs | Wooden studs, metal & plastic pipes, AC wires |
| Maximum Scanning Depth | 1.5 inches | 4 inches |
| Supported Platforms | Android devices | Android & iOS devices |
| App Features | Predefined modes for stud scan & pipe/cable detection | Advanced app with raw sensor data and extensive controls |
| Calibration Needed? | Automatic calibration guided by app | Manual calibration required |
| Scanning Area | 15 x 15 feet | 33 x 33 feet |
| Connectivity | Direct Micro-USB – No WiFi needed | WiFi connectivity |
| Warranty | 1 year | 2 years |
| Weight | 5 ounces (palm-sized) | 2 pounds |
| Support Resources | Online documentation only | Email, phone, video tutorials |
Overview and Key Features
The Walabot DIY 2 and Plus X models have the same basic functionality – using advanced radio technology to see through walls and identify objects concealed behind them. But they differ across some key factors:
Walabot DIY 2
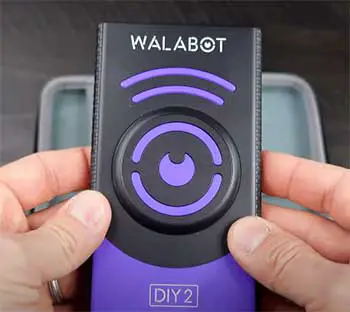
- More affordable and compact entry-level model
- Detects wooden studs up to 1.5 inches deep
- Scan area of 15 x 15 feet
- Connects to Android smartphones/tablets
- Does not require WiFi
- Free app with predefined modes for stud scanning and pipe & cable detection
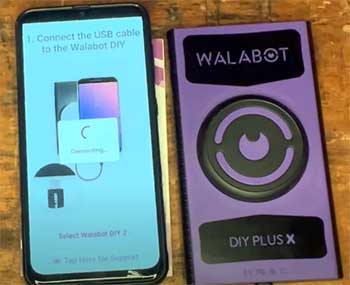
Walabot DIY Plus/Plus X
- Higher-end model with added features
- Detects not just studs but also plastic/metal pipes and AC wires
- Scans area of 33 x 33 feet
- Connects to Android and iOS devices
- Requires WiFi
- Advanced app with raw sensing data and wider scanning customization
So in a nutshell, the Plus X is bigger, more versatile for various detection jobs, works with more device types, covers a larger scan area, but comes at a higher price. The DIY 2 offers an affordable basic stud scanner for Android users minus the advanced capabilities and iOS support.
Key Differences Between Walabot DIY 2 And Plus X Wall Scanners
Now let’s explore how these Walabots stack up across some important metrics for wall scanners.
Depth Penetration Ability
One of the first things you consider with a wall scanner is how deep it can “see” behind the surface to detect hidden objects accurately.
The Walabot DIY 2 can penetrate about 1.5 inches (4cm) deep into the wall material. This allows it to visualize studs behind drywall and plywood up to that depth.
On the other hand, the Plus X model offers enhanced depth penetration up to 4 inches (10cm). This lets you see bigger objects like pipes and wires concealed deeper behind tougher material such as concrete and stucco.
So if you mainly need to scan soft drywall for wooden studs, the DIY 2’s penetration may suffice. But the Plus X gives you more leeway with depth when scanning denser surfaces.
Detection Capability
The Walabots use radio waves to map what’s going on behind your walls. But what exactly can they detect back there?
As mentioned earlier, the affordable DIY 2 focuses strictly on identifying wooden studs behind drywall. Its preset modes and simplicity make it ideal as a dedicated stud finder for home improvement tasks.
But the pricier Plus X goes several steps further. It can detect not just wooden studs but also metal and plastic pipes, AC wires, and other objects behind walls and floors. So you get much more versatility to tackle tasks like avoiding pipes and wires during renovations.
Advanced users can even leverage the Plus X’s raw radio images to try detecting complex structures behind surfaces. But overall, it provides comprehensive object detection lacking in the DIY 2’s stud-only capabilities.
Supported Platforms
Walabot compatibility is another key difference between the models – dictating which smartphone/tablet platforms you can use them with.
The Walabot DIY 2 connects only to Android devices – whether phones like the Samsung Galaxy or tablets like the Lenovo Tab M10. So Android users get cross-device flexibility here.
But iOS users are out of luck with the DIY 2. You’ll need the Walabot Plus X for Apple iPhone/iPad support and the ability to switch between Android and iOS devices easily.
So if you want iOS compatibility along with Android, the Plus X is your only Walabot choice currently.
App Interface and Features
Connecting your Walabot to a smartphone or tablet gives you access to the companion Walabot app (available free) that lets you visualize behind the walls and use the scanner effectively. But the interfaces and features offered differ across models.
Walabot DIY 2 App
- Clean, simple app UI for basic stud scanning
- Choose between Stud Scan mode and Pipe & Cable mode
- Get stud location alerts during calibration phase
- View 2D cross-section images of detected studs
- Minimal controls and settings for ease-of-use
Walabot Plus X App
- Advanced app with expanded capabilities
- Raw radio imagery from scanner with customization options
- Dynamically change scan angles and filter settings
- Detailed stud, pipe, and wire mapping with location marking
- Create inspection profiles and reports to share
- Designed for advanced scanning flexibility
If simple stud finding is your main goal, the DIY 2 app offers a smooth experience fine-tuned for that.
But the Plus X app enables greater control over scans with customization and RAW data functionality for power users.
Required Setup and Calibration
Getting your Walabot scanner set up correctly before starting a scan is key for proper object mapping. But the required process differs slightly for each model.
Walabot DIY 2 Setup
- Hold device 4-12 inches from wall
- Align to pre-marked distances using app cues
- Won’t scan if position exceeds set height range
- App guides simple, automatic calibration
Walabot Plus X Setup
- Flexible scanning distance from 2-16 inches
- Manual calibration scanning a known stud as reference
- Can scan even when misaligned using RAW mode
- App has tutorials for calibration procedure
The DIY 2 strives to make setup foolproof following voice prompts with strict positioning. But advanced users may prefer the Plus X’s flexibility to calibrate scans from wider and customizable distances using guides as needed.
Range/Coverage Area
Considering the size of the area you need to scan is paramount when selecting a Walabot. After all, a model that covers just a small section won’t work well for scanning long walls and floors.
Walabot DIY 2 Coverage Area
- Approximately 15 feet x 15 feet
- Suited for scanning single walls in rooms
Walabot Plus X Coverage Area
- Significantly larger at 33 feet x 33 feet
- Wide view lets you scan entire room perimeter or basement slabs
For smaller, focused scans like checking wiring routes, the DIY 2’s coverage will likely suffice. But the Plus X’s extra-large scanning range gives you room-sized visibility critical during bigger inspection jobs.
Power and Connectivity
Since Walabots connect to and draw power from your smartphone, tablet or PC, battery life and connectivity are important considerations while picking one.
The Walabot DIY 2 draws minimal power from your Android device battery allowing hours of continuous scans. And lacking WiFi, it connects directly to phones and tablets via Micro-USB much like a document scanner. So no worries about network connectivity.
The Plus X however offers advanced functionality by leveraging WiFi data transfer from devices which can drain batteries much faster. It also needs stable WiFi availability to connect which can get tricky in remote sites lacking Internet. Physical connections use Micro-USB (Android) or Lightning cable (iOS).
So if you need to scan for long stretches away from chargers and WiFi, the DIY 2 has the edge here. But the Plus X offers greater overall versatility despite higher power needs.
Durability and Portability
Considering how much hands-on use Walabots see around worksites and home projects, durability is a prime factor, as is overall portability.
The Walabot DIY 2 sports a handy palm-sized build durable enough for daily usage scanning tasks. At about 5 ounces in weight tucked into your toolkit, it won’t weigh you down transporting it to job sites either.
Comparatively, the Plus X model has larger antenna boards enclosed in rugged silicone housing providing enhanced protection. But at 2 pounds in weight in its casing, it’s less pocket-friendly for all-day carrying during inspections.
So if you crave lightweight portability for quick site checks, the DIY 2 shines here. But the Plus X offers superior ruggedization to endure rough use despite the bigger profile.
Cost Considerations
With advanced tech like Walabots, cost often ties significantly into which model provides the best fit for your needs and budget.
The Walabot DIY 2 is very attractively priced at just $99 putting it within reach of homeowners. Value seekers get reliable stud scanning without breaking the bank. We think it’s a great starter Walabot if simple stud finding is your primary requirement.
On the high-end lies the feature-packed Walabot Plus X carrying a premium $$329 price tag. You pay for those advanced detection capabilities, expanded platform support, and bigger coverage – making it appealing for pros. But it’s harder to justify for hobbyists just wanting basic stud scans.
There are also Walabot Plus models without the X at intermediate prices lacking some capabilities of the Plus X. But overall, choosing the best Walabot involves striking the right balance between functionality needs and affordable pricing.
Convenience Factors

Beyond just core scanning features, elements like accessibility, support resources and warranty coverage also impact the convenience of owning either Walabot model.
While the DIY 2 focuses on simpler stud scanning, even basic tasks can get tricky without enough guidance.
Unfortunately, support options appear limited currently to just online documentation without live support.
And the short, single-year warranty leaves you vulnerable to defects down the line.
Meanwhile, the Plus X offers direct email and phone support channels and an expanded two-year warranty for better long-term ownership experience. You also get access to detailed video tutorials taking you through advanced usage procedures step-by-step.
So while the DIY 2 itself stays simple in scope, limited assistance can dampen the ownership experience. But the Plus X gives you multilayered support uplifting convenience despite its steeper learning curve.
Safety Considerations
Since these scanners use radio waves to map objects behind walls, it’s natural to wonder – are Walabots safe for users as well as hidden electrical systems?
Per FCC safety testing, both models utilize sensor technology avoiding interference with pacemakers/medical devices. They also cannot activate live power or gas lines when scanning. So when used correctly per guidelines, Walabot radio emissions are safe for both users and household systems.
Additionally, the Plus X has been tested rigorously and carries UL safety certification for electrical compliance – further reassuring during inspections involving live wires. So both options seem adequately safe when safety best practices provided in manuals are adhered to properly.
FAQs About Walabot Wall Scanners
Here are answers to some common questions DIYers have about picking and using Walabot models:
The Walabot DIY Plus and Plus X models are quite similar in capabilities with some key differences:
1. The Plus X has slightly better depth penetration at 4 inches over 3.5 inches for the Plus
2. It can identify AC live wires while the Plus detects generic wires
3. The Plus X supports both Android and iOS devices unlike Plus (Android only)
4. At $329, the Plus X is priced higher than the $199 Plus model
So the Plus model lacks some elements offered in the flagship Plus X. But it retains most core features at a more affordable rate.
The main differences in summary between Walabot models are:
1. DIY 2 – Only detects wooden studs, Android only. Basic stud scanning for $99
2. DIY Plus – Detects studs, pipes and wires, Android only. Enhanced detection for $199
3. DIY Plus X – Best detection including live wires, Android + iOS, maximum features for $329
So the DIY 2 is a starter stud finder, the Plus models add extensive detection capabilities minus some elements in the flagship Plus X suiting advanced pros.
Yes, the Walabot DIY 2 does not require WiFi connectivity to operate. It connects directly to Android devices via Micro-USB cable much like an external drive to access power and transfer data.
This allows the DIY 2 to function normally capturing wall scans even in areas lacking Internet connectivity. WiFi is only needed for occasional software updates.
The Walabot DIY 2 is an easy-to-use stud scanning device letting you find wooden beams and studs behind walls using advanced radio technology. Priced at $99, it connects to Android phones/tablets to visualize stud locations in detail without needing prior calibration or experience.
Key features of the Walabot DIY 2 include:
1. Detects wooden studs through walls up to 1.5 inches deep
2. Scans area of approximately 15 x 15 feet for single wall coverage
3. Does not need WiFi – uses Micro-USB connectivity with Android devices
4. Includes free Walabot app with intuitive stud scanning modes
5. Compact palm-sized design for easy portability and use
So in essence, the DIY 2 is an accessible entry-level Walabot geared specifically for stud finding applications behind drywall and similar materials. It skips advanced detection of pipes, wires seen in pricier Plus models catering to homeowner requirements with economical pricing.
Concluding Thoughts
In closing, let’s recap how the Walabot DIY 2 and Plus X wall scanners compare overall:
The DIY 2 nails the stud finder role with a simple, affordable package catering to Android users. Its stud-focused features, easy learning curve and modest price point make it a practical starting choice for homeowners.
Meanwhile the Plus X signals a gigantic capability leap with extensive object detection and mapping suited even for building pros. From AC wires to pipes, its powerful features justify the steeper price and complexity to deliver comprehensive scans.
So deciding between Walabot DIY or Plus models ultimately depends on your specific needs…
If you just require a reliable basic stud scanner for home projects, get the excellent value DIY 2. But professionals wanting truly expansive object visibility behind walls need the Plus X despite its premium pricing.
Either way, both options pack genuinely futuristic scanning versatility letting you peer behind walls like never before!