
I’ve looked closely at moisture problems under homes for years now, watching how damp crawl spaces quietly wreck floors, air quality, and energy bills.
In this article I lay out vapor barrier versus full encapsulation side by side so you can see which approach actually solves the issues you face without wasting money or creating new headaches.
| Aspect | Vapor Barrier | Encapsulation |
| Coverage | Ground only | Floor, walls, vents, and often ceiling |
| Moisture Control | Blocks soil moisture | Seals entire space + dehumidifier |
| Typical Cost (2000 sq ft) | $500–$2,500 | $6,000–$20,000 |
| Installation Complexity | Simple, often DIY-friendly | Professional, multi-step |
| Ongoing Maintenance | Minimal (check for tears) | Dehumidifier service, inspections |
| Best Climate Fit | Mild humidity or dry regions | High humidity, frequent rain |
| Energy Impact | Moderate improvement | Stronger savings if sealed tightly |
| Longevity | 5–15 years depending on material | 20+ years with proper care |
Key Differences Between Vapor Barrier And Encapsulation
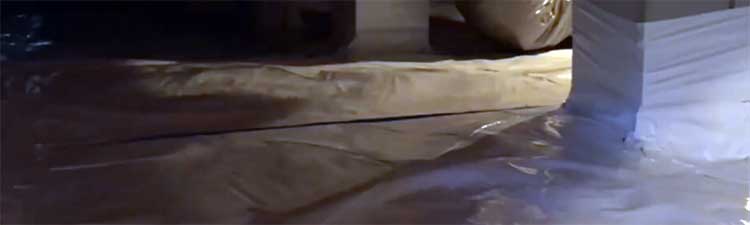
- Coverage area A vapor barrier stops at the ground. Encapsulation wraps the entire volume. When I compare the two side by side, the difference shows up most clearly after a heavy rain. Moisture still enters an open crawl space through walls and vents even with a perfect ground sheet. Encapsulation shuts those paths.
- Moisture management method Vapor barriers rely on passive blocking of soil vapor. Encapsulation actively controls humidity with mechanical equipment. I have measured crawl-space humidity drop from 80 percent to under 50 percent within days of a full encapsulation, something a ground sheet alone rarely achieves in humid climates.
- Installation process Rolling out plastic is straightforward. Encapsulation demands cleaning debris, repairing foundation cracks, sealing every penetration, and wiring a dehumidifier. The labor difference alone explains much of the cost gap.
- Long-term performance A vapor barrier can tear or shift. Encapsulation, once complete, tends to stay effective for decades if the dehumidifier keeps running and the liner stays intact. I have seen twenty-year-old encapsulated spaces still dry while neighboring homes with only ground plastic needed replacement sheets every few years.
- Impact on indoor air Both reduce the amount of damp air that migrates upstairs, yet encapsulation does a more thorough job because it eliminates the continuous exchange with outdoor humidity. The trade-off is the need to maintain mechanical equipment.
- Suitability for storage After encapsulation the crawl space becomes usable storage. A simple vapor barrier leaves the space too damp and dirty for most people to store anything long-term.
Key Features of Vapor Barriers
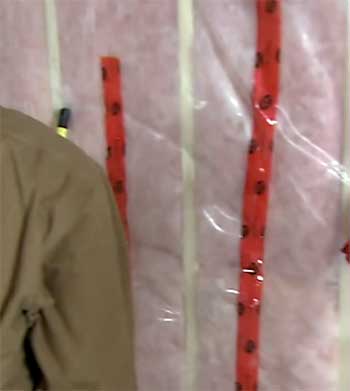
- Material durability ranges from basic polyethylene to reinforced multi-ply sheets with woven cores that resist punctures from rocks or tools. I have noticed that the reinforced versions hold up far better when someone has to crawl under the house for repairs, and the extra strength keeps edges from fraying over time.
- Ease of repair lets you patch a tear with specialized tape in minutes rather than calling a contractor. That simple fix can restore the barrier’s effectiveness without replacing large sections, which keeps long-term costs low.
- Code compliance in many areas is satisfied by a 6-mil sheet, giving you a legal minimum without overspending. Thicker options still meet the same standards while adding extra protection against wear.
- Compatibility with insulation above the barrier so you can still place fiberglass or foam between floor joists. The sheet sits flat and does not interfere with air flow or create gaps that reduce insulation performance.
- Minimal electrical or mechanical requirements mean no new circuits or condensate drains to install. The system works passively once it is in place, which appeals to anyone who prefers low-tech solutions.
- Flexible sizing and cutting allow the material to fit around piers, pipes, and awkward foundation shapes without special tools. Overlapping seams by at least twelve inches and sealing them creates a continuous surface that performs consistently across the entire floor.
- Resistance to common soil chemicals and mild acidity helps the plastic maintain its integrity even when the ground under the house contains residual moisture or mineral content.
Pros of Vapor Barriers
- Low upfront cost keeps the project accessible for almost any budget. I have watched homeowners complete a solid installation for under a thousand dollars in materials, and that price still delivers meaningful protection against rising soil moisture.
- Quick installation often finishes in a single day, minimizing disruption. Most of the work involves clearing debris, rolling out the sheet, and sealing seams, so the house returns to normal use almost immediately.
- Simple maintenance requires only occasional checks for rips or shifting edges. A quick visual inspection every few months is usually enough to catch small problems before they grow.
- Flexible climate use works well in arid regions or homes with already-dry soil. In those settings the barrier provides the exact level of protection needed without unnecessary complexity.
- Easy future upgrades let you add encapsulation later without removing the existing ground sheet. The plastic can stay in place and become the floor layer of a more complete system if conditions change.
- Reduced mold risk on the ground surface stops the worst source of rising damp before it starts. By cutting off the soil vapor, the barrier removes a primary fuel source for mold colonies that would otherwise form on wood and insulation.
- Compatibility with open ventilation systems means you can still meet older building codes that require vents. The barrier does not force you to close openings or change the original design of the crawl space.
- Low environmental footprint during installation because no electricity or mechanical equipment is required. The material itself is lightweight and generates minimal waste when cut to fit.
Cons of Vapor Barriers
- Limited protection leaves walls and vents as open pathways for moisture. In humid summers the barrier alone cannot stop condensation on cold pipes or joists, so dampness can still reach the framing from other directions.
- Vulnerability to damage from foot traffic, pets, or settling soil means patches become routine. Even reinforced sheets can develop tears that allow vapor to pass if they are not monitored and repaired promptly.
- Incomplete air-quality improvement still allows outdoor pollutants and humidity to enter. The open vents continue to bring in whatever the outdoor air carries, including pollen, mold spores, and excess moisture.
- Short service life in aggressive conditions forces replacement every decade or sooner. In areas with high soil moisture or frequent temperature swings the plastic can degrade or shift enough that its effectiveness declines.
- No help against liquid water if the crawl space floods; the plastic simply floats or traps puddles underneath. Any standing water stays trapped between the soil and the sheet until it evaporates or is pumped out.
- Minimal energy savings because the space remains connected to outdoor temperature and humidity swings. The barrier does little to stabilize the thermal conditions under the floor, so the home’s heating and cooling systems still work harder.
- Difficulty achieving perfect coverage around piers and plumbing penetrations can leave small gaps that undermine the overall seal. Careful detailing is required, and any missed spots reduce the barrier’s performance.
Key Features of Encapsulation
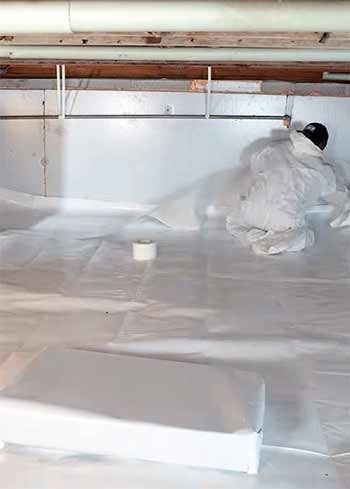
- Continuous liner that creates a true air and vapor seal from floor to rim joist. The material is usually thicker and often includes a woven reinforcement layer so it can handle occasional foot traffic and still keep its seal for years.
- Mechanical humidity control that keeps conditions stable regardless of outdoor weather. A properly sized dehumidifier removes moisture on demand and maintains relative humidity in a safe range even during the wettest months.
- Pest exclusion because sealed vents and walls remove easy entry points for insects and rodents. Once the openings are closed and the liner is tight, common crawl-space invaders lose their preferred pathways into the house.
- Energy-performance gains when the sealed space reduces the load on the home’s heating and cooling system. The conditioned air under the floor stays closer to indoor temperatures, which cuts the amount of energy needed to keep living spaces comfortable.
- Cleanable surface that allows vacuuming or wiping instead of the dirt and cobwebs typical of open crawl spaces. The smooth liner turns a formerly grimy area into something that can be maintained with ordinary cleaning tools.
- Integration with smart monitors so you can track humidity and temperature from a phone app. Many systems include sensors that send alerts if conditions drift outside the target range, giving early warning before problems develop.
- Built-in drainage channels and sump readiness that handle any liquid water that finds its way under the liner. This feature prevents puddles from forming and keeps the entire system dry even after heavy rain or minor foundation seepage.
- Wall attachment methods that use mechanical fasteners and sealed seams so the liner stays firmly in place against concrete or block without peeling or sagging over time.
Also Read: Differences Between Spray Foam And Fiberglass Insulation.
Pros of Encapsulation
- Comprehensive moisture control keeps relative humidity low enough that mold and wood rot struggle to start. Once the system is running, the combination of sealed surfaces and active dehumidification creates conditions that are consistently hostile to biological growth.
- Noticeable improvement in indoor air quality because less damp, musty air rises into living spaces. Many people report that odors disappear and allergy symptoms ease after the crawl space is fully sealed and conditioned.
- Lower heating and cooling costs once the thermal envelope is tightened; many owners report more even temperatures upstairs. The sealed space reduces the amount of outdoor air that infiltrates the house and helps the floor system hold a more stable temperature.
- Pest and allergen reduction from the sealed environment. Closing the vents and lining the walls removes the dark, damp habitat that insects and rodents prefer, which in turn lowers the amount of allergens that travel upstairs.
- Increased usable space under the house that can hold holiday decorations or seasonal gear without worry. The clean, dry surface turns a formerly unusable area into practical storage.
- Higher resale appeal when inspectors and buyers see a clean, dry crawl space. A well-executed encapsulation often stands out during home inspections and can support a stronger asking price.
- Protection of structural wood and insulation that extends the life of the entire floor system. Keeping the joists and subfloor dry prevents the gradual weakening that moisture causes over many years.
- Predictable performance across seasons because the mechanical controls adjust automatically to changing outdoor conditions. The system does not rely on weather patterns or vent openings to stay effective.
Cons of Encapsulation
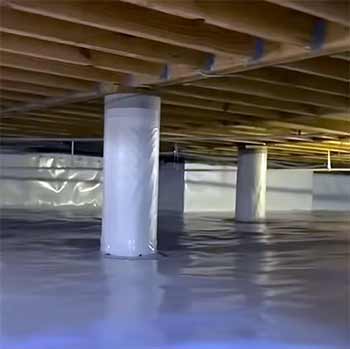
- High initial investment can reach five figures for a typical 2000-square-foot footprint, putting it out of reach for some budgets. Labor, materials, and equipment add up quickly, especially when access is tight or existing damage must be repaired first.
- Ongoing operating costs from the dehumidifier’s electricity use and eventual replacement of the unit. The machine runs for much of the year in humid climates, and the unit itself usually needs replacement after ten to fifteen years.
- Risk of over-drying if the equipment is oversized, which can shrink hardwood floors above. Careful sizing and humidity set-points are essential to avoid creating new problems while solving the old ones.
- Potential for stale air or off-gassing odors if the system lacks proper design or fresh-air exchange. Without some controlled ventilation the sealed space can trap residual smells from soil or building materials.
- Complicated repairs if the liner ever needs replacement or if plumbing work requires cutting through sealed sections. Any future work under the house becomes more involved because the continuous barrier must be opened and then carefully resealed.
- Unsuitability in flood zones or homes with atmospheric combustion appliances that need outdoor air for safe operation. Closing the vents can create code conflicts or safety issues in those specific situations.
- Dependence on continuous power; a long outage can allow humidity to rebound quickly. Backup power or careful monitoring becomes more important once the space relies on mechanical equipment.
- Higher complexity during the initial installation increases the chance of incomplete sealing if the work is not performed carefully. Missed gaps around pipes or poorly fastened wall edges can reduce the system’s effectiveness from day one.
Making The Choice That Fits Your Situation?
I weigh three practical factors every time I advise someone. First is the actual moisture load. If the crawl space stays relatively dry most of the year and only needs protection from soil vapor, a quality vapor barrier usually solves the problem. Second is climate.
Coastal or southern regions with long humid seasons almost always benefit more from full encapsulation. Third is how long you plan to stay in the house. Short-term owners may prefer the lower cost of a barrier; long-term owners often recover the encapsulation investment through avoided repairs and energy savings.
I also look at existing conditions. Standing water, visible mold, or rotten joists must be fixed before either product goes in. A barrier or liner over an active water problem simply hides the damage until it grows worse.
Also Read: Differences Between Bubble Wrap And Foam Insulation.
Frequently Asked Questions (FAQ)
Skip it if you have standing water, a high water table that floods the space, or active mold that has not been remediated. The plastic can trap moisture and make those problems harder to solve.
Expect $6,000 to $20,000 depending on access, moisture severity, and whether a sump and dehumidifier are included. Most projects land between $8,000 and $12,000.
No. It is a legitimate moisture-control method, but it is not required for every house. Homes in dry climates or with already-dry crawl spaces often perform fine with simpler measures.
Main issues include high cost, dehumidifier energy use and maintenance, possible over-drying of wood floors, and the need for careful design around combustion appliances or flood requirements.
Wrapping Up
I have walked enough damp crawl spaces to know that ignoring moisture never ends well. Whether you choose a straightforward vapor barrier or invest in full encapsulation, the decision should match the actual conditions under your house and the budget you can support.
You now have a clear side-by-side view of what each option delivers and where each falls short. Take a careful look at your own crawl space, measure the humidity if you can, and pick the solution that keeps your floors solid, your air clean, and your wallet intact for the long run.