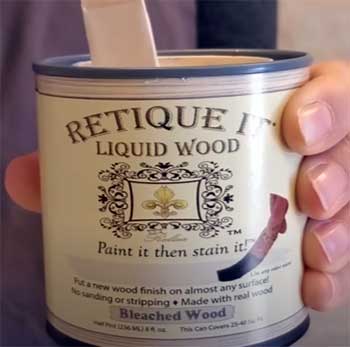
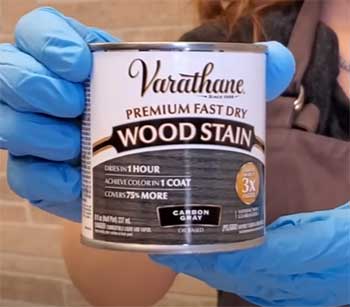
If you’re considering giving your old furniture or cabinets a makeover, Retique It Liquid Wood might just be the solution you’re looking for. This product has taken DIY enthusiasts by storm, and I can definitely see why.
It’s simple, effective, and really makes your projects look like genuine wood—because it is genuine wood. Let me take you through my experience, covering what I loved, what I found challenging, and a few handy tips to help you get the most out of this product.
My Experience With Retique It Liquid Wood
When I first got my hands on Retique It Liquid Wood, I was excited but also a little skeptical. It promises a lot: a genuine wood look on virtually any hard surface.
I had a tired old dresser that I had been wanting to restore, but I wasn’t thrilled about the idea of sanding it down or dealing with messy stains that never quite seemed to work as I hoped. So, I decided to give Retique It a shot.
- Application – Easier Than You Think (But Read the Instructions!)

The first thing that stood out to me was how easy it was to use. You simply paint it on, stain it, and seal it.
That’s pretty much it. However, it does have a bit of a learning curve.
It’s important to follow the directions closely, because getting that natural wood finish isn’t just about slapping it on and hoping for the best.
My first attempt was on a particleboard piece I had lying around.
I was surprised by how thin the product was, almost like watered-down paint.
This was where I learned that controlling the amount of product is key, especially at the edges—a lesson that saved me a lot of headaches later on. I would recommend starting with light, even coats, and building up from there to get that true, natural wood feel.
Pros – Where Retique It Shines
Let’s talk about what I genuinely loved about Retique It Liquid Wood.
- Looks and Feels Like Real Wood: This product contains 66% recycled wood, and the final result reflects that. It doesn’t just look like wood; it also feels like it. The surface is textured just enough to resemble the real deal, which is so much better than any faux wood finish I’ve tried before. The wood grain was surprisingly authentic, and even friends who saw the finished dresser couldn’t believe it wasn’t natural wood.
- Easy Cleanup and Low Odor: Cleanup was incredibly simple, just soap and water. Plus, it’s water-based, so I didn’t have to deal with any overwhelming fumes, which was a big win for me since I like working indoors. It’s also low VOC, making it much safer for use indoors compared to many other products that can make your workspace smell like a chemical factory.
- Versatility: Another great thing is its versatility. I used it on wood, but you can use Retique It on metal, plastic, drywall, or just about any hard surface. Imagine all those thrift store finds that you previously thought were hopeless because they weren’t made of wood—Retique It opens up so many possibilities. I even used it on an old ceramic vase, just to see if it could pull off the wood look, and it worked shockingly well!
Cons – Where It Gets Tricky

No product is perfect, and Retique It is no exception. I want to share some challenges I faced so you’re well-prepared if you decide to give it a go.
- Thin Consistency Requires Patience: The biggest downside for me was the consistency. Retique It is quite thin, which means it can be tricky to apply evenly—especially for beginners. It’s easy to overdo it, particularly along the edges. On my first try, I ended up with a messy-looking edge, which meant I had to sand and start over. Lesson learned: less is more. Building up multiple coats slowly will give you a much better finish.
- Learning Curve with Wood Grain Tool: I also found that using the wood grain tool takes a bit of practice. It’s not impossible, but it’s worth practicing on a scrap piece before going all-in on your actual project. I tried using a gel stain after applying Retique It, but it ended up covering the grain completely, which wasn’t what I wanted at all. After some trial and error, I realized that using a lighter stain and a steady hand works best for highlighting the grain.
- Does Not Work Well with Penetrating Stains: This product works well with non-penetrating stains, but penetrating stains didn’t absorb as I expected. It’s more like a surface-level transformation, so make sure you’re using the right type of stain to get the effect you want. I found that gel stains, while tricky, could give a beautiful finish once I understood how to control them.
How To Get The Most Out of Retique It Liquid Wood?
After a few trial runs, I found some helpful tips that made a big difference in getting that perfect wood look. Here’s what worked for me:

- Prep Your Surface: Even though Retique It can cover nearly any hard surface, make sure your surface is clean and smooth. You don’t need to sand it down to bare wood, but removing any flaking paint or old finish will help you get better results.
- Multiple Light Coats: Instead of trying to achieve full coverage with one thick coat, opt for two or three light coats. This prevents drips and helps give a more even, realistic finish. Plus, it’s easier to control the edges this way.
- Practice with the Grain Tool: If you’re going for a grain effect, practice first! The tool can make or break the look, so getting a feel for the right pressure and angle is crucial. I found it best to apply the grain in long, smooth strokes.
- Choose the Right Stain: Stick to non-penetrating stains to get the best results. Penetrating stains didn’t give me the color depth I wanted, but gel stains were much better once I learned to use them carefully.
- Seal Your Project: Always finish with a sealer. Retique It turns your surface into a wood-like material, but sealing it will protect it from scratches and wear over time. I used a polyacrylic finish, which kept the look intact and provided extra durability.
Comparison With Other Brands
Now, you might be wondering how Retique It stacks up against some of the other products on the market. Let me break it down for you.
- Retique It Vs. Minwax Polyshades
Minwax Polyshades is a well-known product that combines stain and polyurethane in one. While it’s great for adding color to already-sanded wood, it’s not ideal for surfaces that aren’t bare. In contrast, Retique It doesn’t need all the prep work—you don’t need to strip or sand down your piece before applying it. Plus, Minwax tends to have a strong odor, whereas Retique It is virtually odorless.
- Retique It Vs. Rust-Oleum Wood Finish
Rust-Oleum also makes a decent wood finish, but it’s very different from Retique It. Rust-Oleum works well for bare wood, but its coverage and adhesion on other surfaces are inconsistent. Retique It really shines when it comes to versatility—you can use it on practically anything, from particleboard to ceramics.
- Retique It Vs. Dixie Belle Paint
Dixie Belle Paint is another popular choice for furniture flips. It’s easy to use and offers a chalky finish, but it lacks the authentic wood grain effect that Retique It provides. If you want a real wood look, Retique It is the way to go. Dixie Belle is more about bold, vibrant colors, whereas Retique It allows for a more natural wood aesthetic.
Frequently Asked Questions (FAQs)
Typically, two to three coats work best. Start with a light coat, let it dry, and then add additional coats until you’ve achieved the desired level of coverage and texture.
Yes, absolutely! One of the great things about Retique It is that you don’t need to strip off old paint. Just make sure the surface is clean and smooth before you start applying the product.
Retique It can be used on a wide variety of surfaces, including wood, metal, plastic, drywall, and even cement. Pretty much any hard surface can be transformed with Retique It, which opens up endless possibilities for your DIY projects.
Start by cleaning your surface. Apply Retique It with a brush in long, smooth strokes. Once dry, use a non-penetrating stain if you want to change the color. Finally, seal your project with a polyacrylic to protect your new wood-like finish.
Final Thoughts
Retique It Liquid Wood is a fantastic product if you’re looking to transform furniture and surfaces without the hassle of sanding down to bare wood. It’s easy to use, versatile, and delivers a truly wood-like finish that other products just can’t match.
Give it a try—you’ll be amazed at what you can create.
If you’re ready to tackle that next DIY project, go ahead and grab a can of Retique It Liquid Wood. You’ll be turning those tired old pieces into masterpieces before you know it.
