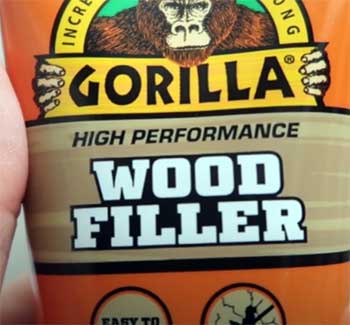
I’ve been knee-deep in woodworking projects for years, and let me tell you, finding a reliable wood filler is like striking gold. Gorilla All Purpose Wood Filler has become my go-to for patching up cracks, filling holes, and making my projects look flawless.
Whether you’re a weekend DIYer or a seasoned carpenter, this stuff is a game-changer. It’s tough, easy to use, and delivers a finish that blends seamlessly with your wood. Trust me, you’ll want this in your toolbox for any repair or restoration job.
Let’s get into why this product has earned a permanent spot in my workshop.
My First Time Using Gorilla Wood Filler
Picture this: I’m restoring an old oak dining table that’s been in my family for decades.
The surface was riddled with scratches, gouges, and a few unsightly nail holes from a previous repair attempt gone wrong.
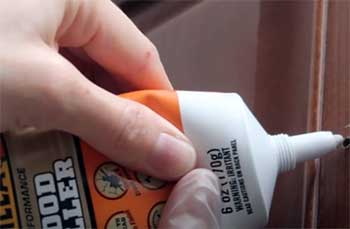
I’d heard the hype about Gorilla Wood Filler, so I grabbed a 16-ounce tub from my local hardware store, eager to see if it lived up to its reputation.
Spoiler alert: it did, but not without a few hiccups that taught me how to use it right.
I started by prepping the table, sanding down the rough spots and wiping away dust to ensure a clean surface. The filler’s texture caught me off guard at first—it’s gritty, almost like wet sand, but surprisingly moldable.
I scooped out a small amount with a putty knife and pressed it into a deep gouge. It spread smoothly, filling the crevice without much effort. I was impressed by how well it adhered to the wood, even in a tricky spot where the grain was uneven.
After about 15 minutes, the shallow fills were dry enough to sand, though deeper spots took closer to an hour. Sanding was a breeze; the filler smoothed out to a natural finish that didn’t scream “patch job.”
My first mistake? Overfilling. I got a bit overzealous and packed too much into one spot, which meant extra sanding time. Lesson learned: thin layers are your friend.
I also noticed the filler’s natural color had a slight greenish undertone before staining, which worried me at first, but once I applied a dark walnut stain, it blended beautifully. The table now looks like it was never damaged, and I’ve got Gorilla to thank for that.
Since then, I’ve used it on everything from door frames to a rickety old chair, and it’s never let me down. That first project was a turning point—it showed me that with the right tools, even a beat-up piece of furniture can be brought back to life.
What Makes Gorilla Wood Filler Stand Out?
- Strong Adhesion That Holds Up
One of the things I love most about Gorilla Wood Filler is how well it sticks to wood.
I’ve used it on oak, pine, and even some weathered cedar, and it grips like nobody’s business.
I once filled a cracked door jamb that took a beating from my kids slamming the door, and months later, the repair is still rock-solid.
The filler’s ability to anchor nails and screws is a huge bonus. I fixed a loose cabinet hinge by filling the stripped screw hole, letting it cure, and screwing it back in—tight as new. This kind of reliability makes it a must-have for any project where durability matters.
- Smooth Application for Any Skill Level
Applying this filler feels intuitive, even if you’re new to woodworking. Its sandy texture spreads easily with a putty knife or even your fingers for smaller jobs. I’ve found it doesn’t clump or crumble like some other brands I’ve tried, which makes it forgiving for beginners.
You don’t need to be a pro to get a smooth, professional-looking finish. Just press it in, wipe away excess, and you’re halfway there. I’ve taught my teenage nephew how to use it on a bookshelf project, and he picked it up in minutes.
That ease of use is a big reason I keep reaching for it.
- Stainable and Paintable for Versatility
The ability to stain or paint over Gorilla Wood Filler is a lifesaver. I’ve stained repairs to match everything from light pine to rich mahogany, and the results are nearly invisible. Painting is just as easy—once sanded, it takes paint like a dream.
I redid a set of white baseboards in my living room, and you’d never guess where the nail holes were filled. This versatility makes it perfect for both cosmetic and structural fixes, whether you’re refreshing furniture or patching up trim.
It’s like having a chameleon in your toolbox—it adapts to whatever finish you need.
- Water Resistance for Indoor and Outdoor Use
I’ve used this filler on outdoor projects, like repairing a weathered deck rail, and it holds up well when coated with exterior paint. It’s not meant for constant water exposure, but for occasional rain or humidity, it’s tough enough.
Indoors, it’s a champ for bathroom cabinets or kitchen trim where moisture might be an issue. Knowing it won’t crack or shrink in these environments gives me peace of mind. I’ve got a set of patio furniture I repaired last spring, and after a wet season, the fills are still intact, no cracks in sight.
- Minimal Shrinkage for a Lasting Fix
Nothing’s worse than filling a hole only to see it sink or crack as it dries. Gorilla’s formula is designed to minimize shrinkage, and I can vouch for that. I filled a deep gouge in a hardwood floor, and after curing, the surface stayed level.
Even after months of foot traffic, the repair hasn’t budged. This durability is why I keep coming back to it, especially for high-traffic areas like floors or furniture that gets daily use. It’s not just a quick fix—it’s a fix that lasts.
The Downsides of Gorilla Wood Filler
- Gritty Texture Takes Getting Used To

That sandy, gritty texture I mentioned?
It’s a double-edged sword.
While it makes the filler moldable, it can feel odd if you’re used to smoother putties.
The first time I used it, I found it a bit tricky to spread evenly until I got the hang of applying it in thin layers.
If you’re working on a delicate project, like fine furniture, you might need to practice to avoid over-application.
It’s not a dealbreaker, but it’s something to keep in mind if you’re aiming for perfection right out of the gate.
- Drying Time Varies by Depth
Gorilla’s drying time can be a bit unpredictable. Shallow fills, like nail holes, dry in about 15-30 minutes, which is great for quick jobs. But deeper repairs, like a half-inch gouge, can take up to six hours to fully cure.
I learned this the hard way when I tried rushing a project and ended up sanding too soon, which left a slightly uneven surface. Patience is key with deeper fills, and you’ll need to plan your project timeline accordingly. It’s not a flaw, just a reality of working with deeper repairs.
- Potential for Drying Out in the Container
If you don’t seal the tub or tube tightly, this filler can dry out faster than you’d like. I left the lid off for a couple of hours once, and the top layer started to harden. Adding a few drops of water and mixing it helped, but it’s a hassle.
Store it properly, and you’ll avoid this issue, but it’s something to keep in mind if you’re not using it regularly. I’ve lost a bit of product to this, and it’s frustrating when you’re in the middle of a project.
- Stainability Isn’t Perfect for All Woods
While the filler takes stain well overall, I’ve noticed it can be tricky on certain woods, like oak, where the grain is more pronounced. The filler’s natural color has a slight greenish tint, which can affect lighter stains if you don’t sand it down carefully.
It’s not a dealbreaker, but you’ll want to test it on a scrap piece first. I’ve had great results with darker stains, but lighter ones require extra care to blend seamlessly.
How To Keep Your Gorilla Wood Filler Repairs Looking Great?
- Proper Surface Prep Is Everything
Before you even open the tub, make sure your wood surface is clean and dry. I always sand the area lightly with 120-grit sandpaper to remove splinters or loose bits. Wipe it down with a damp cloth to get rid of dust—this ensures the filler sticks like it’s supposed to.
If the surface is greasy or oily, a quick swipe with rubbing alcohol does the trick. Spending a few extra minutes on prep saves you headaches later, especially when you’re aiming for a flawless finish.
- Apply in Thin Layers for Best Results
I can’t stress this enough: don’t glob it on. Thin layers dry faster, shrink less, and sand easier. Use a putty knife to press the filler into the crack or hole, then smooth it out. If you’re filling a deep gouge, build it up in layers, letting each one dry for at least an hour.
This approach gives you a stronger, smoother repair that won’t crack over time. I’ve tried rushing it with thick layers, and it’s a mess—trust me, slow and steady wins here.
- Sand Carefully for a Seamless Finish
Once the filler is dry, grab some medium-grit sandpaper (around 150-220 grit) and go to town. I like to sand in the direction of the wood grain to avoid scratches. For a polished look, finish with 400-grit sandpaper before staining or painting.
Don’t rush this step—sanding is what makes the repair disappear into the wood. I’ve spent extra time sanding intricate trim, and the result is a finish so smooth you’d swear it was never damaged.
- Seal It for Outdoor Durability
If you’re using Gorilla Wood Filler outside, coat it with a good exterior paint or waterproof sealant. I repaired a porch railing last summer and sealed it with a marine-grade varnish. A year later, it’s still holding strong despite rain and sun.
Without that protective layer, moisture can seep in and weaken the repair, so don’t skip this step. It’s the difference between a repair that lasts a season and one that lasts years.
- Store It Right to Avoid Waste
To keep your filler from drying out, seal the container tightly after every use. I wrap the tub’s lid with plastic wrap before screwing it on, which adds an extra layer of protection. Store it in a cool, dry place—my garage shelf works perfectly.
If it starts to harden, a teaspoon of water mixed in can bring it back to life, but don’t overdo it. Proper storage means you’ll get every last bit out of that tub.
How Gorilla Stacks Up Against Other Wood Fillers?
- Minwax Stainable Wood Filler
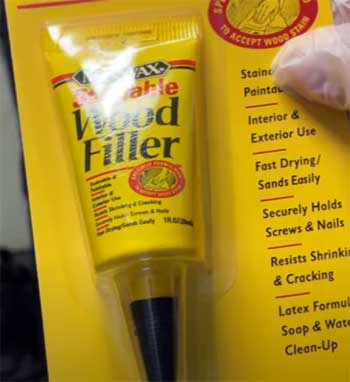
Minwax is a big name in woodworking, and their stainable wood filler is a solid competitor.
I’ve used it on pine and oak projects, and its dry, sandy texture is similar to Gorilla’s, making it easy to apply.
It dries quickly with almost no shrinkage, which is great for small nail holes.
However, I’ve found Minwax doesn’t adhere as well to weathered or outdoor surfaces compared to Gorilla.
It’s also pricier per ounce, and the smaller containers mean you might run out mid-project.
For indoor cosmetic fixes, Minwax is fantastic, but Gorilla’s versatility gives it an edge for mixed-use projects.
- DAP Plastic Wood
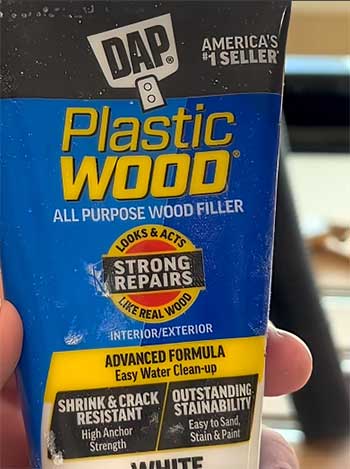
DAP Plastic Wood is another go-to for many DIYers, and I’ve used it for quick fixes on door frames and baseboards.
Its toothpaste-like consistency spreads effortlessly, and it dries in as little as five minutes for shallow repairs.
However, it’s not as strong as Gorilla for anchoring screws or nails, and I’ve noticed it can shrink slightly in deeper fills.
It’s also less water-resistant, so outdoor use is limited unless heavily sealed.
If you’re working on painted surfaces indoors, DAP is a great budget option, but Gorilla outperforms it for durability.
- Elmer’s Carpenter’s Wood Filler
Elmer’s is a favorite for beginners because of its no-fuss application and color-changing formula that turns from purple to natural when dry. I tried it on a pine bookshelf, and the color indicator was handy for knowing when to sand.
However, the consistency can be inconsistent—sometimes it’s too wet, leading to shrinkage. It’s also not ideal for outdoor use or heavy-duty repairs, as it doesn’t hold up as well as Gorilla under stress.
For small, indoor touch-ups, Elmer’s is user-friendly, but Gorilla’s strength and versatility make it my preference.
- Bondo Wood Filler
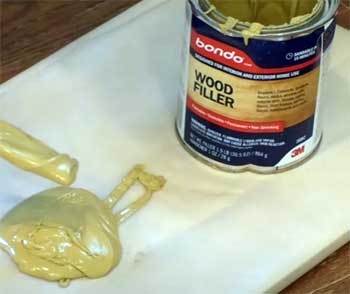
Bondo is a beast for heavy-duty repairs, especially if strength is your priority.
I used it to fix a broken chair frame, and its two-part formula dried rock-hard in just 15 minutes.
However, it’s a nightmare to work with indoors due to its strong chemical smell, and it’s tough to sand because of its hardness.
Stainability is also hit-or-miss—you’ll need a primer layer for decent results.
Bondo’s great for structural fixes, but for most woodworking projects, Gorilla’s ease of use and natural finish make it a better all-around choice.
- Goodfilla Wood Filler
Goodfilla’s powder-based formula lets you mix only what you need, which is great for avoiding waste. I’ve used it on oak cabinets, and it takes stain decently, though not as consistently as Gorilla.
The downside is the mixing process—it’s time-consuming and easy to mess up if you don’t get the ratio right. It’s also less adhesive than Gorilla, so it’s not ideal for anchoring hardware.
For eco-conscious DIYers who don’t mind the extra prep, Goodfilla is a solid pick, but Gorilla’s ready-to-use convenience wins out for me.
Frequently Asked Questions (FAQ)
The curing time depends on the depth of the repair. Shallow fills, like nail holes, dry to the touch in about 15-30 minutes and are ready for sanding. Deeper repairs, like a half-inch gouge, can take 2-6 hours to fully cure. I’ve found that letting it sit overnight for thicker applications ensures a rock-solid finish. Temperature matters too—keep it above 40°F for best results.
Wood filler isn’t a cure-all. Don’t use it for structural repairs, like fixing a broken table leg, where strength is critical—glue or epoxy is better for that. It’s also not ideal for large gaps over an inch deep, as it can crack or take forever to dry. For outdoor projects with constant water exposure, like a submerged dock, skip it unless you’re sealing it heavily.
For sheer strength, Bondo Wood Filler takes the crown due to its chemical bonding and rock-hard finish. However, Gorilla is plenty strong for most repairs, especially if you need to anchor screws or nails. I’ve found it more versatile than Bondo, which can be overkill for smaller projects. If you’re not dealing with heavy structural damage, Gorilla’s balance of strength and ease makes it a top contender.
Yes, you can screw into Gorilla Wood Filler once it’s fully cured. I’ve done this with cabinet hinges and furniture repairs, and it holds screws securely. Just make sure the filler is completely dry—give it at least a few hours for shallow fills and up to a day for deeper ones. Pre-drilling a pilot hole can help ensure a tight fit.
Why Gorilla Wood Filler Is A Must-Have For Your Next Project?
After countless projects, from fixing family heirlooms to patching up my deck, Gorilla All Purpose Wood Filler has proven itself a reliable partner. Its strength, ease of use, and ability to blend seamlessly with any wood make it a standout.
Whether you’re tackling a small touch-up or a bigger repair, this filler delivers results that look professional without the hassle. Grab a tub or tube, and you’ll see why I keep it within arm’s reach for every woodworking job.
Your projects deserve the best, and Gorilla delivers.