As a homeowner tackling renovations, I’ve often found myself puzzled by the terms “vapor barrier” and “moisture barrier.” They sound similar, but their roles in protecting your home are distinct.
In this article, I’ll break down the differences, explore their pros and cons, and help you decide which is right for your project. By sharing my insights and experiences, I aim to make these technical concepts clear and engaging, so you can confidently safeguard your home from water damage.
A Brief Comparison Table
| Feature | Vapor Barrier | Moisture Barrier |
| Purpose | Prevents water vapor diffusion | Blocks liquid water penetration |
| Material | Plastic sheeting, foil, polyethylene | Asphalt, rubberized coatings, Tyvek |
| Permeability | Low (0.1 perms or less) | Higher (varies, often 1-10 perms) |
| Common Use | Interior walls, ceilings, floors | Exterior walls, foundations, roofs |
| Installation | Interior side of insulation | Exterior surfaces, below-grade areas |
| Cost | $0.50–$2 per sq. ft. | $1–$5 per sq. ft. |
| Durability | Susceptible to punctures | Highly durable, weather-resistant |
Understanding The Basics
When I first started researching how to keep my home dry, I assumed vapor barriers and moisture barriers were interchangeable.
I was wrong.
A vapor barrier is designed to stop water vapor—those tiny, invisible molecules that float through the air—from passing through walls, floors, or ceilings.
Think of it like a shield against humidity.
A moisture barrier, on the other hand, is built to block liquid water, like rain or groundwater, from seeping into your home’s structure.
Both are critical, but they tackle different problems.
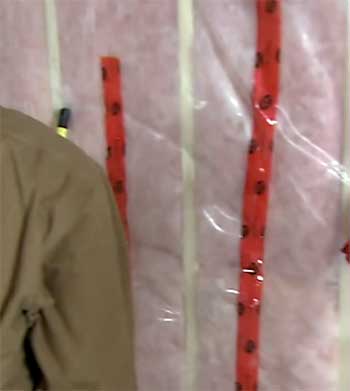
Vapor barriers are typically thin sheets of plastic, like polyethylene, or even foil. They’re rated by their permeability, measured in “perms.” A true vapor barrier has a perm rating of 0.1 or less, meaning it’s nearly impenetrable to vapor.
I’ve seen them used in places like basements or attics, where humidity can build up and cause issues like mold or insulation damage.
Moisture barriers, however, are tougher. They’re often made of materials like asphalt, rubberized coatings, or synthetic fabrics like Tyvek. These are designed to handle direct water exposure, so you’ll find them on exterior walls, roofs, or foundations.
Their perm ratings are higher, allowing some vapor to pass through while keeping liquid water out. This distinction clicked for me when I realized my leaky basement needed a moisture barrier on the exterior, not just a vapor barrier inside.
Why This Matters To You
If you’re like me, you want your home to stay dry, comfortable, and free of costly repairs. Choosing the wrong barrier—or skipping one entirely—can lead to damp insulation, warped wood, or even mold that sends you scrambling for remediation.
I’ve spoken with contractors who’ve seen homeowners slap a vapor barrier where a moisture barrier was needed, trapping water and turning a small issue into a big one.
Understanding the differences helps you make informed decisions, whether you’re building a new home or retrofitting an old one.
Vapor Barriers: Features And Benefits
Vapor barriers are my go-to when I’m working on interior spaces prone to humidity. Their primary job is to keep water vapor from sneaking into insulation or wall cavities, where it can condense and cause trouble. Here’s what I’ve learned about their key features:
- Low Permeability: With a perm rating of 0.1 or less, vapor barriers are practically airtight against vapor. This is crucial in cold climates, where warm, moist indoor air can hit cold walls and condense.
- Versatile Materials: From polyethylene sheets to foil-faced insulation, there’s a range of options. I’ve used 6-mil poly in my basement, and it’s affordable and effective.
- Energy Efficiency: By preventing moisture from degrading insulation, vapor barriers help maintain your home’s thermal performance, saving you on energy bills.
- Mold Prevention: Keeping vapor out reduces the risk of mold, which I’ve seen become a nightmare in poorly ventilated spaces.
Pros of Vapor Barriers
Vapor barriers have saved me time and money on multiple projects, and their benefits are hard to ignore when used correctly. Here’s a closer look at why I often reach for them:
- Cost-Effective: At $0.50–$2 per square foot, vapor barriers are one of the most affordable ways to protect your home. When I insulated my attic, I covered 500 square feet with 6-mil polyethylene for under $200, a fraction of what mold remediation would’ve cost.
- Easy Installation: As a DIY enthusiast, I appreciate how straightforward vapor barriers are to install. With a utility knife, some tape, and a staple gun, I’ve managed to outfit entire rooms in a weekend. The simplicity means you don’t always need a contractor, though precision is key.
- Effective in Cold Climates: In colder regions, where indoor heating creates humid air, vapor barriers are lifesavers. During a Minnesota winter, I noticed my friend’s uninsulated walls were damp from condensation. A vapor barrier fixed the issue by keeping warm, moist air from hitting cold surfaces.
- Customizable Options: Vapor barriers come in various forms—polyethylene sheets, foil-faced batts, or even paint-on membranes. When I renovated a crawlspace, I chose a thicker 10-mil sheet for extra durability, which gave me peace of mind in a high-humidity area.
- Energy Savings: By keeping insulation dry, vapor barriers maintain its R-value (thermal resistance). In my home, this translated to lower heating bills, as the insulation didn’t lose its effectiveness due to moisture saturation.
- Wide Availability: You can find vapor barriers at any hardware store, from big-box retailers to local shops. I’ve even sourced specialty foil barriers online for unique projects, like a sauna room that needed extra vapor protection.
- Compatibility with Insulation: Vapor barriers work seamlessly with common insulation types like fiberglass or cellulose. In my garage, combining a vapor barrier with fiberglass batts kept the space dry and warm, even during heavy snowfalls.
Cons of Vapor Barriers
Despite their advantages, vapor barriers aren’t perfect. I’ve run into issues that taught me their limitations the hard way:
- Risk of Trapping Moisture: If you install a vapor barrier on the wrong side of a wall—like the cold side in a hot climate—it can trap moisture instead of preventing it. A buddy of mine in Florida made this mistake, and within months, his walls were rotting because the barrier blocked vapor from escaping.
- Fragility: Thin plastic sheets, like the 6-mil poly I used, tear easily if you’re not careful. During one install, I accidentally punctured the sheet while moving lumber, creating gaps that let vapor through. It forced me to patch and re-tape, which was a hassle.
- Not for Liquid Water: Vapor barriers are useless against leaks or flooding. When a pipe burst in my garage, the polyethylene sheet did nothing to stop the water, and I had to replace soaked drywall. A moisture barrier would’ve been the better choice for that exterior wall.
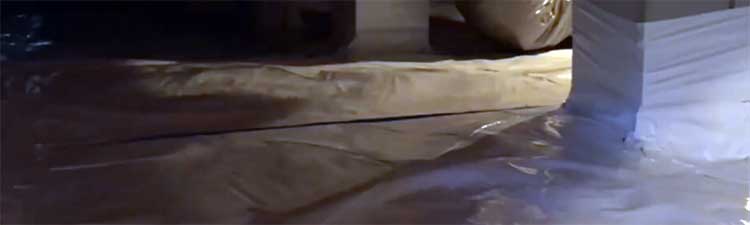
- Ventilation Dependency: Without proper airflow, vapor barriers can create a sealed environment that traps humidity. In a poorly ventilated basement, I once noticed condensation forming behind a vapor barrier because the space lacked adequate air exchange.
- Climate Limitations: In hot, humid climates, vapor barriers can do more harm than good. I learned this when helping a friend in Texas, where a vapor barrier caused moisture buildup in the walls because the humid outdoor air couldn’t escape.
- Installation Errors: Getting the placement right is critical. I’ve seen DIYers overlap seams improperly or forget to seal edges, allowing vapor to sneak through. It’s not rocket science, but it requires attention to detail, which I underestimated early on.
- Limited Lifespan in Harsh Conditions: While durable in controlled environments, vapor barriers can degrade if exposed to UV light or extreme temperatures. I once left some polyethylene exposed during a project delay, and it became brittle after a few weeks in the sun.
Moisture Barriers: Features And Benefits
Moisture barriers are the heavy-duty players in the water protection game. When I was dealing with a soggy foundation, my contractor recommended a rubberized asphalt coating, and it was a game-changer.
These barriers are designed to stop liquid water in its tracks, making them ideal for exterior applications. Here’s what stands out:
- High Durability: Materials like asphalt or synthetic fabrics can withstand harsh weather, UV exposure, and even soil pressure.
- Flexible Permeability: With perm ratings often between 1 and 10, they allow some vapor to escape, preventing trapped moisture in certain setups.
- Wide Applications: From roofs to below-grade foundations, moisture barriers are versatile. I’ve seen Tyvek used on exterior walls to great effect.
- Long Lifespan: Unlike vapor barriers, these are built to last, often enduring decades of exposure.
Pros of Moisture Barriers
Moisture barriers have been a lifesaver in projects where liquid water was the enemy. Here’s why I’ve come to rely on them for exterior and below-grade work:
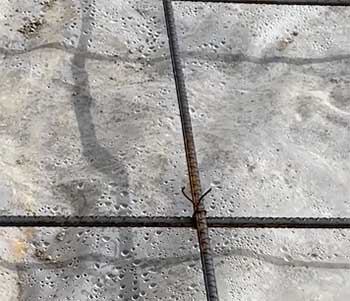
- Robust Protection Against Liquid Water: Moisture barriers are designed to handle direct water exposure, like heavy rain or groundwater. When I had a foundation leak, a liquid-applied asphalt barrier stopped water from seeping into my basement, saving me from costly structural damage.
- Weather Resistance: Materials like Tyvek or rubberized coatings can endure wind, UV rays, and temperature swings. During a siding project, I used Tyvek, and it held up perfectly through a stormy summer, keeping the walls dry.
- Breathability: Many moisture barriers, like house wraps, allow vapor to pass through while blocking liquid water. This was a game-changer in my humid climate, where trapped moisture could’ve led to mold behind the siding.
- Long-Term Durability: Unlike vapor barriers, moisture barriers are built for the long haul. The asphalt coating on my foundation is still going strong after 10 years, with no signs of wear.
- Versatile Applications: From roofs to foundations to exterior walls, moisture barriers cover a wide range of uses. I’ve used them in everything from a garden shed to a multi-story home, always with reliable results.
- Protection Against Structural Damage: By keeping water out, moisture barriers prevent issues like wood rot or concrete erosion. In a rental property, a moisture barrier under the roof membrane saved me from replacing water-damaged rafters.
- Compatibility with Building Codes: Most moisture barriers meet stringent building codes for exterior applications. When I built an addition, the inspector praised my choice of a synthetic house wrap, which checked all the boxes for compliance.
- Enhanced Home Value: A well-protected home is more appealing to buyers. When I sold a property, the realtor noted that the moisture barrier on the foundation was a selling point, as it signaled durability.
Cons of Moisture Barriers
While moisture barriers are impressive, they’re not without drawbacks. Here’s what I’ve encountered:
- Higher Cost: At $1–$5 per square foot, moisture barriers can strain your budget. Coating my 1,000-square-foot foundation cost nearly $3,000, a big jump from the $500 I’d have spent on a vapor barrier.
- Complex Installation: Some moisture barriers, like liquid-applied coatings, require professional skills. My DIY attempt at a rubberized coating was a mess—uneven application led to weak spots, and I had to hire a pro to fix it.
- Limited Interior Use: Moisture barriers are overkill for most interior projects. I once considered using a house wrap inside a bathroom, but a contractor pointed out that a vapor barrier was cheaper and more appropriate.
- Maintenance Needs: Certain moisture barriers, like some coatings, need reapplication every few years. I was surprised when a foundation coating started flaking after five years, requiring a costly touch-up.
- Weight and Bulk: Some materials, like asphalt membranes, are heavy and cumbersome. Hauling rolls of roofing membrane up a ladder for a shed project was exhausting, and I wished for a lighter alternative.
- Potential for Over-Breathability: In some cases, high permeability can be a downside. A friend used a breathable moisture barrier in a cold climate, and vapor diffusion caused condensation issues because it wasn’t paired with proper insulation.
- Environmental Concerns: Some moisture barriers, like asphalt-based products, aren’t eco-friendly and can off-gas during application. I noticed a strong smell when applying a coating, which made me question its long-term impact.
Key Differences of Vapor Barrier And Moisture Barrier In Application
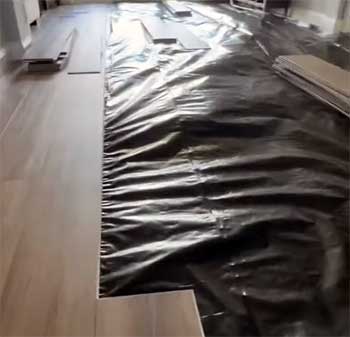
When I renovated my attic, I used a vapor barrier to keep humid indoor air from ruining the insulation. But when I tackled my home’s exterior during a siding upgrade, a moisture barrier like Tyvek was the right call to protect against rain.
The application depends on where water is coming from and how it behaves. Vapor barriers go on the warm side of a wall (usually inside in cold climates) to stop humidity. Moisture barriers go on the exterior or below-grade areas to block liquid water.
Climate plays a huge role. In cold climates, vapor barriers prevent indoor moisture from hitting cold surfaces. In hot, humid climates, moisture barriers are often better, allowing vapor to escape while blocking rain.
Mixed climates can be tricky—I’ve seen hybrid systems where both are used strategically, but it requires careful planning to avoid trapping moisture.
Real-World Scenarios
Let me share a story. A neighbor decided to DIY a basement reno and slapped a vapor barrier on the interior walls without addressing exterior groundwater issues. Within a year, mold was creeping up the drywall because liquid water was seeping through the foundation.
A moisture barrier, like a waterproof coating on the exterior, would’ve saved him thousands. On the flip side, when I insulated my attic, a vapor barrier was perfect for keeping humid air from condensing on the cold roof deck.
Another time, I helped a friend with a new build. We used Tyvek as a moisture barrier under the siding, which let vapor escape while keeping rain out. It was a relief knowing the walls could “breathe” in our humid climate.
These experiences taught me that context—climate, location, and water source—dictates the right choice.
Choosing The Right Barrier For Your Project
Picking between a vapor barrier and a moisture barrier boils down to your specific needs.
Ask yourself: Are you fighting humidity or liquid water?
Where’s the barrier going—inside or outside?
What’s your climate like?
For example, if you’re in a cold region and insulating a wall, a vapor barrier on the interior side is likely your best bet.
If you’re waterproofing a foundation or installing siding, a moisture barrier is non-negotiable.
I always recommend consulting a local contractor or building code guidelines. When I was unsure about my basement, a quick chat with a pro clarified that I needed both: a moisture barrier outside and a vapor barrier inside.
Budget matters too—vapor barriers are cheaper, but cutting corners on a moisture barrier can lead to expensive repairs.
Common Mistakes To Avoid
I’ve made my share of mistakes, and I’ve seen others do the same. One big one is using a vapor barrier where a moisture barrier is needed. It’s like wearing a raincoat indoors—it doesn’t solve the problem and might make it worse.
Another is poor installation. I once forgot to seal the seams of a vapor barrier, and moisture sneaked through the gaps. Always use proper tape or sealants. Finally, don’t ignore ventilation.
Both barriers need airflow to work effectively, or you’re just trapping moisture in a different way.
Frequently Asked Questions (FAQ)
You shouldn’t use a vapor barrier in hot, humid climates where moisture needs to escape outward, or on the cold side of a wall, as it can trap moisture.
Tyvek is a moisture barrier. It blocks liquid water while allowing vapor to pass through, making it ideal for exterior walls.
Yes, if moisture is trapped due to improper installation or ventilation, mold can grow under a vapor barrier.
No, a vapor barrier stops water vapor, while damp proofing (a type of moisture barrier) prevents liquid water from penetrating surfaces like foundations.
Wrapping Up
Navigating the world of vapor barriers and moisture barriers can feel overwhelming, but I hope I’ve made it clearer for you. By understanding their roles—vapor barriers for humidity, moisture barriers for liquid water—you can protect your home effectively.
Whether you’re insulating a cozy attic or waterproofing a basement, choosing the right barrier is key to avoiding costly damage. Take the time to assess your project’s needs, consider your climate, and consult a pro if you’re unsure.
With the right approach, you’ll keep your home dry, comfortable, and built to last.