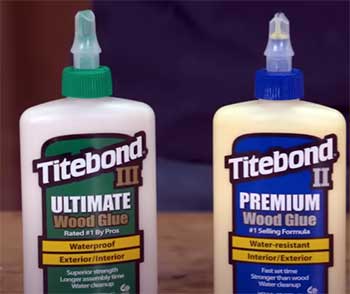
I’ve spent countless hours in my workshop, gluing everything from delicate cutting boards to sturdy outdoor furniture, and I’ve learned one thing: choosing the right wood glue is make-or-break. Titebond 2 and Titebond 3 are two heavyweights in the woodworking world, but which one’s the best for your project?
In this article, I’ll share my hands-on experience, break down their strengths and weaknesses, and help you decide which glue suits your needs. From bond strength to water resistance, I’ll cover it all with a clear, practical perspective.
A Brief Comparison Table
| Feature | Titebond 2 Premium | Titebond 3 Ultimate |
| Water Resistance | Type II (Water-resistant) | Type I (Waterproof) |
| Bond Strength | ~3,750 psi | ~4,000 psi |
| Open Time | 3-5 minutes | 8-10 minutes |
| Clamp Time | 30-60 minutes | 30-60 minutes |
| Color (Dried) | Yellow | Light Brown |
| Application Temp | Above 55°F | Above 47°F |
| FDA Approval | Yes (Indirect food contact) | Yes (Indirect food contact) |
| Best For | Indoor, limited outdoor use | Indoor, heavy outdoor use, food-safe |
| Price (Per Quart) | ~$10-$12 | ~$14-$16 |
This table sums up the key differences, but there’s so much more to unpack. Let’s get into my real-world experience with these glues and why those specs matter.
My First Encounter With Titebond Glues
When I started woodworking, I grabbed Titebond 2 because it was the go-to at my local hardware store. The bright blue bottle screamed reliability, and it didn’t disappoint. Fast forward a few years, and I’m building a cedar bench for my backyard.
A friend swore by Titebond 3, claiming its waterproof magic was unbeatable. Naturally, I bought a bottle and put it to the test. What I discovered through trial, error, and a few sticky situations is that both glues are fantastic—but they shine in different scenarios.
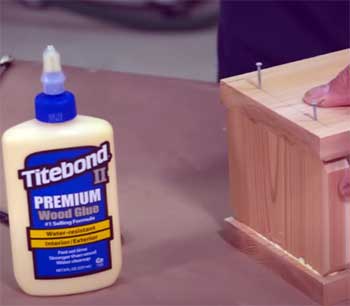
Titebond 2: The Reliable Workhorse
Titebond 2 Premium is like that friend who’s always there when you need them—dependable, straightforward, and gets the job done. It’s a PVA (polyvinyl acetate) glue designed for indoor projects with occasional moisture exposure.
I’ve used it for everything from picture frames to bathroom vanities, and it’s never let me down.
Pros of Titebond 2
- Quick Set Time: One thing I love about Titebond 2 is its speed. It has a 3-5 minute open time, meaning you’ve got a short window to adjust your pieces before it starts to grab. For simple glue-ups, like edge-joining oak boards for a tabletop, this is perfect. I can clamp, tweak, and move on without waiting around. The clamp time is about 30-60 minutes, so I’m not stuck babysitting my project all day.
- Easy Cleanup: Spills and squeeze-out? No big deal. Titebond 2 cleans up with a damp cloth while it’s wet, which saves me from scraping dried glue off my projects. I’ve had moments where I got distracted and left glue drips on a walnut board—wiping them away with water was a breeze.
- Sandability: Once dry, Titebond 2 sands like a dream. I’ve run my orbital sander over glued joints, and the glue doesn’t gum up or resist like some others. This is a huge plus when I’m prepping furniture for a smooth finish.
- FDA-Approved for Indirect Food Contact: I’ve made a few cutting boards for friends, and Titebond 2’s FDA approval for indirect food contact gave me peace of mind. It’s safe for kitchen projects like butcher blocks, as long as the glue isn’t directly touching food.
- Affordable: At about $10-$12 per quart, Titebond 2 won’t break the bank. For hobbyists like me who go through glue regularly, the price is a big win. It’s a high-quality adhesive without the premium price tag.
Cons of Titebond 2
- Limited Water Resistance: Titebond 2 is water-resistant (ANSI Type II), but it’s not waterproof. I learned this the hard way when a birdhouse I made started to delaminate after a rainy season. It’s fine for projects that see occasional splashes, like bathroom cabinets, but for anything exposed to constant moisture, it’s not the best choice.
- Yellow Color: The dried glue has a noticeable yellow hue. On lighter woods like maple or pine, this can show through if you’re not careful with cleanup. I’ve had to sand extra hard to hide glue lines on a white oak project, which was a pain.
- Temperature Sensitivity: Titebond 2 needs to be applied above 55°F. In my unheated garage during winter, this was a problem. I had to bring my glue and wood indoors to ensure a strong bond, which added an extra step to my workflow.
- Shorter Open Time: For complex glue-ups, like assembling a chair with multiple joints, the 3-5 minute open time feels rushed. I’ve had moments where I scrambled to align pieces before the glue started setting, leading to some less-than-perfect joints.
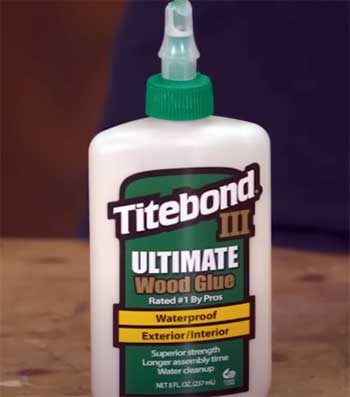
Titebond 3: The Heavy-Duty Champion
Titebond 3 Ultimate is the big brother of the Titebond family, built for tough jobs and harsh conditions. When I started using it for outdoor projects, I was impressed by its resilience.
It’s also a PVA glue but with an advanced polymer formula that gives it an edge in specific situations.
Pros of Titebond 3
- Waterproof (Type I): Titebond 3’s claim to fame is its ANSI Type I waterproof rating. This means it can handle boiling water and extreme weather without breaking down. I used it to glue a cedar planter box that’s been sitting outside for three years, through rain, snow, and scorching summers—it’s still rock-solid.
- Stronger Bond: With a bond strength of ~4,000 psi compared to Titebond 2’s ~3,750 psi, Titebond 3 is slightly stronger. In my tests, joints made with Titebond 3 consistently caused the wood to break before the glue failed, even on hardwoods like walnut. For heavy-duty projects like outdoor benches, this gives me extra confidence.
- Longer Open Time: The 8-10 minute open time is a game-changer for intricate glue-ups. When I built a dining table with a herringbone pattern, Titebond 3 gave me the breathing room to align each piece perfectly without rushing. This makes it ideal for complex projects like furniture with multiple joints.
- Lower Application Temperature: Titebond 3 works down to 47°F, which is great for those chilly workshop days. I’ve glued projects in my garage during early spring without worrying about the bond failing due to cold temperatures.
- FDA-Approved for Indirect Food Contact: Like Titebond 2, Titebond 3 is safe for cutting boards and other kitchen projects. I’ve used it for butcher blocks, and the waterproof nature adds an extra layer of durability for items that get washed frequently.
Cons of Titebond 3
- Higher Cost: At $14-$16 per quart, Titebond 3 is pricier than Titebond 2. For small projects, the cost difference isn’t a big deal, but if you’re buying gallons for large builds, it adds up. I sometimes question if the extra features are worth it for indoor projects.
- Darker Color: Titebond 3 dries to a light brown color, which can be noticeable on light woods. I made a maple cutting board and had to be extra diligent with cleanup to avoid visible glue lines. It’s not a dealbreaker, but it requires more care than Titebond 2.
- Thermal Plasticity: Titebond 3 loses strength at high temperatures (around 150°F, it drops to ~1,000 psi). I noticed this when a glued joint on an outdoor table softened slightly during a heatwave. For projects exposed to intense heat, like furniture near a sunny window, this could be a concern.
- Longer Cure Time: While the clamp time is similar to Titebond 2, Titebond 3 takes longer to fully cure—up to 24 hours for maximum strength. I’ve had to plan my projects around this, especially when I’m eager to sand and finish the same day.
Real-World Applications: Where Each Glue Shines
Let’s talk about where these glues fit into your projects. I’ve used both extensively, and here’s how I decide which one to grab.
- Titebond 2 in Action
Titebond 2 is my go-to for indoor projects. I’ve glued up oak bookshelves, pine picture frames, and walnut coffee tables with it, and the results are always solid. Its quick set time is perfect for straightforward glue-ups where I’m joining two or three pieces.
I also used it for a bathroom vanity, knowing it could handle occasional splashes without issue. For smaller shops or hobbyists on a budget, Titebond 2’s affordability and versatility make it a staple.
One memorable project was a set of kitchen cabinets. I edge-glued maple boards, clamped them for an hour, and sanded the next day. The joints were invisible, and the glue sanded smoothly without clogging my sandpaper.
Titebond 2’s water resistance was enough for the occasional spill, and the FDA approval meant I didn’t worry about indirect food contact in the kitchen.
- Titebond 3 in Action
Titebond 3 is my pick for outdoor projects or anything that needs extra durability. That cedar bench I mentioned? It’s still holding strong after years of weather exposure, thanks to Titebond 3’s waterproof formula.
I’ve also used it for cutting boards, knowing its Type I rating ensures the joints won’t fail even after repeated washing. The longer open time was a lifesaver when I built a complex outdoor pergola with multiple angled joints—it gave me the flexibility to adjust pieces without panicking.
One standout project was a butcher block for a friend who’s a chef. The board gets heavy use, including frequent washing, and Titebond 3’s waterproof nature has kept it intact. The light brown glue line blends decently with the walnut and maple, though I had to be meticulous with cleanup to avoid any visible seams.
Key Differences Between Titebond 2 And Titebond 3 That Matter
Let’s break down the critical differences that influence my glue choice.
- Water Resistance: Titebond 2’s Type II water resistance is fine for indoor projects or outdoor items with limited moisture exposure, like a covered porch table. But Titebond 3’s Type I waterproof rating is the clear winner for anything exposed to rain, snow, or frequent washing. I learned this when a Titebond 2-glued birdhouse started to come apart after a wet winter, while a Titebond 3-glued planter box laughed off the same conditions.
- Bond Strength: Titebond 3’s 4,000 psi edges out Titebond 2’s 3,750 psi, but in practice, both are stronger than most woods. I’ve tested joints on oak and walnut, and the wood always breaks before the glue. Unless you’re building something extreme, like a skateboard ramp, the strength difference is negligible for most projects.
- Open Time: Titebond 3’s 8-10 minute open time is a blessing for complex assemblies. I’ve struggled with Titebond 2’s 3-5 minute window when gluing up furniture with multiple pieces, like a chair with angled joints. If you’re a beginner or tackling intricate designs, Titebond 3 gives you more wiggle room.
- Color and Aesthetics: Titebond 2’s yellow hue can stand out on light woods, while Titebond 3’s light brown is slightly less noticeable on darker species like walnut. However, both require careful cleanup to avoid visible glue lines. I’ve found Titebond 3 trickier to hide on maple, so I lean toward Titebond 2 for lighter woods.
- Application Temperature: Titebond 3’s lower minimum application temperature (47°F vs. 55°F) makes it more versatile for cold-weather woodworking. I’ve glued projects in my chilly garage with Titebond 3 without issue, while Titebond 2 forced me to work indoors during winter.
- Price: Titebond 2 is the budget-friendly option, saving you a few bucks per quart. For large projects, like building a deck, those savings add up. Titebond 3’s higher price is justified for outdoor or food-safe projects, but for indoor work, I often stick with Titebond 2 to keep costs down.
Challenges and Lessons Learned
I’ve had my share of glue-related mishaps. One time, I used Titebond 2 on a cedar outdoor chair, thinking its water resistance would be enough. After a year of rain, the joints started to loosen. Lesson learned: for anything exposed to consistent moisture, Titebond 3 is the way to go.
On the flip side, I once used Titebond 3 for a quick indoor repair and regretted the longer cure time—I couldn’t sand until the next day, which slowed me down.
Another challenge is glue line visibility. With both glues, I’ve had to develop a habit of wiping away excess immediately to avoid sanding headaches later.
Titebond 3’s darker color caught me off guard on a pine project, where the glue line was faintly visible under a clear finish. Now, I always test on scrap wood to check how the glue looks with my chosen wood and finish.
Tips For Using Titebond 2 And Titebond 3
Here’s what I’ve learned to get the best results from both glues:
- Surface Prep is Key: Both glues need clean, freshly cut, or lightly sanded surfaces for maximum strength. I always wipe down my wood with a damp cloth to remove dust before gluing.
- Clamping Pressure: Use enough pressure to bring joints together tightly—100-150 psi for softwoods, 125-175 for medium woods, and 175-250 for hardwoods. I’ve starved joints by clamping too hard, so I keep it firm but not excessive.
- Temperature Matters: Store both glues below 75°F to avoid thickening. If they freeze, stir or shake to restore consistency. I’ve tossed out thickened glue in the past, which was a costly mistake.
- Cleanup Hacks: Wipe excess glue with a damp cloth while wet. For dried glue, a scraper followed by sanding works best. I keep a spray bottle of water handy for quick cleanups.
- Test First: For exotic woods like cedar or teak, test adhesion on scrap pieces. I had a Titebond 3 joint fail on oily teak until I wiped it with acetone first.
When To Choose Titebond 2 And Titebond 3?
Here’s my rule of thumb based on years of gluing:
- Choose Titebond 2 for indoor projects like furniture, cabinets, or picture frames. It’s affordable, sets quickly, and sands easily. It’s also great for projects with occasional moisture, like bathroom vanities or kitchen cutting boards.
- Choose Titebond 3 for outdoor projects like benches, planters, or pergolas, where waterproofing is critical. It’s also ideal for complex glue-ups needing longer open time or food-safe projects like butcher blocks.
Also Read: Is Flex Super Glue Worth It?
FAQ: Your Titebond Questions Answered
Titebond 3 is better for outdoor projects and food-safe applications due to its waterproof rating and slightly stronger bond. Titebond 2 is better for indoor projects where quick set time and lower cost matter.
Both are FDA-approved for indirect food contact, making them suitable for cutting boards. Titebond 3 is preferred for its waterproofing, ensuring durability with frequent washing.
Titebond 3 struggles with oily woods like teak or rosewood unless pre-treated with a solvent like acetone. It also won’t bond well to non-porous surfaces like metal or plastic.
Titebond 2 is great for indoor projects like furniture, cabinets, and picture frames. It’s also suitable for limited outdoor use, like covered porch furniture, and FDA-approved for cutting boards.
Conclusion: Your Glue, Your Project, Your Choice
You’re standing in the glue aisle, staring at Titebond 2 and Titebond 3, wondering which one to grab. I’ve been there, and after years of gluing everything from cutting boards to pergolas, I can tell you both are fantastic—but they’re not interchangeable.
Titebond 2 is your budget-friendly, quick-setting buddy for indoor projects and light moisture exposure. Titebond 3 is the tough guy for outdoor builds and complex glue-ups, with waterproofing that laughs at rain. Pick the one that matches your project’s needs, and you’ll be gluing like a pro.
What’s your next build? Let’s make sure it sticks.