When it comes to fixing a roof leak, you need a product that’s reliable, easy to use, and built to last. Through The Roof sealant checks all these boxes and more.
If you’re tired of temporary fixes and want a permanent solution, this product is your go-to. It adheres to almost any surface, stays clear without yellowing, and remains elastic regardless of temperature changes.
Imagine not having to worry about that pesky leak again, even in the middle of a rainstorm. This sealant offers peace of mind that’s hard to beat.
What Makes Through The Roof Sealant Stand Out?
- Elasticity and Flexibility
One of the standout features of Through The Roof sealant is its elasticity.
Unlike traditional sealants that can crack and fail with temperature changes, this product flexes and moves with your roof.
Whether it’s the heat of summer or the chill of winter, it remains intact and functional.
This flexibility ensures a long-lasting seal that you can count on for years.

- Clarity and UV Resistance
Through The Roof sealant goes on clear and stays clear, which means it won’t mar the appearance of your roof. Additionally, it offers excellent UV resistance, preventing it from yellowing over time.
This ensures that your roof looks good and remains protected from the sun’s harmful rays.
- Versatility
This sealant adheres to a wide range of surfaces including metal, plastic, asphalt, wood, and concrete. This versatility makes it a valuable addition to your home maintenance toolkit.
Whether you’re sealing a leak on your roof, patching up gutters, or fixing a crack in a concrete surface, Through The Roof has you covered.
- Performance in All Conditions
Through The Roof sealant works in both wet and dry conditions, even sealing effectively in standing water. This means you don’t have to wait for perfect weather to apply it.
Its ability to remain elastic and watertight in temperatures ranging from 0°F to 120°F makes it suitable for use in any season.
Personal Experience Using Through The Roof Sealant
I decided to tackle a persistent leak in my roof that had been causing problems for months. Armed with a few quarts of Through The Roof sealant and some basic tools, I set out to fix the issue once and for all.
Here’s how it went.
- Preparation
First, I cleaned the roof area thoroughly.
Using a leaf blower and a hand brush, I removed all loose dirt, stone granules, and leaves.
This step is crucial for ensuring the sealant adheres properly.
I highly recommend using a hand brush to get into the small cracks and crevices where dirt tends to hide.
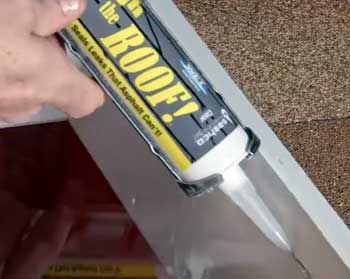
- Application
I used foam brushes to apply the sealant. These brushes are perfect for getting the sealant into cracks and spreading it evenly over larger surfaces.
The sealant is slightly thinner than silicone, making it easy to brush flat, but it’s thick enough to stay put once applied.
- Experience
The sealant adhered perfectly to the damp shingles and previous patches of roof cement. It was super sticky, so wearing rubber gloves is a must. This stuff is tough to get off your hands, and it’s best to avoid getting it on your clothes.
I applied a thin layer, focusing on embedding the sealant deeply into any cracks before brushing a smooth layer over the top.
The directions suggest a layer between 1/8-1/4 inches thick, but I found that a thinner layer around 1/16-1/8 inches worked best for me.
- Results
After sealing all the cracks and covering the previous patches, I was delighted with the results. Even after a heavy thunderstorm, there were no signs of leakage. The sealant remained clear and elastic, blending seamlessly with the roof.
Pros and Cons of Through The Roof Sealant
Pros
- Elasticity: Flexes with temperature changes and remains intact.
- Clarity: Goes on clear and stays clear, maintaining the aesthetic of your roof.
- UV Resistance: Excellent protection against the sun’s rays, preventing yellowing.
- Versatility: Adheres to various surfaces including metal, plastic, asphalt, wood, and concrete.
- All-Weather Performance: Effective in both wet and dry conditions, and in temperatures from 0°F to 120°F.
Cons
- Messy Application: It’s very sticky, and it’s easy to get it on your clothes and tools.
- Curing Time: Once the jar is opened, the sealant starts to cure quickly. You need to use it promptly.
- Shiny Finish: The cured sealant is somewhat shiny, which might be noticeable on visible parts of the roof.
Tips On How To Apply Through The Roof Sealant
Applying Through The Roof sealant can be straightforward if you follow these tips. Here’s a step-by-step guide to ensure you get the best results:
Preparation
- Clean the Surface: Before applying the sealant, clean the area thoroughly. Use a leaf blower to remove loose debris like leaves and dirt. For a deeper clean, use a hand brush to get into cracks and crevices. This ensures that the sealant adheres properly.
- Choose the Right Tools: Foam brushes are ideal for applying Through The Roof sealant. They help you spread the sealant evenly and get it into small cracks. Make sure to have a few brushes on hand as they can wear out quickly.
- Protect Yourself: Wear rubber gloves and old clothes. The sealant is very sticky and difficult to remove from skin and fabric. It’s also a good idea to have a rag or paper towels for wiping your hands and tools.
Application
- Start with Visible Cracks: Apply the sealant to visible cracks first. Use the brush to press the sealant into the cracks, then spread it out to create a smooth, even layer. This ensures a thorough seal.
- Spread Evenly: Aim to spread a layer between 1/16 to 1/8 inches thick. A thicker layer can be messy and unnecessary. Focus on getting a smooth, even coat that fully covers the area.
- Work Quickly: Once the jar is opened, the sealant starts to cure. Plan your application so that you can use the sealant promptly. Re-seal the jar between applications to extend its usability.
- Dispose of Waste Properly: Have a trash bag ready for used brushes, gloves, and any other waste. This helps keep your work area clean and prevents the sticky sealant from spreading to unwanted areas.
Post-Application
- Clean Up: After you’ve applied the sealant, clean your tools and dispose of any waste immediately. If you’ve got sealant on your gloves or clothes, wipe it off as soon as possible.
- Inspection: Check the sealed area after a few hours to ensure it’s curing properly. If any spots look thin or missed, you can apply another layer.
Comparison With Other Brands
- Through The Roof Vs. Silicone Sealants
Through The Roof offers better flexibility and UV resistance compared to traditional silicone sealants. Silicone tends to yellow over time and doesn’t adhere as well to certain surfaces.
However, silicone is often easier to apply and less messy.
- Through The Roof Vs. Asphalt-Based Sealants
Asphalt-based sealants are known for their durability but can become brittle and crack over time, especially with temperature changes.
Through The Roof remains elastic and is easier to apply in various weather conditions, making it a more versatile option.
- Through The Roof Vs. Polyurethane Sealants
Polyurethane sealants are strong and durable but can be challenging to work with due to their thickness and longer curing times.
Through The Roof is easier to apply and cures faster, providing a quicker solution to leaks.
Frequently Asked Questions (FAQ)
Through The Roof sealant is designed to last significantly longer than traditional sealants. Its unique co-polymer rubber formula ensures that it remains elastic and watertight year after year, outlasting many other products on the market.
Through The Roof is a co-polymer rubber-based sealant. This formulation gives it exceptional flexibility, adhesion, and durability, making it ideal for a wide range of surfaces and conditions.
Yes, you can apply Through The Roof sealant even in the rain. Its formulation allows it to adhere to wet surfaces, making it a reliable option for emergency repairs during inclement weather.
Absolutely. Through The Roof sealant adheres to wood as well as many other materials, including metal, plastic, asphalt, and concrete. This versatility makes it a great choice for various repair tasks around the home.
Final Thoughts
Through The Roof sealant is a standout product for anyone needing a reliable and long-lasting solution for roof leaks. Its unique features, such as elasticity, UV resistance, and versatility, make it an essential item for home maintenance.
While it may be a bit messy to apply, the results are well worth it. With regular inspections and proper storage, this sealant will keep your roof watertight and looking great for years to come.
If you’re looking for a product that truly delivers on its promises, Through The Roof sealant is the way to go.
There’s noticeably a bundle to find out about this. I assume you made sure good points in features also.