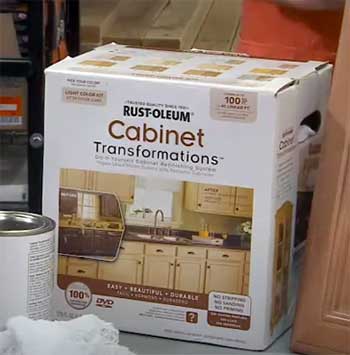
Your kitchen’s screaming for a makeover, but the thought of a full remodel makes your wallet weep. Enter Rust-Oleum Cabinet Transformations—a DIY kit that promises a stunning cabinet refresh without the hassle or hefty price tag.
I’m here to tell you why you should grab this kit and transform your space. It’s easy, affordable, and delivers professional-looking results.
In this article, I’ll share my hands-on experience, break down the pros and cons, compare it to other brands, and give you maintenance tips to keep your cabinets looking fresh. Trust me, you’ll want this in your cart by the end.
My Journey With Rust-Oleum Cabinet Transformations
Picture this: my kitchen, once a gloomy cave of dated, dark oak cabinets, was dragging down the vibe of my entire home.
I craved a bright, modern look but wasn’t ready to shell out thousands for new cabinets.
That’s when I stumbled across Rust-Oleum Cabinet Transformations at my local hardware store.
The promise of no sanding, no priming, and a custom-tinted finish had me sold.
I grabbed the small kit, tinted it to a crisp pure white, and dove into the project with equal parts excitement and skepticism.
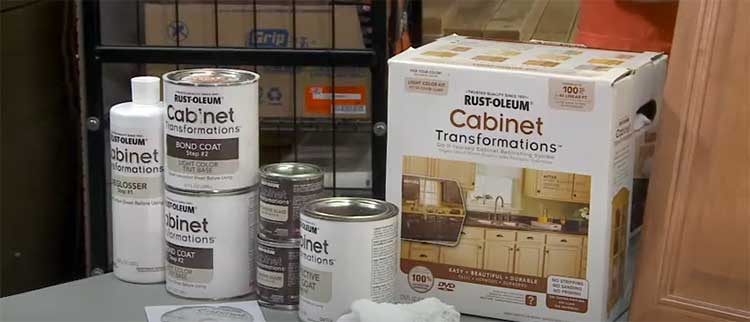
The process was surprisingly straightforward. I started by removing the cabinet doors and hardware, labeling everything to avoid a chaotic reassembly. Cleaning the cabinets was a breeze—I used dish soap and a sponge in my bathtub, tackling stubborn grease with a splash of acetone.
The kit’s deglosser was next, and I’ll admit, I was nervous it wouldn’t prep the glossy wood properly. But it worked like a charm, dulling the shine without the mess of sanding. Painting was where the magic happened.
The bond coat went on smoothly, and though I noticed faint brush marks at first, they blended beautifully with a second coat. I opted for the decorative glaze to add a subtle, custom touch, wiping it gently for a soft, antiqued look.
The topcoat sealed everything, giving my cabinets a durable, semi-gloss finish that looked like it belonged in a showroom.
The transformation took a weekend, and the results were jaw-dropping. My kitchen went from drab to dazzling, and I spent under $150. The only hiccup? I wished I’d used a roller for the topcoat to avoid those initial brush marks.
But overall, this kit made me feel like a DIY pro, and my cabinets have been turning heads ever since.
The Good Stuff: Why I Love This Kit
Let’s start with what makes Rust-Oleum Cabinet Transformations a game-changer. First, the ease of use is unmatched. I’m no DIY guru, but the step-by-step instructions printed on every can and in the booklet were foolproof. From cleaning to topcoating, I felt guided every step of the way.
The no-prep promise is a big win—skipping sanding and priming saved me hours and kept my kitchen dust-free. The deglosser did its job, prepping my glossy cabinets without a hitch.
The finish is another major plus. The bond coat isn’t quite paint or stain; it’s a thin, smooth coating that lets the wood grain peek through, giving a natural yet polished look.
My pure white cabinets look bright and modern, and the glaze added a custom touch that makes them feel high-end. Durability is impressive too. After a year of daily use, my cabinets have held up to spills, splashes, and even my toddler’s sticky fingers with minimal wear.
The topcoat is tough, resisting scratches and stains better than I expected for a DIY product.
Cost is a huge selling point. For about $80-$125 (depending on kit size and extras like brushes), I transformed my kitchen for a fraction of what new cabinets or professional painting would cost. Compare that to $20,000 for a full cabinet replacement, and it’s a no-brainer.
Plus, the kit is efficient—I used less than a quart for my medium-sized kitchen, with some left over for touch-ups. The ability to tint the color to your liking is a bonus, letting you match your vision without hunting for the perfect shade.
Where It Falls Short: The Not-So-Perfect Parts
No product is flawless, and Rust-Oleum Cabinet Transformations has its quirks. Brush marks were my biggest gripe. Despite my best efforts, the bond coat showed faint strokes, especially on larger panels.
Switching to a high-quality foam roller for the topcoat helped, but it’s something to watch for. If you’re aiming for a flawless, factory-like finish, you’ll need patience and technique.
Color accuracy can be tricky. I chose pure white, but the tiny color swatches on the box didn’t fully capture the final look. In certain lights, it leaned slightly creamy, which wasn’t a dealbreaker but could frustrate perfectionists.
I’ve heard similar complaints about darker shades drying differently than expected, like black turning charcoal. My advice? Ask for a sample or test a small area first.
The topcoat can be finicky. It’s water-based, which is great for low odor, but it requires careful application to avoid streaks. I learned the hard way that thick coats lead to drips, so light, even layers are key.
Also, if you’re using a light color like white, some woods (like oak) can release tannins, causing yellowing over time. Rust-Oleum suggests an oil-based primer for these cases, but that adds a step they don’t advertise upfront.
Finally, while the kit is beginner-friendly, it’s not a quick project. Prepping, painting, and drying took me a full weekend, and that’s with no major hiccups. If you’ve got kids or a busy schedule, plan accordingly.
It’s a lot of work, but for the price and results, I found it worth every minute.
Keeping Your Cabinets Looking Like New
Once your cabinets are transformed, you’ll want to keep them pristine. I’ve learned a few tricks to maintain that fresh-from-the-store look, and I’m sharing them to save you headaches down the road.
- Regular Cleaning Is Your Friend
Your cabinets are going to face spills, grease, and fingerprints—especially in a busy kitchen. I clean mine weekly with a mild dish soap solution (a drop of soap in a cup of warm water) and a soft microfiber cloth.
Avoid abrasive sponges or harsh cleaners like bleach, which can dull the topcoat. For stubborn grease, a dab of vinegar works wonders. Dry immediately to prevent water spots, especially near the sink.
This routine keeps my cabinets sparkling and prevents grime buildup that could wear down the finish over time.
- Touching Up Nicks and Scratches
Life happens, and your cabinets might take a hit. I’ve had a few nicks from dropped pots, but touch-ups are easy with leftover bond coat. Lightly sand the damaged area with fine-grit sandpaper (220-grit works), clean it, and apply a thin layer of bond coat with a small brush.
If you used glaze, dab a bit on and wipe gently to match the surrounding area. Finish with a light topcoat layer. Store your leftover kit materials in a cool, dry place for quick fixes. This has saved my cabinets from looking worn, and the repairs blend seamlessly.
- Avoiding Common Pitfalls
Heat and humidity are your cabinets’ enemies. I learned this when steam from my kettle caused slight peeling near the stovetop. Keep appliances like kettles or toasters away from cabinets, and use exhaust fans when cooking to reduce moisture. If you live in a humid climate, consider a dehumidifier.
Also, avoid slamming doors or drawers—the topcoat is tough, but repeated impact can cause chips. I added soft-close hinges to my cabinets, which has been a game-changer. These small habits go a long way in preserving your hard work.
- Refreshing the Finish Over Time
After a few years, your cabinets might show signs of wear, especially in high-traffic areas. I plan to refresh mine by lightly sanding the topcoat and applying a new layer every 3-5 years. This keeps the finish glossy and protects the bond coat underneath.
If you want to change colors, you can paint over the existing finish with another Rust-Oleum kit—just degloss first. This flexibility means your cabinets can evolve with your style without starting from scratch.
Comparing Rust-Oleum To The Competition
When I was researching cabinet painting options, I looked at a few other brands to see how Rust-Oleum stacked up. I tried two others—Valspar and Nuvo—for my bathroom vanities before committing to Rust-Oleum for my kitchen. Here’s how they compare, based on my experience and research.
- Valspar Cabinet and Furniture Paint
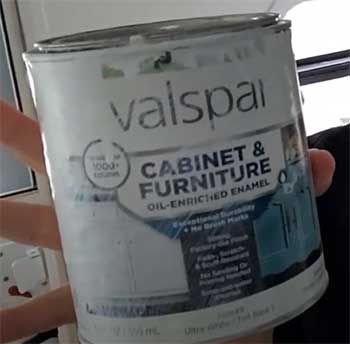
Valspar’s cabinet paint is a solid choice, especially if you’re after a bold, opaque finish.
I used it on a bathroom vanity, and the coverage was excellent—no wood grain showed through, which was great for a modern look.
It’s a traditional paint, so it requires sanding and priming, which added hours to my project.
The finish was durable, but I noticed chips after a year of heavy use. Valspar’s color range is vast, but you’re mixing or matching yourself, which can feel overwhelming.
It’s pricier than Rust-Oleum—about $40 per quart, plus primer—and the extra prep makes it less beginner-friendly. If you want a thick, painted look and don’t mind the grunt work, Valspar’s a contender, but I preferred Rust-Oleum’s simplicity.
- Nuvo Cabinet Paint
Nuvo was my favorite before Rust-Oleum stole the show. Their all-in-one kit, like Rust-Oleum’s, skips sanding and priming, which I loved for my second bathroom vanity. The paint is thicker, giving a smoother, more uniform finish with fewer brush marks.
However, the color options are limited—only pre-mixed shades, no tinting. I chose a soft gray, but it felt flat compared to Rust-Oleum’s glaze option. Nuvo’s topcoat is built into the paint, which simplifies the process but sacrifices customization.
At $70-$100 per kit, it’s comparable in price, but I found Rust-Oleum’s finish more durable and versatile. Nuvo’s great for a quick, no-fuss job, but Rust-Oleum edges it out for flexibility.
- Benjamin Moore Advance
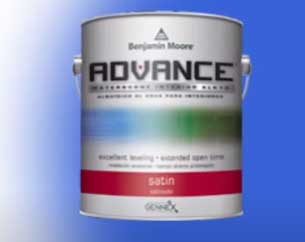
For a premium option, I looked into Benjamin Moore Advance, a high-end cabinet paint pros often recommend.
It delivers a flawless, furniture-like finish, but it comes with a steep learning curve.
Sanding and priming are non-negotiable, and the paint demands precise application to avoid streaks.
I didn’t use it myself (the $50-per-quart price tag scared me off), but friends who have swear by its durability.
The downside?
It’s not beginner-friendly, and you’ll need extra supplies, pushing costs well above Rust-Oleum’s. If you’re a seasoned DIYer with cash to spare, it’s worth considering, but Rust-Oleum’s kit is hard to beat for most homeowners.
Frequently Asked Questions (FAQ)
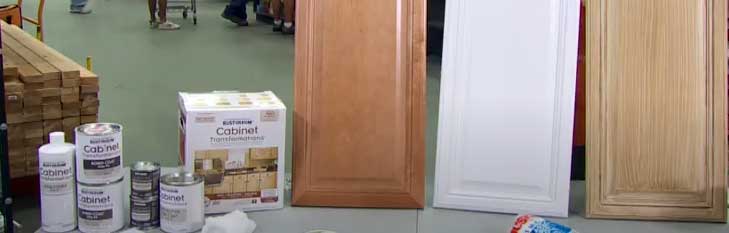
Rust-Oleum Cabinet Transformations is a multi-step kit that refinishes cabinets without sanding or priming. You start by cleaning and applying the deglosser to dull the existing finish. Next, you paint on the bond coat, which is tinted to your chosen color. An optional decorative glaze adds a custom, antiqued look. Finally, a protective topcoat seals the finish, making it durable and washable. The process is designed for beginners, with clear instructions, and works on wood, laminate, or melamine surfaces, delivering a professional look in a weekend.
Rust-Oleum Cabinet Transformations is a fantastic choice for DIY cabinet painting. It’s not traditional paint but a specialized coating that’s thin, smooth, and durable. It resists stains, scratches, and wear better than many standard paints, and the topcoat ensures long-lasting protection. While it may show brush marks if not applied carefully, its ease of use, affordability, and professional results make it a top pick for homeowners. Compared to pricier options like Benjamin Moore, it’s a budget-friendly alternative with solid performance.
Yes, you can use a roller with Rust-Oleum Cabinet Transformations, and I highly recommend it. A high-quality foam or microfiber mini-roller (4-6 inches) works best for the bond coat and topcoat, minimizing brush marks and ensuring a smooth finish. Use a brush for corners and tight spots, but roll larger panels for consistency. The kit doesn’t include a roller, so grab one separately. Rolling takes a bit of practice to avoid bubbles, but it’s worth it for a polished look.
Drying times for Rust-Oleum Cabinet Transformations vary#-Oleum vary by step. The deglosser dries in about 30 minutes. The bond coat needs 2-3 hours between coats (two are recommended). The decorative glaze, if used, dries in 2-4 hours. The topcoat requires 3-4 hours between coats (two are suggested) and fully cures in 24 hours. Total drying time depends on humidity and temperature—warmer, drier conditions speed things up. You can rehang cabinets after 24 hours, but avoid heavy use for 7 days to ensure the finish sets properly.
Wrapping Up: Your Kitchen Deserves This
If your cabinets are stuck in the past, Rust-Oleum Cabinet Transformations is your ticket to a modern, vibrant kitchen. I transformed my space in a weekend, and the results still blow me away. It’s affordable, easy, and delivers a finish that rivals pricier options.
Sure, it takes some elbow grease, but the payoff is worth it. Grab this kit, pick your dream color, and give your cabinets the glow-up they deserve. You’ll wonder why you waited so long.