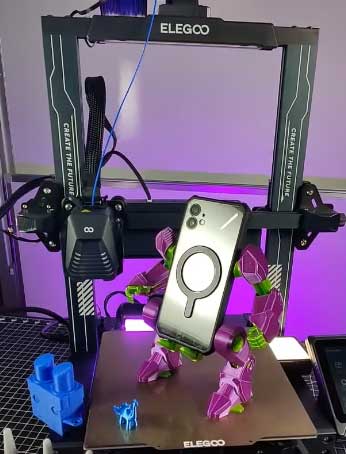
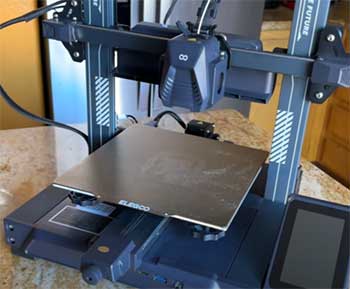
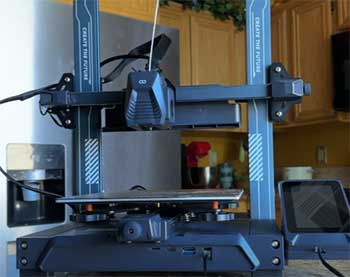
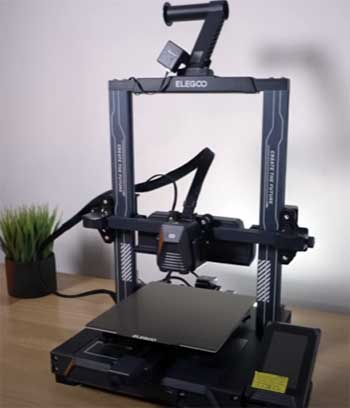
I’ve spent countless hours tinkering with 3D printers, from budget models to high-end beasts, and I’m thrilled to share my experience comparing the Elegoo Neptune 4 and Neptune 4 Pro.
My goal is to help you decide which of these fast, Klipper-powered machines is the best fit for your printing needs. In this article, I’ll break down their features, performance, and quirks in a conversational, user-focused way, to cover all bases. Let’s explore their pros, cons, and key differences to guide your choice.
A Brief Comparison Table
| Feature | Neptune 4 | Neptune 4 Pro |
| Price | $259 | $299 |
| Build Volume | 225 x 225 x 265 mm | 225 x 225 x 265 mm |
| Max Print Speed | 500 mm/s (recommended 250 mm/s) | 500 mm/s (recommended 250 mm/s) |
| Firmware | Klipper | Klipper |
| Extruder | Direct Drive, All-Metal Hotend | Direct Drive, All-Metal Hotend |
| Max Nozzle Temp | 300°C | 300°C |
| Max Bed Temp | 110°C | 110°C |
| Guide Rails | Plastic V-Wheels | All-Metal Linear Rails |
| Heated Bed | Single-Zone (250W) | Segmented (100W center, 250W full) |
| Cooling System | Four Additional Gantry Fans | Four Additional Gantry Fans |
| Auto Bed Leveling | 121-Point (11×11) | 121-Point (11×11) |
| Connectivity | USB, MicroSD, LAN (WiFi Optional) | USB, MicroSD, LAN (WiFi Optional) |
| Weight | ~8.3 kg | ~8.5 kg |
My Journey With 3D Printing
As a 3D printing enthusiast, I’ve gone from printing tiny Benchy boats to complex functional parts, and I’ve learned that choosing the right printer is crucial. The Elegoo Neptune 4 and 4 Pro caught my attention with their promise of blazing-fast speeds and Klipper firmware at a budget-friendly price.
Both printers are part of Elegoo’s 2023 lineup, designed to compete with models like the Anycubic Kobra 2 and Sovol SV07. But with only a $40 price difference, I wondered: is the Pro worth the extra cash? Let’s unpack their features and find out.
Key Features of The Neptune 4
The Neptune 4 is a game-changer for budget 3D printing. Here’s what I found impressive:

- Klipper Firmware: This open-source firmware allows input shaping and pressure advance, reducing vibrations and enabling print speeds up to 500 mm/s (though 250 mm/s is recommended for quality). It’s a massive leap from the Marlin firmware on older Neptune models.
- Direct Drive Extruder: The all-metal hotend, reaching 300°C, handles a wide range of filaments, from PLA to ABS and even nylon. The dual-gear system ensures precise filament control.
- Cooling System: Four gantry-mounted fans, plus traditional extruder fans, cool layers quickly, supporting high-speed printing without warping.
- Build Volume: At 225 x 225 x 265 mm, it’s spacious enough for most hobbyist projects, from cosplay props to functional parts.
- Auto Bed Leveling: The 121-point (11×11) system ensures a level bed, making setup a breeze for beginners.
- Connectivity: USB, MicroSD, and LAN options (with optional WiFi via a dongle) offer flexibility for file transfers.
During my tests, the Neptune 4 churned out a detailed PLA model in half the time of my older Ender 3, thanks to Klipper’s optimizations. The PEI-coated spring steel bed made print removal effortless, and the touchscreen interface was intuitive.
Key Features of The Neptune 4 Pro
The Neptune 4 Pro builds on the standard model with a few upgrades that caught my eye:

- All-Metal Linear Rails: Unlike the Neptune 4’s plastic V-wheels, the Pro uses metal guide rails with ball bearings on the X and Y axes, promising smoother motion and potentially less maintenance.
- Segmented Heated Bed: The bed has a 120 x 120 mm central zone (100W) and a full 250W mode, automatically adjusting based on print size to save energy.
- Same Core Features: It shares the Neptune 4’s Klipper firmware, direct drive extruder, 300°C nozzle, 500 mm/s max speed, and 121-point leveling system.
When I printed a PETG part on the Pro, the metal rails seemed to reduce wobble compared to the standard model, especially at higher speeds. The segmented bed was a nice touch for small prints, heating only the center and saving power.
Pros And Cons of The Neptune 4
Pros
- Affordable Price: At $259, it’s one of the cheapest Klipper-equipped printers, offering high-end features on a budget.
- Blazing Speed: The 500 mm/s max speed (250 mm/s recommended) is a game-changer for quick prototypes.
- Versatile Filament Support: The 300°C hotend handles PLA, PETG, ABS, TPU, and high-temp filaments like nylon.
- User-Friendly: Auto bed leveling and the PEI bed make it beginner-friendly, while Klipper appeals to tinkerers.
- Solid Community: Elegoo’s active Discord and Reddit communities (like r/ElegooNeptune3) offer tons of support.
Cons
- Plastic V-Wheels: These may wear faster than metal rails, requiring maintenance or upgrades for heavy use.
- Noise Level: The four gantry fans make it louder than older Neptune models, which could be an issue in quiet spaces.
- Klipper Learning Curve: While powerful, Klipper’s interface and network setup can be tricky for newbies.
- Firmware Stability: Some early users reported flaky firmware, though updates have improved reliability.
I noticed the V-wheels needed occasional cleaning to maintain smooth motion, and the fan noise was noticeable during long prints in my small apartment.
Pros And Cons of the Neptune 4 Pro
Pros

- Durable Rails: Metal linear rails should last longer and handle high-speed printing with less wear.
- Energy-Efficient Bed: The segmented heated bed saves power on small prints, a plus for eco-conscious users.
- Same Great Speed: Like the Neptune 4, it hits 500 mm/s max, with excellent quality at 250 mm/s.
- Wide Filament Compatibility: The all-metal hotend supports the same range of filaments as the Neptune 4.
- Beginner-Friendly Setup: The 121-point leveling and touchscreen make it accessible, despite advanced features.
Cons
- Higher Price: At $299, it’s $40 more than the Neptune 4, which may not justify the upgrades for casual users.
- Noisy Operation: The cooling fans are just as loud as the Neptune 4’s, if not more so.
- Rail Maintenance: Some users reported issues with metal rails disintegrating if not greased properly, which I experienced after overtightening during assembly.
- Firmware Quirks: Like the Neptune 4, early firmware had issues, and Klipper’s complexity remains a hurdle.
The Pro’s rails felt sturdier, but I had to learn to grease them properly after a print failed due to friction. The noise was a constant companion, especially at max speed.
Performance In Real-World Use
To get a feel for these printers, I ran identical tests: a 100 mm tall PLA vase, a PETG functional bracket, and an ABS prototype, all sliced with Elegoo Cura. The Neptune 4 completed the vase in 2 hours at 250 mm/s, with smooth surfaces and no stringing.
The Neptune 4 Pro shaved off a few minutes, thanks to slightly better motion stability from the metal rails, but the difference was subtle. Both struggled with ABS at 500 mm/s, showing layer adhesion issues, so I stuck to 150 mm/s for that material.
The Pro’s segmented bed was a standout for small prints. When printing a 50 mm wide PLA keychain, it heated only the center, using less power than the Neptune 4’s full bed. However, for large prints, both beds performed equally well, reaching 110°C for ABS adhesion.
Noise was a downside for both—my roommate complained about the “jet engine” sound during late-night sessions. If you’re in a shared space, consider a quieter model like the Neptune 3 Pro.
Build Quality And Assembly

Both printers arrived in compact boxes, with pre-assembled X, Y, and Z axes, making setup a 15-20 minute task.
The included tools (Allen keys, filament cutter, scraper) were handy, and the USB drive had demo models and Elegoo Cura.
The Neptune 4’s plastic V-wheels felt solid but less premium than the Pro’s metal rails.
I noticed the Pro’s frame was slightly heavier, adding stability during high-speed prints.
One hiccup: I overtightened the Pro’s Y-axis wheels, causing rail wear after a few hours, as noted in some Reddit threads.
Elegoo’s support advised greasing the rails, which fixed the issue, but it was a reminder to follow maintenance guidelines.
The Neptune 4’s V-wheels were more forgiving but required cleaning to avoid dust buildup.
Software And Connectivity
Both printers use Elegoo Cura, a tweaked version of UltiMaker Cura, which I found intuitive for slicing models. It supports profiles for both printers, letting me adjust speed, supports, and resolution easily.
I also tried OrcaSlicer, which some users recommend, but ran into issues with the Pro’s profile, causing a nozzle crash. Stick with Elegoo Cura for reliability.
The LAN connectivity was a highlight. I connected both printers to my network, accessing them via a browser to monitor prints remotely. WiFi requires a USB dongle, which I didn’t test, but USB and MicroSD worked flawlessly.
Klipper’s interface, accessed via the touchscreen or browser, took some getting used to, especially for tweaking settings like Z-offset. If you’re new to Klipper, expect a learning curve, but YouTube tutorials helped me navigate it.
Community Feedback And Reliability
Scouring Reddit (r/ElegooNeptune3, r/ElegooNeptune4) and Elegoo’s Discord, I found mixed sentiments. Many users love the Neptune 4’s value, with one calling it “a $300 printer that punches way above its weight.”
Others warned about the Pro’s MKS Klipper hardware, citing occasional MCU disconnects due to the RK3328 chip. My experience was mostly smooth, but I updated the firmware immediately to avoid early bugs.
Some Neptune 3 Pro owners felt burned by Elegoo’s rapid release cycle, arguing the Neptune 4 series is just a “Klipperized” version of the 3 Pro. I disagree—the speed, cooling, and hotend upgrades make it a distinct evolution.
Still, if you own a 3 Pro, you can mod it with a BTT Pad 7 and Klipper for similar performance, as one Redditor suggested.
Is the Neptune 4 Pro Worth the Extra $40?
Here’s where it gets tricky. The Neptune 4 is a steal at $259, offering nearly all the Pro’s features. The Pro’s metal rails and segmented bed are nice, but the rails require maintenance, and the bed’s energy savings are minor unless you print small parts often.
For beginners or budget-conscious hobbyists, the Neptune 4 is the better deal. If you plan to print heavily or value durability, the Pro’s rails might tip the scale.
I lean toward the Neptune 4 for most users. The $40 saved can buy a spool of PLA or PETG, and the V-wheels are fine for casual printing. However, if you’re building a print farm or prioritize long-term reliability, the Pro’s upgrades make sense.
Tips for Getting The Most Out of Your Neptune
Based on my experience, here are some tips:
- Update Firmware: Check Elegoo’s website for the latest firmware to avoid bugs.
- Grease Rails (Pro): Use 3D printer grease on the metal rails to prevent wear.
- Clean V-Wheels (Neptune 4): Dust can accumulate, so wipe them down regularly.
- Use Elegoo Cura: It’s optimized for these printers and reduces slicing errors.
- Join Communities: Reddit and Elegoo’s Discord are goldmines for troubleshooting and mods.
Frequently Asked Questions (FAQ)
The Neptune 4 Pro has all-metal linear rails instead of plastic V-wheels and a segmented heated bed for energy efficiency. The Neptune 4 is $40 cheaper but lacks these upgrades.
It can print up to 500 mm/s, but 250 mm/s is recommended for optimal quality.
Yes, the four gantry fans make it noisier than older Neptune models, especially at high speeds.
It supports PLA, PETG, ABS, TPU, and high-temperature filaments like nylon, thanks to its 300°C hotend.
Conclusion: Your Choice, Your Prints
You’re now armed with everything I’ve learned about the Elegoo Neptune 4 and 4 Pro. Both printers are fantastic for their price, delivering speed, versatility, and quality that rival pricier models.
If you’re on a tight budget or just starting, the Neptune 4 is your best bet—its performance is nearly identical to the Pro’s. If you want a slight edge in durability and efficiency, the Neptune 4 Pro is worth considering. Whichever you choose, you’ll be crafting amazing prints in no time.
Happy printing!

Perfect!
Just exactly what I was after.
Tks!
Pete S.