I’m not one to gush over products, but let me tell you, Minwax Stainable Wood Filler has earned its place on my workbench. Whether you’re patching up nail holes in your oak dining table or fixing a gouge in your pine deck, this stuff is a game-changer.
It’s versatile, reliable, and blends so well you’ll barely notice the repair. If you’re tackling woodworking projects, big or small, you need a filler that can keep up with your vision. Trust me, Minwax delivers.
Let’s explore why this product is worth your investment.
My Experience With Minwax Stainable Wood Filler
Last summer, I decided to refinish an old cedar chest I found at a flea market.
It was a beauty, but it had seen better days—nail holes peppered the lid, and there was a nasty crack along one side that screamed for attention.
I’d heard good things about Minwax Stainable Wood Filler, so I grabbed a tub from the hardware store and got to work.
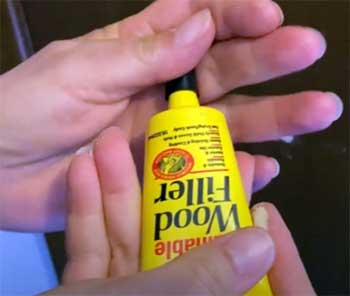
The first thing I noticed was the texture: it’s grainy, almost like wet sand, but not so dry that it crumbles.
It felt substantial, like it could hold its own against the wear and tear of time.
Applying it was a breeze. I scooped out a small amount with a putty knife, pressed it into the nail holes, and smoothed it over the crack. The filler didn’t slump or drip, which was a relief since I’m no pro at this.
I slightly overfilled the areas, as I’d read that it shrinks a bit when drying, and I wanted a flush finish after sanding. After about four hours, it was ready to sand down.
The sanding process was smooth—no clumping or flaking—and the repaired spots blended seamlessly with the cedar grain. When I applied a walnut stain, the filler took it surprisingly well, though it was a touch lighter than the surrounding wood.
A second coat of stain evened things out, and the chest looked like it had never been damaged.
What struck me most was how sturdy the repair felt. I could tap on the filled areas without that hollow, plasticky sound you sometimes get with cheaper fillers. I even drove a small screw into one of the repaired spots to test its strength, and it held firm—no cracking or crumbling.
This wasn’t just a cosmetic fix; it was built to last. That chest now sits proudly in my living room, and no one’s ever guessed it was a DIY rescue job.
Pros of Minwax Stainable Wood Filler
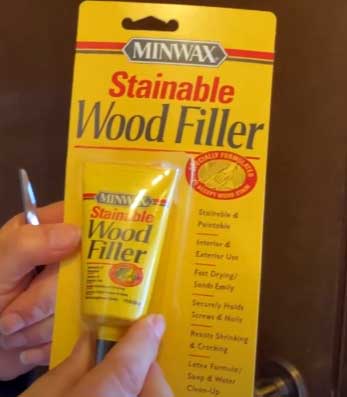
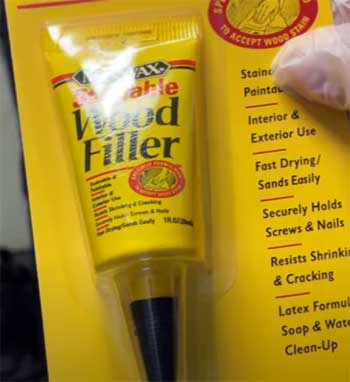
- Versatility for Indoor and Outdoor Use
One of the things I love about Minwax Stainable Wood Filler is how it doesn’t care where you use it.
Indoors on your oak coffee table?
No problem. Outdoors on your weathered deck? It’s got you covered.
This water-based formula, packed with real wood fibers, holds up against the elements, making it a go-to for projects in any environment.
I’ve used it on everything from furniture to exterior trim, and it never feels out of place.
- Stainability That Actually Works
Let’s talk about staining, because this is where Minwax shines. Unlike some fillers that claim to be stainable but leave you with blotchy, mismatched patches, this one takes both oil-based and water-based stains like a champ.
In my cedar chest project, the filler absorbed the walnut stain almost as well as the surrounding wood. Sure, it wasn’t a perfect match on the first coat, but a little extra stain and some patience got me there. If you’re aiming for a seamless finish, this filler makes it possible.
- Ease of Application
I’m no woodworking guru, so I appreciate products that don’t make me feel like I need a PhD to use them. Minwax’s grainy consistency is forgiving—it’s easy to scoop, spread, and shape with a putty knife.
It doesn’t ooze everywhere or dry too fast, giving you time to get it right. For someone like me, who’s more enthusiastic than expert, that’s a huge win.
- Durability and Strength
This filler isn’t just about looking good; it’s tough. Once it dries, it’s rock-solid, capable of holding screws and nails without cracking. I was skeptical at first, but after driving a screw into a filled spot on my cedar chest, I was sold.
The repair felt as sturdy as the original wood, which is more than I can say for some other fillers I’ve tried that crumbled under pressure.
- Minimal Shrinkage
Nothing’s worse than filling a hole, sanding it smooth, and then finding a divot because the filler shrank.
Minwax keeps shrinkage to a minimum, which means less rework. I learned to overfill slightly, as it does settle a bit, but it’s nowhere near the crater-like shrinkage I’ve seen with other products. This reliability saves time and frustration.
Cons of Minwax Stainable Wood Filler
- Gritty Texture Can Be Tricky for Small Pores
While I love the grainy texture for most jobs, it’s not perfect for everything.
The larger wood fibers in Minwax can make it tough to fill tiny pores or hairline cracks.
When I tried using it on a piece of maple with fine grain, it felt like overkill—the filler didn’t settle into the smallest imperfections as smoothly as I’d hoped.
For those delicate jobs, you might need something finer.
- Longer Drying Time for Deep Repairs
If you’re filling deeper holes, like those left by screws or carpenter bees, be prepared to wait. Minwax can take up to six hours to fully cure in thicker applications, which can slow down your project.
For my cedar chest, the shallow nail holes were ready in a couple of hours, but the deeper crack took closer to five. If you’re in a rush, this might test your patience.
- Risk of Overspreading
Here’s where I learned a lesson the hard way. If you’re not careful, it’s easy to spread Minwax beyond the repair area, and that can mess with your stain.
On my cedar chest, I got sloppy and smeared some filler onto the surrounding wood. When I stained, those spots came out lighter, and no amount of sanding fully fixed it. You’ve got to be precise to avoid this headache.
- Potential for Drying Out in the Container
I’ve noticed that Minwax can start to dry out in the tub if you don’t seal it tightly after every use.
The first time I opened a new container, some edges already seemed a bit hard, which made me worry about its shelf life. If you’re not using it regularly, store it carefully to keep it workable.
Maintenance Tips For Minwax Stainable Wood Filler
- Proper Surface Preparation
Before you even open the tub, make sure your wood is ready. I’ve found that cleaning the surface with a damp cloth to remove dust, grease, or old paint makes a huge difference.
For rotted wood, I use a wood hardener first to stabilize the fibers—it’s a tip I picked up from Minwax’s own instructions, and it really helps the filler bond better. A clean, dry surface ensures your repair sticks and lasts.
- Apply in Thin Layers for Deep Holes
When tackling larger holes, don’t just glob on the filler and hope for the best. I made this mistake once and ended up with a lumpy mess. Instead, apply Minwax in thin, 1/8-inch layers, letting each one dry before adding more.
This takes longer but prevents cracking and ensures a solid fill. For my cedar chest crack, I built up three thin layers, and the result was flawless.
- Sand Carefully for a Smooth Finish
Sanding is where the magic happens, but it’s also where you can mess things up. I start with 120-grit sandpaper to smooth the filler, then move to 220-grit for a polished finish.
Be gentle around the edges to avoid digging into the surrounding wood, which can create uneven stains. A sanding block helps keep things even, especially on flat surfaces.
- Test Your Stain First
Staining over Minwax isn’t a set-it-and-forget-it deal. I always test the stain on a scrap piece with some filler applied to see how it takes. Different woods and stains interact differently with the filler, so this step saves you from surprises.
For my cedar chest, I tested a small patch first, which helped me decide to go with a second coat for a better match.
- Seal Outdoor Repairs
If you’re using Minwax outside, don’t skip the sealant. I learned this after a deck repair started to wear down after a rainy season. A good exterior-grade sealant or paint over the filled area protects it from moisture and UV damage.
Apply it after the filler is fully cured and sanded for maximum durability.
- Store Properly to Extend Shelf Life
To keep your Minwax from turning into a brick in the tub, seal it tightly after every use. I wrap the lid in plastic wrap before closing it to create an extra barrier against air.
Store it in a cool, dry place, and if it starts to feel dry, a tiny bit of water can sometimes revive it, but don’t overdo it.
Comparison of Minwax Stainable Wood Filler With Other Brands
- Gorilla Wood Filler

Gorilla Wood Filler is a close contender, and I’ve used it on a few projects, like patching a chipped doorframe.
Its thick, sandy texture is similar to Minwax, but it’s a bit denser, which makes it great for larger holes.
It applies smoothly and doesn’t require a second coat for nail holes, which is a time-saver.
However, its darker, almost greenish undertone can throw off your stain color, especially on lighter woods like pine.
I found it harder to get a perfect stain match compared to Minwax, and it dries out faster in the container if you’re not careful.
Gorilla’s adhesion is top-notch, though, and it sands as easily as Minwax, making it a solid choice for heavy-duty repairs where appearance isn’t the top priority.
- DAP Plastic Wood Filler
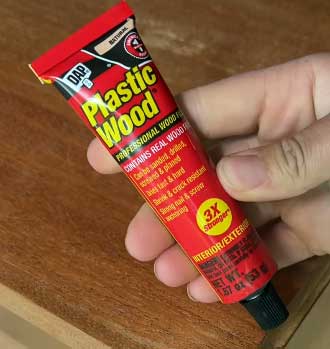
DAP Plastic Wood Filler has a loyal following, and I gave it a whirl when fixing some scratches on a pine bookshelf.
Its putty-like consistency is a dream for small holes—it spreads easily and sands to a glassy finish.
However, I noticed a strong chemical smell when I opened the tub, which lingered longer than I’d like, making it less ideal for indoor work unless you’ve got good ventilation.
DAP’s stainability is decent, especially on pine, but it can look more like filler than wood in joints, which bugged me on a visible project.
It also takes longer to dry than Minwax for deeper repairs, and I’ve had issues with slight shrinkage, which meant extra sanding and filling.
- Bondo Wood Filler
Bondo Wood Filler is a beast for big repairs, and I used it once to patch a rotted porch post.
Its two-part formula hardens fast—sometimes too fast if you’re not quick with your putty knife.
It’s incredibly durable, almost like cement, but that comes at a cost.
The smell is downright noxious, and I wouldn’t dream of using it indoors without a mask and open windows.
Staining Bondo is a gamble; it often ends up a weird, off-color shade that doesn’t blend well with the surrounding wood.
Sanding is also a chore because it dries so hard. If you’re painting over it, Bondo’s a great pick, but for stain-grade work, it falls short of Minwax’s versatility.
Frequently Asked Questions (FAQ)
Picking the best stainable wood filler depends on your project, but I’d give the crown to Minwax Stainable Wood Filler for most jobs. Its ability to take both oil- and water-based stains, combined with its durability and ease of use, makes it a standout. It blends well with most woods, especially oak, and holds up indoors and out. Gorilla and DAP are solid alternatives for specific needs, but Minwax’s balance of stainability, strength, and versatility makes it my go-to.
Drying time for Minwax Stainable Wood Filler varies by depth. For shallow repairs like nail holes, it’s usually ready to sand in 2-4 hours. Deeper fills, like cracks or screw holes, can take up to 6 hours to fully cure. I’ve found that temperature and humidity play a role—warmer, drier conditions speed things up. Always check by touching the surface; it should feel hard and not tacky before sanding.
Yes, you can screw into Minwax Stainable Wood Filler once it’s fully cured. I tested this on my cedar chest, and the filler held a small screw without cracking or crumbling. It’s sturdy enough for light-duty applications, like securing small hardware, but for heavy structural repairs, you might want to consider an epoxy-based filler for extra strength.
Absolutely, Minwax Stainable Wood Filler is paintable. After sanding it smooth, I’ve painted over it with both latex and oil-based paints, and it holds up beautifully. Just make sure it’s fully cured and sanded to avoid any texture issues. For best results, apply a primer first to ensure even paint adhesion, especially on larger repairs.
Why Minwax Stainable Wood Filler Is A Must-Have?
After countless projects, I can confidently say Minwax Stainable Wood Filler is a staple you shouldn’t skip. Its ability to blend with stains, hold up under pressure, and work in any environment makes it a lifesaver for DIYers and pros alike.
Whether you’re reviving a family heirloom or patching up outdoor furniture, this filler delivers results that look and feel professional. Grab a tub, and you’ll wonder how you ever tackled woodworking without it.