If your bathtub or tiles look worn out and you’re avoiding a full replacement that costs thousands, you should grab Homax Tough as Tile right now.
I used it myself, and it turned my dingy old bathroom into something fresh and modern without breaking the bank.
It’s affordable, straightforward to apply if you follow the steps, and gives you that glossy, like-new finish you crave. Trust me, you’ll thank yourself when you see the results.
My Hands-On Experience With Homax Tough as Tile
Let me take you back to when I first decided to tackle my bathroom renovation.
My house is from the 1980s, and the bathtub had seen better days—yellowed stains, small chips, and that overall tired look that made the whole room feel outdated.
I didn’t have the budget for a professional reglaze or a new tub install, so I started researching DIY options.
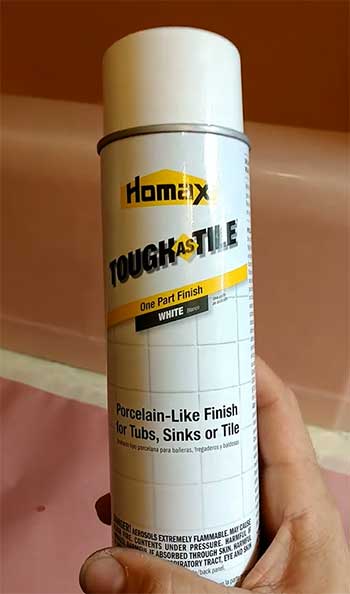
Homax Tough as Tile kept popping up as a solid choice, especially the brush-on version.
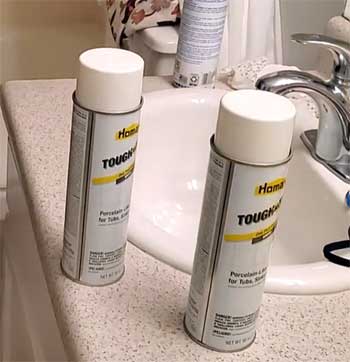
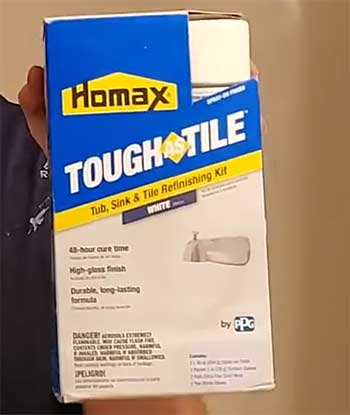
I went with the 26-ounce kit in white, which comes with everything you need: the finish, cleaner, steel wool, gloves, and even a roller. The first step was preparation, and I won’t sugarcoat it—this part took time.
I scrubbed the tub thoroughly with the included cleaner, then used the steel wool to scuff up the surface for better adhesion. You have to make sure every bit of soap scum, old caulk, or residue is gone, or the finish won’t stick properly.
I spent a good afternoon on this, masking off the fixtures and ventilating the room because the fumes are no joke.
Application day was exciting. Since it’s a one-part formula, no mixing required, which I appreciated right away. I used the recommended roller for even coverage, starting with thin coats. The finish is thick, almost like a heavy paint, and it self-levels pretty well as it dries.
I did two coats, waiting about three hours between them as instructed. Watching it transform the tub from dull to shiny was satisfying—you could see the gloss building up.
The cure time is where patience comes in. I waited the full 72 hours before light use, and honestly, a week before showering normally. The smell lingered for a couple days even with fans running, but it dissipated.
Now, months later, my tub still looks bright and clean. It feels smooth underfoot, and daily use hasn’t worn it down. I catch myself admiring it every time I step in for a shower. Sure, there were moments of doubt during application, like when I worried about brush marks, but they smoothed out.
Overall, this product gave me professional-looking results on a DIY budget, and I feel proud every time someone compliments the bathroom.
The Pros That Make Homax Tough as Tile Stand Out
- Affordable Transformation Without Major Disruption
You can’t beat the price point here.
A full tub replacement or professional refinishing easily hits $500 to thousands, not counting the chaos of ripping out fixtures.
With Homax, I spent less than $100 on the brush-on kit, and it covered my standard bathtub with some leftover.
That savings let me splurge on new shower curtains, mats, and even a fresh faucet.
If you’re renting or flipping a house, this is a game-changer—you get that crisp, white porcelain vibe without committing to permanent changes.
Many users I’ve seen online echo this: it’s a budget-friendly way to hide years of stains, minor chips, and yellowing, making your bathroom feel instantly upgraded.
- Ease of Use for Beginners Like Me
What sold me initially was the one-part formula—no mixing two components like some competitors, which means no rushing against a short pot life. You just stir, pour into a tray, and roll or brush on.
The kit comes complete with cleaner, steel wool, gloves, and even a roller suggestion, so you’re not running back to the store.
I found the brush-on version forgiving; it’s thick enough to cover imperfections but flows to self-level as it settles. Thin coats are key, and once I got the rhythm, it went smoothly. Compared to spray versions that clog or overspray everywhere, this felt controlled.
If you’re new to DIY like I was, you’ll appreciate how approachable it is—no special skills needed beyond patience.
- Durable Glossy Finish That Brightens the Room
The high-gloss shine is what hooks you. My tub went from dull and dingy to reflecting light like new ceramic, making the whole bathroom feel bigger and cleaner. It resists water beading well, and in daily use—showers, baths for the kids—it’s held up without fading or staining easily.
The epoxy base creates a hard shell once fully cured, and I’ve dropped bottles without chipping so far. Some reviewers report it lasting 3-5 years in moderate-use bathrooms, which matches my experience months in.
You get that professional porcelain look that hides old wear beautifully, and the white color brightens everything.
- Quick Project Timeline Compared to Alternatives
I knocked out the application in a single day after prep, with coats spaced a few hours apart. Total downtime was about a weekend plus the 72-hour cure—way faster than waiting for contractors or dealing with demolition dust.
No need to shut down the bathroom for weeks. For busy folks, you can plan around it: prep one evening, apply the next day, and be back to normal soon after. It’s satisfying to see quick progress, and that motivates you through the waiting.
- Good Coverage and Versatility on Various Surfaces
This stuff adheres well to porcelain, fiberglass, and ceramic if prepped right. It covered my old stains and small scratches completely in two coats. I’ve seen it used successfully on sinks and tiles too, giving consistent results across bathroom fixtures. The opacity is strong, even over darker bases with enough layers.
The Cons of Homax Tough as Tile
- Strong Odors During Application and Cure
I’ll be upfront—the fumes are intense. It’s an epoxy finish, so expect chemical smells that can give you a headache if you’re not careful. I had fans blasting and windows wide open, but it still lingered for days.
If you have sensitivities, pets, or kids around, plan to vacate or use a high-quality respirator. Many reviews mention this as the biggest downside; the odor hangs around even after drying, so ventilation is non-negotiable.
- Preparation Is Critical and Time-Consuming
This isn’t a slap-it-on-and-go product. Prep took me longer than application: deep cleaning, removing caulk, scuffing with steel wool, and masking everything. Skip any step, and you’ll risk peeling or poor adhesion—I read tons of stories where rushed jobs failed within months.
Old soap scum or residue fights back, so you might scrub multiple times. It’s labor-intensive, and if your surface has deep damage, it might not hide everything perfectly.
- Potential for Uneven Results If Not Careful
The finish is thick, which is great for coverage but tricky to apply evenly. Too heavy a coat, and it sags or runs; too light, and you get streaks. Roller marks can show if you’re not using the right nap or technique.
Some users complain it dries rough like sandpaper if overworked, though mine smoothed out. The spray version gets slammed for clogs, overspray ruining rooms, and powdery/runny inconsistency—stick to brush-on if possible.
Results vary by skill level; pros get flawless, but DIYers sometimes end up with visible imperfections.
- Longevity Varies Based on Use and Prep
While mine is holding strong, it’s not invincible like factory glazing. Heavy daily use, abrasive cleaners, or impacts can cause chips or wear in 1-3 years for some. Reviews are split: great for low-traffic sinks, but tubs see peeling around drains or edges sooner if water pools.
It’s more a temporary refresh than permanent—expect 3-5 years max with care, less if conditions aren’t ideal. Hard water or harsh scrubbing accelerates breakdown.
- Long Cure Time and Initial Softness
You must wait the full 72 hours (or more) before water exposure, and it feels tacky longer in humid areas. Rushing this leads to soft spots that scratch easily. The wait tests your patience, especially with only one bathroom.
These drawbacks don’t outweigh the benefits for me, but know them going in—you’ll set realistic expectations and avoid common pitfalls others face.
Tips To Keep Your Refinished Surfaces Looking New With Homax Tough as Tile
- Daily Cleaning Routines That Preserve the Shine: You want to treat the surface gently to maximize its life. I use soft sponges and mild dish soap for everyday wipes. Avoid abrasive pads—they scratch the gloss over time. After showers, I squeegee or towel-dry to prevent water spots and mineral buildup. This simple habit keeps it sparkling without effort.
- Choosing the Right Cleaners for Long-Term Protection: Stick to non-abrasive, pH-neutral cleaners. I love a mix of vinegar and water for tougher spots, but dilute it well. Never use bleach, ammonia, or anything with grit—it etches the finish. For soap scum, a gentle bathroom spray works wonders. I’ve tried baking soda pastes occasionally, applied softly, and they lift grime without damage.
- Avoiding Common Habits That Cause Premature Wear: No suction-cup mats—they pull at the finish when removed. I switched to non-slip strips instead. Also, avoid placing heavy objects or dropping shampoo bottles directly; the impact can chip. If you have kids or pets, teach them to be careful around the tub edges.
- Periodic Inspections and Touch-Ups: Every few months, I check for wear spots or small chips. If I spot one early, a tiny dab of matching epoxy touch-up seals it before it spreads. Full cure means it’s resistant, but proactive care extends that 3-5 year lifespan I’ve seen in my own setup.
- Environmental Factors That Influence Durability: Humidity and steam are constant in bathrooms, so good ventilation helps. I run the exhaust fan during and after showers to reduce moisture buildup. In hard-water areas like mine, a water softener or regular descaling prevents mineral deposits that dull the surface.
These habits have kept my refinished tub looking fresh far longer than I expected. You put in the work upfront, so consistent care pays off big.
Comparing Homax Tough as Tile To Other Brands
- How Homax Stacks Up Against Rust-Oleum Tub and Tile Kit
Rust-Oleum’s two-part epoxy requires mixing, which adds complexity but creates a harder finish in theory. Many users report it lasts longer—up to 5-7 years in ideal conditions—versus Homax’s typical 3-5. However, the mixing pot life stresses you out; if you don’t apply fast, it hardens in the tray.
Fumes are intense for both, but Rust-Oleum’s seem stronger to some. I chose Homax for its no-mix simplicity, and while Rust-Oleum might edge out on durability, Homax wins for ease and fewer application headaches.
- Why I Preferred Homax Over Ekopel Pour-On Refinishing
Ekopel stands out as odorless and thick— you pour it and it levels perfectly, creating a deep coat that’s reportedly chip-resistant for 10 years. It’s pricier and messier to apply since it floods the surface. Homax costs less and brushes on controllably, which suited my smaller tub.
If you hate smells and want maximum thickness, Ekopel shines, but for budget-conscious folks like me who want good-enough longevity, Homax delivers without the premium price.
- Homax Versus Bathworks and Similar Roll-On Options
Bathworks offers another epoxy kit, often praised for smooth application and adhesion. It’s similar to Homax in brush-on style but sometimes includes better prep tools. Users say Bathworks resists yellowing better over time.
Still, Homax’s one-part formula feels more user-friendly, and availability at local stores tipped the scale for me. Both give glossy results, but Homax’s self-leveling saved me from visible strokes.
Frequently Asked Questions (FAQ)
Yes, it’s a one-part epoxy-based finish designed for durability.
Typically 3-5 years with proper application and gentle care.
It’s a high-gloss, one-part epoxy acrylic coating.
DIY versions like this last 3-10 years depending on product and maintenance; professional jobs often longer.
Final Thoughts
Magic focuses more on chip repair than full resurfacing, though they have kits. It’s great for spot fixes but lacks the full coverage depth of Homax for entire tubs. Homax provides broader transformation, while Magic suits minor touch-ups.
If your damage is localized, Magic saves money; for a complete overhaul like mine, Homax covers more ground effectively.
Overall, Homax balances cost, ease, and results better than many competitors for everyday DIYers.