I’m always on the lookout for products that make my woodworking projects easier, and DAP Plastic Wood Filler has become a staple in my toolkit.
Whether you’re patching up a scratched table, filling nail holes in trim, or restoring an old deck, this stuff gets the job done with minimal fuss.
It’s versatile, easy to use, and delivers a finish that blends seamlessly with your wood surfaces. If you’re tackling any wood repair, trust me—you’ll want this filler in your arsenal. It’s a game-changer for DIYers and pros alike, saving time and delivering results.
My Experience With DAP Plastic Wood Filler
Let me take you back to last summer when I decided to restore an old oak dining table that had seen better days.
It was a family heirloom, but years of use had left it with scratches, dents, and a few nail holes from some ill-advised DIY attempts by my uncle.
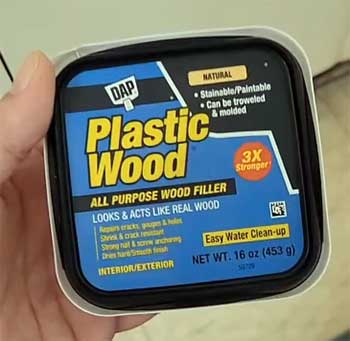
I needed something reliable to bring it back to life, and that’s when I grabbed a tub of DAP Plastic Wood Filler.
Opening the container, I was hit with a slight chemical whiff—not overwhelming, but enough to remind me to work in a well-ventilated garage.
The pink, putty-like consistency intrigued me right away. It’s designed to change color as it dries, which I found oddly satisfying, like watching a magic trick unfold.
Applying it was a breeze. I used a putty knife to scoop out a small amount and pressed it into the scratches and holes. The texture was smooth but thick, almost like pancake batter, making it easy to spread without dripping everywhere.
I filled a deep gouge on the table’s edge and some smaller nail holes on the surface, and the filler stayed put, even on vertical surfaces. After about an hour, it was dry enough to sand, though deeper repairs took closer to four hours.
Sanding was straightforward—the filler smoothed out nicely without crumbling or leaving dimples. When I stained the table, the filled areas blended decently with the oak, though I noticed the color wasn’t a perfect match unless I applied a pre-stain conditioner first.
Painting over another test patch was even better; the surface took the paint like a dream, leaving no trace of the repair.
What stood out most was how user-friendly this product is. I didn’t need to be a master carpenter to get professional-looking results. The table now sits proudly in my dining room, and no one can tell where the repairs were made.
That said, the smell lingered a bit longer than I’d hoped, and I learned the hard way to seal the container tightly after use to prevent it drying out. Overall, my experience with DAP Plastic Wood Filler was a win, and it’s earned a permanent spot on my workbench.
Pros of DAP Plastic Wood Filler
- Versatility Across Projects
One thing I love about DAP Plastic Wood Filler is how it handles a variety of repairs.
I’ve used it on everything from furniture to trim to outdoor decking, and it performs consistently.
It’s labeled for both interior and exterior use, which means you don’t need to buy separate products for different jobs.
Whether you’re filling cracks in a coffee table or patching up weathered porch railings, this filler adapts to the task.
It’s water-resistant once cured, so it holds up against rain and humidity, making it a solid choice for outdoor projects.
- Easy Application
You don’t need to be a pro to use this stuff. The putty-like consistency makes it simple to scoop and spread with a putty knife or even your fingers for smaller jobs. It clings well to wood surfaces, so you’re not fighting drips or slumps, even when working on vertical repairs.
I found it particularly handy for filling multiple small nail holes in a row—think baseboards or cabinetry—without needing to mix or fuss with complicated instructions. Just open, apply, and you’re good to go.
- Paintable and Stainable Finish
Here’s where DAP shines: it’s both paintable and stainable, giving you flexibility in finishing. When I painted over it on a test board, the surface was smooth and took the paint evenly, no priming needed.
Staining is trickier—it’s not perfect right out of the tub, but with a pre-stain conditioner, I got a finish that blended well with pine and oak. The color-changing formula (pink to natural) helps you know when it’s ready for sanding, which takes the guesswork out of the process.
- Quick Drying for Small Repairs
For small jobs like nail holes or shallow scratches, this filler dries fast—often in under an hour. This means you can move on to sanding and finishing without waiting all day.
Even for deeper repairs, it’s usually ready in a few hours, which is a lifesaver when you’re on a tight schedule. I’ve had projects where I could sand and paint in the same afternoon, which isn’t always the case with other fillers.
- Minimal Shrinkage
Nothing’s worse than applying filler only to find it’s shrunk and cracked after drying. DAP Plastic Wood Filler holds its shape well, especially for smaller repairs.
I noticed no significant shrinkage in the nail holes or shallow dents I filled, which meant I rarely had to go back for a second coat. This saves time and material, making your projects more efficient.
Cons of DAP Plastic Wood Filler
- Noticeable Odor
Let’s be real—the smell is a downside.
When I opened the tub, the chemical scent hit me, and while it’s not as bad as some other products I’ve used, it’s noticeable.
If you’re working indoors, you’ll want good ventilation, maybe even a fan.
The odor lingers a bit during application but fades once the filler dries.
Still, if you’re sensitive to smells, this might bug you.
- Not Ideal for Large Repairs
For big, deep holes—like those left by carpenter bees or rotted wood—DAP isn’t my first choice. It takes a long time to dry in thick applications, sometimes collapsing in the middle, which leaves an uneven surface.
I tried using it for a large gouge on an outdoor stair once, and it required multiple layers to get it right, which was a hassle. For those jobs, you might need something heavier-duty.
- Staining Challenges
While it’s marketed as stainable, don’t expect miracles. The filler doesn’t absorb stain the same way wood does, so you’ll often get a slightly different shade.
I found that mixing a bit of stain into the filler before applying or using a gel stain over it helped, but it’s an extra step. If a perfect color match is critical, you’ll need to experiment or consider another product.
- Can Dry Out in Container
If you don’t seal the tub tightly, this stuff dries out faster than you’d like. I learned this after leaving the lid slightly ajar overnight—half the tub was hard as a rock by morning.
It’s not a dealbreaker, but it means you have to be diligent about storage, especially if you’re only using small amounts at a time.
Maintenance Tips For DAP Plastic Wood Filler
- Proper Storage to Prevent Drying
To keep your DAP Plastic Wood Filler fresh, always seal the container tightly after use. I press the lid down firmly and store it in a cool, dry place, like a garage shelf away from heat sources.
If you’re working on a multi-day project, consider transferring a small amount to a separate container to avoid exposing the whole tub to air. A quick tip: place a piece of plastic wrap over the tub before closing the lid to create an extra barrier against drying.
- Surface Preparation for Best Results
Before applying the filler, make sure your wood surface is clean and dry. I always wipe down the area with a damp cloth to remove dust and debris, then let it dry completely. If there’s loose or rotted wood, scrape it out first—DAP won’t bond well to unstable surfaces.
For stained projects, apply a wood conditioner to the surrounding wood to help the filler blend better when you stain. This extra step makes a big difference in the final look.
- Application Techniques for Smooth Finishes
When applying, use a putty knife for larger areas and your fingers for tiny holes. I like to press the filler firmly into the repair to ensure it adheres, then smooth the surface to minimize sanding later.
For deep repairs, apply in thin layers, letting each dry fully before adding more. This prevents cracking and ensures a solid fill. If you’re working on vertical surfaces, don’t overapply—the thick consistency holds well, but too much can sag.
- Sanding and Finishing for a Seamless Look
Once the filler is dry (check the color change from pink to natural), sand it with medium-grit sandpaper (120-150 grit) for initial shaping, then switch to fine-grit (220) for a smooth finish. I sand in the direction of the wood grain to avoid scratches.
If you’re staining, test the stain on a small filled area first to check color matching. For painting, a quick coat of primer can help the paint adhere even better, though DAP usually takes paint well on its own.
- Protecting Outdoor Repairs
For exterior projects, like decks or railings, seal the filled area with an exterior-grade sealant or paint after it’s fully cured. This protects the filler from moisture and UV damage, extending its lifespan.
I’ve found that a good polyurethane or exterior latex paint works well. Reapply sealant every couple of years, depending on weather exposure, to keep the repair looking fresh and intact.
Comparison of DAP Plastic Wood Filler With Other Fillers
- Gorilla Wood Filler

Gorilla Wood Filler caught my attention with its thick, sandy texture, which feels denser than DAP’s putty-like consistency.
It’s a dream to apply, especially for larger holes, as it packs in easily without slumping.
I used it to fill screw holes in a cedar fence, and it didn’t need a second coat, unlike DAP in some deeper applications.
It dries fast—often in 15-30 minutes for small repairs—and sands smoothly, though it requires a bit more elbow grease than DAP.
The downside?
Its darker, slightly green undertone can make staining tricky, often resulting in a less warm finish than the surrounding wood. It’s also pricier, and the tub dries out quickly if not sealed properly. While Gorilla excels for outdoor durability and ease of use, its staining performance lags behind DAP, especially on lighter woods like pine.
- Bondo Wood Filler
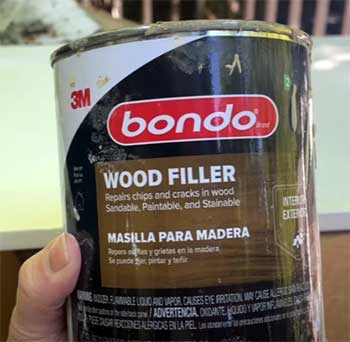
Bondo Wood Filler is a beast for heavy-duty repairs, but it’s not my go-to for every project.
Its two-part formula—mixing a hardener with the base—creates a rock-hard finish that’s ideal for large gaps or rotted wood, like on exterior stairs I repaired last year.
It dries in as little as 15 minutes, which is great for quick jobs, but the trade-off is a strong, lingering smell that demands serious ventilation.
I found it harder to sand than DAP, and it left a residue that required extra cleanup.
Staining is a gamble; Bondo often takes on a strange hue that doesn’t match the wood, though it paints beautifully. For small indoor repairs, like nail holes, it’s overkill and messy compared to DAP’s simplicity.
- Minwax Stainable Wood Filler
Minwax Stainable Wood Filler is a strong contender, especially for staining projects.
Its mud-like consistency is smoother than DAP’s, making it a breeze to spread over small cracks or nail holes.
I used it on an oak bookshelf, and it blended almost perfectly with the wood after staining, outperforming DAP in color matching.
It dries in under an hour for small repairs, with minimal shrinkage, and holds screws well for structural fixes.
However, it’s grainier than DAP, which can make it less ideal for tiny pores or super-smooth finishes. It also takes longer to dry for deeper repairs—up to six hours—compared to DAP’s four. While Minwax is my pick for stained furniture, DAP’s versatility and paintability give it an edge for mixed projects.
Frequently Asked Questions (FAQ)
Once applied and properly sealed, DAP Plastic Wood Filler can last for years. I’ve got repairs on my deck that have held up through three winters without cracking or peeling, thanks to a good coat of exterior paint. Indoors, it’s even more durable, with no signs of wear on my dining table after two years. The key is proper application—clean surfaces, thin layers for deep fills, and a sealant for outdoor use. If stored correctly, an unopened tub can last for a couple of years, but once opened, use it within a few months to avoid drying out.
In my experience, DAP Plastic Wood Filler rarely cracks when used for small to medium repairs, like nail holes or shallow scratches. Its minimal shrinkage helps it stay intact. However, for large, deep fills, I’ve seen it collapse or crack if applied too thickly in one go. To avoid this, I apply it in thin layers, letting each dry fully. Using it on flexible or moving wood, like outdoor joints, can also lead to cracking unless sealed properly. Follow the application tips, and you’ll keep cracking to a minimum.
DAP Plastic Wood is sturdy enough for most cosmetic repairs—think nail holes, scratches, or small gouges. It bonds well to wood and can be sanded, drilled, or painted over without issue. I’ve used it on furniture that gets daily use, and the repairs hold up fine. However, it’s not structural; don’t expect it to hold screws or support heavy loads like an epoxy would. For larger or high-stress repairs, it’s less durable than something like Bondo. For everyday fixes, though, its strength is more than adequate.
Absolutely, DAP Plastic Wood is a solid choice for most wood repairs. Its ease of use, quick drying time, and versatility make it a go-to for DIYers like me. It’s great for small to medium repairs, paints beautifully, and stains decently with some prep. While it’s not perfect for large holes or exact stain matching, it’s reliable and affordable. Compared to pricier options, it strikes a great balance of performance and value, making it a staple for anyone tackling wood projects.
Why DAP Plastic Wood Filler Stands Out?
After countless projects, DAP Plastic Wood Filler remains my trusty sidekick for wood repairs. Its ease of use, versatility, and solid performance make it a must-have for anyone looking to restore furniture, fix trim, or spruce up outdoor woodwork.
Sure, it has quirks—like the smell and staining challenges—but with a few tricks, it delivers results that look professional without breaking the bank. Grab a tub, and you’ll see why it’s a favorite for DIYers and seasoned woodworkers alike.