I’m a maker who’s spent countless hours tinkering with 3D printers, and choosing the right one can feel like picking a favorite song—each has its own vibe. The Bambu Lab P1S and A1 are two heavyweights in the consumer 3D printing world, and I’ve tested both to help you decide which fits your workshop.
This article compares their features, weighs their pros and cons, and shares my real-world experience to guide your choice. Whether you’re a hobbyist or a pro, let’s find the printer that sparks your creativity.
A Brief Comparison Table
| Feature | P1S | A1 |
| Price (Base) | $699 | $399 |
| Price (Combo with AMS) | $949 | $559 |
| Build Volume | 256 x 256 x 256 mm | 256 x 256 x 256 mm |
| Motion System | CoreXY | Cartesian (Bed Slinger) |
| Enclosure | Fully enclosed | Open design |
| Max Print Speed | 500 mm/s | 500 mm/s |
| Max Acceleration | 20,000 mm/s² | 10,000 mm/s² |
| Hotend Max Temp | 300°C | 300°C |
| Bed Max Temp | 110°C | 100°C |
| AMS Compatibility | Full AMS (up to 16 colors) | AMS Lite (up to 4 colors) |
| Display | Monochrome, text-only | 3.5-inch color touchscreen |
| Camera | 720p, 0.5 fps | 1080p, gantry-mounted |
| Noise Level | Moderate | Quieter with silent motor drivers |
| Filament Types | PLA, PETG, TPU, ABS, ASA, PA, PC | PLA, PETG, TPU, limited ABS/ASA |
| Auto Calibration | Yes | Yes, with flow rate sensor |
| Footprint (with AMS) | Compact (AMS on top) | Larger (AMS beside) |
My Journey With 3D Printing And Why This Comparison Matters?
I got hooked on 3D printing about five years ago when I built my first printer from a kit.
The thrill of watching a digital model come to life layer by layer never gets old.
But as my projects grew—think custom drone parts, multi-color game pieces, and even some ABS prototypes—I needed a machine that could keep up.
Bambu Lab’s P1S and A1 caught my eye for their speed, quality, and user-friendly features.
I’ve spent months printing with both, and I’m excited to share what I’ve learned to help you pick the right one.
The P1S is a fully enclosed CoreXY printer, designed for speed and versatility, while the A1 is a Cartesian “bed slinger” that’s more affordable and beginner-friendly. Both promise stellar print quality, but they cater to slightly different needs.
I’ll break down their features, share my hands-on experience, and highlight what makes each shine (or stumble).
Design And Build: Enclosed Elegance Vs. Open Accessibility
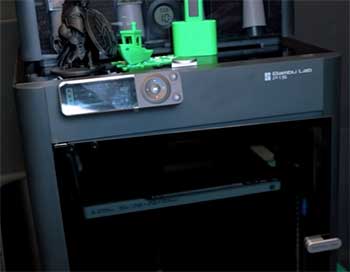
When I unboxed the P1S, its sleek, enclosed design screamed “professional.” The plastic panels and compact frame make it look like a high-end appliance, perfect for my small workshop.
The CoreXY motion system, where the print bed only moves vertically, feels sturdy and minimizes vibrations at high speeds.
This design lets the P1S handle complex prints without the bed wobbling, which I noticed when printing tall, intricate models.
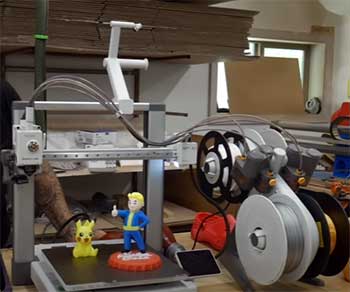
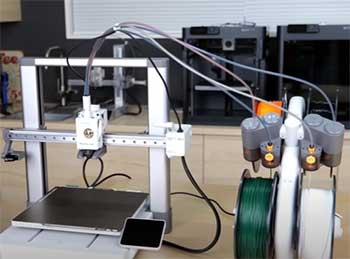
The A1, on the other hand, has an open, modern look that reminds me of IKEA furniture—clean lines and a polished frame.
Its Cartesian setup, with the bed moving back and forth, is less rigid but makes the hotend and components super accessible.
I swapped nozzles on the A1 in under a minute, thanks to its magnetic clip system, while the P1S required a bit more finesse with a screwdriver.
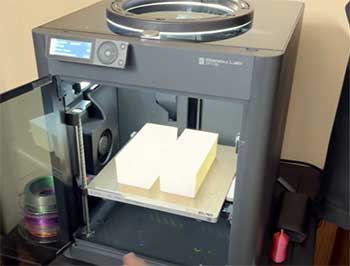
The P1S’s enclosure is a game-changer for printing materials like ABS, which need stable temperatures to avoid warping. I printed a large ABS enclosure for an electronics project, and the P1S kept the chamber warm and draft-free, resulting in a flawless part.
The A1 struggled with larger ABS prints unless I rigged an aftermarket enclosure, which added hassle and cost.
However, the A1’s open design makes maintenance a breeze. When a filament jam clogged the hotend, I could see and fix it without dismantling panels. The P1S’s enclosure, while great for printing, meant I had to remove screws to access the same components.
If you’re new to 3D printing or love tinkering, the A1’s accessibility is a big plus.
Speed And Performance: Neck-and-Neck, with a Twist
Both printers boast a max speed of 500 mm/s, which is blazing fast compared to my old Ender 3. In real-world tests, though, the P1S edges out the A1 thanks to its higher acceleration (20,000 mm/s² vs. 10,000 mm/s²).
I printed a 3DBenchy—a standard test model—on the P1S in 13 minutes with crisp details. The A1 took 16 minutes, still impressive, but I noticed slight ringing on sharp corners at max speed.
The P1S’s CoreXY system shines here. Its rigid frame and dual-motor setup let it zip through direction changes without sacrificing quality. I pushed the P1S to “ludicrous” mode (164% of standard speed) for a PLA phone stand, and the results were nearly perfect.
The A1, with its bed-slinger design, handles high speeds well but benefits from input shaping—a feature that reduces vibrations. Without it, I’d see more artifacts on fast prints.
Both printers use vibration compensation and pressure advance to maintain quality at speed. The A1’s flow rate sensor, a feature borrowed from the A1 Mini, fine-tunes filament extrusion automatically.
I printed a PETG gear on the A1, and the sensor ensured smooth surfaces without manual tweaking. The P1S lacks this sensor, so I occasionally adjusted flow rates in Bambu Studio for trickier materials.
Material Versatility: P1S Takes The Lead
Material compatibility is where the P1S pulls ahead.
Its enclosed chamber and 110°C bed temperature make it a beast for technical filaments like ABS, ASA, and polycarbonate.
I printed a carbon fiber-filled nylon part for a robotics project, and the P1S handled it like a champ, with no warping or layer separation.
The enclosure also traps odors, which is a relief when printing ABS in my home office.
The A1, with its open design and 100°C bed limit, is best for PLA, PETG, and TPU. I printed vibrant PLA models, like a multi-color Settlers of Catan set, with zero issues. But when I tried ABS, larger parts warped unless I used a draft shield and slowed the print.
For carbon fiber or glass-filled filaments, the A1 needs a hardened steel hotend and extruder gear, which adds cost and complexity.
If you stick to beginner-friendly filaments, the A1 is fantastic. But if you’re like me and love experimenting with engineering-grade materials, the P1S’s versatility is worth the extra investment.
Multi-Color Printing: AMS As. AMS Lite
Both printers support Bambu Lab’s Automatic Material System (AMS) for multi-color or multi-material prints, but they use different versions. The P1S pairs with the full AMS, which supports up to four units for 16 colors.
I printed a topographic map with four colors on the P1S, and the transitions were crisp, though the purge tower wasted about 20% of the filament. Stacking the AMS on top of the P1S keeps my desk tidy, which I appreciate in my cramped workspace.
The A1 uses the AMS Lite, limited to four colors. It sits beside the printer, taking up more desk space, and its exposed filament feeds look a bit messy. I printed a multi-color keychain, and the AMS Lite worked well, but the waste was higher—around 30% for a small part.
The A1’s system is simpler mechanically, retracting filament directly from the hotend, which I found more reliable for frequent color changes.
For casual multi-color projects, the A1’s AMS Lite is plenty. But if you’re dreaming of 16-color masterpieces, the P1S’s full AMS is the way to go.
User Experience: Touchscreen Vs. Text Display
The A1’s 3.5-inch color touchscreen is a joy. It’s responsive, shows print previews, and guides you through setup with clear prompts. I started a print directly from the screen in seconds, and the interface felt like using a smartphone.
The P1S’s monochrome text display, controlled by a D-pad, feels like a step back. It shows basic info—temps, print time—but navigating menus is clunky. I relied on the Bambu Handy app or Bambu Studio to control the P1S, which mitigated the issue but didn’t fully replace a good onboard interface.
Both printers offer Wi-Fi connectivity, letting you monitor prints remotely. The A1’s gantry-mounted 1080p camera provides a decent view, though it refreshes slowly (about one frame every two seconds).
The P1S’s 720p camera is grainier and struggles in low light, but it’s enough to check for print failures. I caught a loose print on the A1 via the app and paused it remotely, saving filament.
Calibration and Setup: Plug-and-Play Perfection
Setting up both printers was a breeze.
The P1S took about 40 minutes, mostly to unpack the AMS and attach the spool holder.
The A1 was faster—30 minutes—since its gantry and base screw together easily.
Both run a 15-20 minute auto-calibration on first boot, leveling the bed, compensating for vibrations, and tuning motor noise.
I’ve run dozens of prints on both without needing to recalibrate, though I occasionally ran the A1’s flow rate calibration for new filaments.
The P1S’s auto bed leveling is rock-solid, ensuring perfect first layers even on long prints. The A1’s system is equally reliable and adds the flow rate sensor, which I found especially helpful for TPU, a notoriously finicky material.
If you hate manual tweaks like I do, both printers make setup feel effortless.
Noise Levels: A1’s Quiet Edge
Noise matters when your printer runs for hours in a shared space. The A1’s silent motor drivers keep it hushed, with cooling fans producing a soft white noise. I ran it in my living room, and my partner barely noticed.
The P1S is louder, with a hum that’s noticeable during fast prints. It’s not deal-breaking, but I kept it in a separate room to avoid distractions. Bambu’s recent firmware updates have quieted the P1S slightly, but the A1 still wins for stealth.
Print Quality: Too Close to Call
Both printers deliver jaw-dropping print quality right out of the box. I printed a detailed PLA dragon on the P1S, and the scales were razor-sharp, with no stringing. The A1 matched it on a PETG phone holder, with smooth surfaces and tight tolerances.
The P1S’s CoreXY system theoretically offers better precision due to its rigidity, but in practice, the A1’s input shaping and sensors close the gap. Unless you’re printing at ludicrous speeds or using exotic materials, you won’t see a difference.
Also Read: Differences Between Flashforge And Creality 3D Printers.
Pros And Cons of Bambu Lab P1S And A1
Bambu Lab P1S Pros
- Enclosed design handles ABS, ASA, and engineering filaments like a pro.
- CoreXY system delivers faster acceleration and smoother high-speed prints.
- Full AMS support for up to 16 colors, ideal for complex multi-color projects.
- Compact footprint with AMS stacking saves desk space.
- Robust build feels premium and durable.
Bambu Lab P1S Cons
- Outdated monochrome display is a letdown for the price.
- Louder operation can be distracting in shared spaces.
- Enclosure makes maintenance trickier than an open design.
- Higher price tag, especially with AMS combo ($949).
Bambu Lab A1 Pros
- Affordable at $399 (or $559 with AMS Lite), perfect for beginners.
- Color touchscreen is intuitive and modern.
- Quieter operation thanks to silent motor drivers.
- Open design makes maintenance and nozzle swaps a breeze.
- Flow rate sensor improves print quality without manual tweaks.
Bambu Lab A1 Cons
- Open design limits ABS and ASA printing without an enclosure.
- AMS Lite is bulkier and limited to four colors.
- Bed-slinger design is less stable at extreme speeds.
- Slightly slower acceleration compared to P1S.
Who Should Buy the P1S?
The P1S is my pick if you’re a seasoned maker or need to print technical materials. Its enclosure and high bed temperature make it a beast for ABS, ASA, and carbon fiber-filled filaments. I used it for a drone frame in polycarbonate, and the results were sturdy and precise.
The full AMS is a dream for multi-color enthusiasts, and the CoreXY system ensures speed doesn’t compromise quality. If you have the budget and want a printer that grows with your skills, the P1S is worth every penny.
Who Should Buy the A1?
The A1 is a no-brainer for beginners or budget-conscious hobbyists. Its $399 price tag (or $559 with AMS Lite) delivers pro-level quality without breaking the bank. I recommended it to a friend new to 3D printing, and they were printing PLA models within an hour.
The touchscreen and quiet operation make it a joy to use, and the open design simplifies maintenance. If you stick to PLA, PETG, or TPU and want a plug-and-play experience, the A1 is your match.
My Verdict: It’s All About Your Needs
After months of printing with both, I lean toward the P1S for its versatility and enclosure. It’s my go-to for complex projects, like multi-material prototypes or ABS parts.
But the A1 surprised me with its ease of use and value. It’s the printer I’d gift to a newbie or use for quick PLA prints. Your choice depends on your goals: prioritize material flexibility and speed with the P1S, or go for affordability and simplicity with the A1.
Also Read: Differences Between Flashforge And Bambu 3D Printers.
Frequently Asked Questions (FAQ)
The A1’s open design restricts ABS and ASA printing without an enclosure, and its AMS Lite supports only four colors. It has slower acceleration (10,000 mm/s²) and a larger footprint with AMS.
Yes, the P1S can print carbon fiber-filled filaments with its enclosed chamber and 300°C hotend, though a hardened steel nozzle is recommended for durability.
The Bambu X1 Carbon matches the A1’s max speed (500 mm/s) but has higher acceleration (20,000 mm/s² vs. 10,000 mm/s²), making it faster for complex prints, similar to the P1S.
Conclusion: Your Perfect Printer Awaits
You’re standing at a crossroads, ready to pick a 3D printer that fuels your creativity. The Bambu Lab P1S and A1 are both phenomenal, but they cater to different makers. If you crave versatility for technical materials or multi-color epics, the P1S is your trusty sidekick.
If you’re starting out or want an affordable, user-friendly machine for PLA and PETG, the A1 won’t let you down. I’ve loved testing these printers, and I’m confident you’ll find the one that brings your ideas to life.
Happy printing!
This is one of the best product comparisons/reviews I’ve ever read. Well done!