If you’re tired of mediocre coffee from pods or bulky machines and crave rich, smooth cups that highlight your favorite beans, you should buy the AeroPress right now.
It’s affordable, portable, and delivers cafe-quality results at home or on the go—trust me, once you try it, you’ll wonder how you ever settled for less.
My First Experiences With The AeroPress
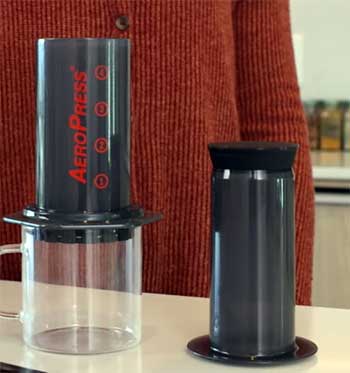
When I first unboxed my AeroPress a few years ago, I admit I was skeptical.
It looked so simple—just a plastic tube, plunger, and some filters.
How could this little thing compete with my old drip machine or the convenience of pods?
But you know that excitement when you try something new and it clicks immediately?
That’s what happened on my very first brew.
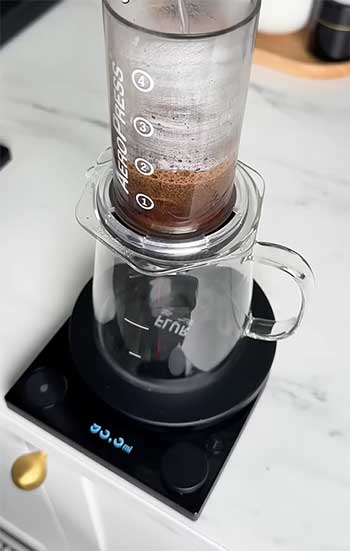
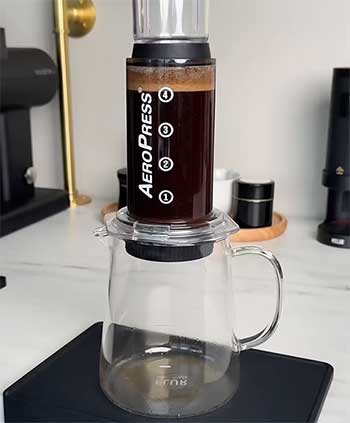
I started with the standard method: scooped in some medium-ground beans from a local roaster, poured hot water, stirred, and pressed.
The coffee that came out was eye-opening—smooth, full-bodied, with none of that bitter edge I was used to.
It tasted clean, almost like a hybrid between pour-over clarity and espresso richness. I drank it black, and the flavors popped: bright notes from a light roast Ethiopian bean I’d been struggling to enjoy in my French press.
Over the next weeks, I experimented more. One morning, I tried the inverted method—flipping it upside down to let the grounds steep longer. You feel like a mad scientist doing it, but the control is addictive.
I added a bloom phase, pouring just enough water to wet the grounds first, then waiting 30 seconds before the full pour. The result? Even sweeter, more balanced cups. My partner joined in, and we’d brew side by side, tweaking ratios until we found our perfect strength.
Travel sealed the deal for me. I packed it for a weekend trip—no electricity needed, just hot water from a hotel kettle. Brewing in a tiny Airbnb kitchen felt liberating. You press over a mug, and in under two minutes, you’ve got a superior cup while everyone else settles for instant packets.
I’ve taken it camping too, pairing it with a portable grinder. The ritual grounds me: grinding beans fresh, watching the steam rise, pressing slowly to extract every nuance.
What surprised me most is how forgiving it is. Mess up the grind a bit? Still tasty. Water too hot or cool? Adjustable next time. I’ve made concentrated shots for Americanos, diluted for larger mugs, even cold brew overnight.
You start seeing coffee differently—less about convenience, more about craft. My daily routine shifted: no more rushing to a cafe; I make what I want, exactly how I want it. It’s empowering, and honestly, fun. If you’re like me and love tinkering but hate complicated setups, you’ll get hooked fast.
The Pros That Make AeroPress Stand Out
- Incredible Flavor in Every Cup
You won’t believe how much better your coffee tastes until you try it yourself.
The AeroPress combines immersion with gentle pressure, extracting flavors quickly without overdoing bitterness.
I love how it brings out sweetness and brightness in beans—light roasts shine with fruity notes, mediums feel balanced and chocolatey, dark roasts get rich without harshness.
Compared to my old methods, it’s cleaner, smoother, almost velvety.
The paper filter traps oils and fines, leaving no grit or muddiness. You get that full-bodied feel like a French press but with pour-over clarity. It’s low in acidity too, so even sensitive stomachs handle it well.
- Versatility You Can Play With
This is where you really feel the magic. Want espresso-style concentrate? Fine grind, quick press for intense shots perfect in lattes. Prefer something lighter like pour-over? Coarser grounds, longer steep for delicate nuances.
I’ve made everything from strong morning shots to refreshing iced coffee, cold brew concentrates, even tea infusions. You control temperature, time, agitation, even bypass water for dilution. Add accessories like a metal filter for more body or a Prismo for real pressure buildup.
It’s like having multiple brewers in one compact tool—you tweak recipes endlessly without buying new gear.
- Portability and Durability for Real Life
I throw mine in a bag without worry—it’s lightweight, unbreakable plastic that survives drops, travel, even backpacking. No fragile parts, no electricity required. You brew anywhere with hot water: office desks, hotel rooms, campsites, hikes.
Models like the Go pack into a mug for ultimate compactness. It’s tough; mine’s years old, scratched but performing perfectly. Newer versions like Clear or Premium use better materials, but even the original holds up amazingly.
- Speed That Fits Busy Mornings
You get a fresh cup in about a minute or two. Heat water while grinding, pour, stir, press—done. Faster than waiting for a full pot or preheating machines. No long waits like cold brew or complicated setups. You brew exactly what you need, no waste.
- Easy Cleanup That Saves Time
This changed everything for me. Press out the puck, rinse under the tap—the plunger wipes the chamber clean. No scrubbing pots, no messy filters lingering. Dishwasher-safe too (top rack). You’re ready for the next brew instantly. The puck composts easily.
- Affordable Without Compromising Quality
You spend little upfront, and ongoing costs are low: cheap paper filters or reusable metal ones. Fresh beans beat expensive pods every time, saving money long-term while enjoying better coffee. Accessories enhance without breaking the bank.
- Eco-Friendly and Consistent Results
Paper filters are biodegradable, metal ones reusable forever. You reduce waste compared to pods. It’s forgiving—consistent great cups even if variables shift slightly. Fresh grounds always win over stale pods.
These strengths add up to something special—you feel involved without hassle, and the results reward your effort every single time. Pair it with a good grinder, and you’re set for years.
Also Read: Is Shardor Coffee Grinder Worth It?
Maintenance Tips To Keep Your AeroPress Brewing Perfectly
- Daily Cleaning for Effortless Upkeep: After each brew, you just eject the puck into the trash or compost—it’s satisfying and quick. Run hot water through the chamber, plunger, and cap; the design self-cleans as the plunger pushes residue out. You wipe the rubber seal gently with your finger or cloth. Takes seconds, and you’re done. I do this every time, and it keeps flavors pure, no old oils tainting tomorrow’s cup. Rinse the filter cap too if grounds stick.
- Deep Cleaning When Needed: Every few weeks, or if you notice buildup like sticky residue or off smells, you disassemble fully. Pop off the silicone seal—it’s easy, twists right off without tools. Soak everything in warm soapy water for 10-15 minutes, or use a vinegar-water mix (1:1) for stubborn coffee oils and minerals. You scrub lightly with a soft brush or sponge inside grooves and the seal’s crevices. Avoid abrasives to prevent scratches. Rinse thoroughly, air dry. This prevents off-tastes, keeps the seal pliable, and extends life. I vinegar-soak monthly; it refreshes everything, removes any scale from hard water.
- Storing Properly for Longevity: Always store assembled with the plunger pushed fully through the chamber—this relaxes the seal, preventing compression set or cracks over time. You keep filters dry in their holder or cap. If traveling, pack in a case or the Go mug to protect from dust. Avoid extreme heat like car dashboards; plastic can warp. These habits mean your AeroPress lasts decades—mine shows no wear.
- Filter Care and Alternatives: Paper filters give that clean, bright taste; rinse and reuse 2-3 times if careful, saving money. For fuller body with more oils, switch to reusable metal filters—clean them with soap or soak after each use to avoid rancid oils. Stock papers cheaply in bulk. Pre-rinse papers with hot water to remove papery taste and preheat the brewer.
- Avoiding Common Issues and Extending Life: Don’t press too hard if resistance builds—check for too-fine grind or old buildup first. Use filtered water to minimize minerals. If the seal feels sticky, warm soapy water fixes it; replace seals cheaply if worn (rare). Occasionally remove and flip the seal for even wear. Dishwasher occasionally ok (top rack), but hand-washing preserves better. With accessories like organizers, everything stays tidy and ready.
- Extra Tips for Peak Performance: Use gentle dish soap—harsh ones degrade plastic over years. Dry fully before storing to prevent mold. If brewing often, weekly seal massage with food-grade mineral oil keeps it supple (optional). For Go models, clean the mug lid grooves. These steps ensure consistent, delicious brews—your investment stays like new.
Following these, your brews stay consistent and delicious. It’s truly low-maintenance, but a little care goes far—you’ll appreciate how reliable and fresh it remains year after year.
The Cons I’ve Encountered Along the Way
No product is perfect, and the AeroPress has a few drawbacks that I’ve run into over years of daily use. Here they are honestly:
- Limited Capacity for Groups: It’s designed for 1-2 cups max (original about 10oz, Go less, XL more but still not huge). If you host often or brew for multiple people, repeating the process gets repetitive and time-consuming.
- Manual Effort Required: You provide the press and timing—no automation or presets. That hands-on involvement is rewarding for flavor control, but if mornings are rushed or you want zero effort, it feels like work compared to pod machines.
- Experimentation Needed for Perfection: Results shine with tweaks to grind, ratio, time, temperature. Beginners might get inconsistent cups at first—sour if under-extracted, bitter if over.
- Plastic Construction Concerns: Though food-safe, BPA-free, and durable, some worry about microplastics with hot water or long-term scratches. Premium glass/metal versions fix this but cost much more.
- Not True Espresso: It makes strong concentrate great for Americanos, but no real crema or high pressure like machines. Espresso purists might miss that intensity.
- Small Parts to Manage: Accessories and filters can scatter if not organized; losing the cap or scoop annoys.
- Dripping in Inverted Method: Without add-ons like Prismo, it can leak slightly when flipped, requiring careful setup.
These aren’t dealbreakers for me—the upsides dominate hugely—but they’re worth knowing if convenience trumps craft.
Also Read: Is Hamilton Beach FlexBrew Worth It?
How AeroPress Compares To Other Brewing Methods?
- AeroPress Versus French Press
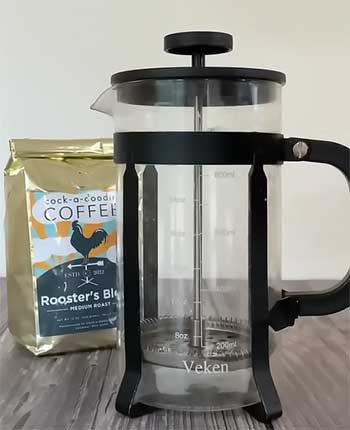
I’ve owned both for years, and they feel like cousins in the immersion world—you steep grounds in hot water, then separate them somehow. But the differences hit you right in the cup.
With my French press, that metal mesh lets through all the natural oils and tiny particles, giving you a thick, heavy-bodied coffee that’s rich and almost syrupy.
Dark roasts feel indulgent, with chocolatey depth and a lingering mouthfeel.
You brew larger batches easily—perfect when my partner and I want multiple mugs without fuss.
Steep for four minutes, plunge slowly, and you’re set.
The AeroPress shifts everything to cleaner territory. That paper filter (or metal for more body) traps fines and excess oils, resulting in smoother, brighter cups with low bitterness and no sediment at the bottom. Light roasts pop with fruity clarity, and acidity shines without harshness.
You finish brews in under two minutes, pressing gently for controlled extraction. It’s forgiving if you tweak variables, but rewards precision.
Cleanup tells another story: French press means rinsing that mesh plunger thoroughly to avoid rancid oils, and glass carafes demand care. AeroPress? Eject the puck, quick rinse—done. Portability seals it for me; the French press stays home, while AeroPress travels everywhere.
If you crave bold, oily richness and brew for groups, grab a French press. For quick, clean, nuanced single servings you control deeply, AeroPress wins every time.
- AeroPress Versus Hario Switch
The Hario Switch fascinates me because it’s a hybrid—you use it for pure immersion like me with AeroPress, or flip the switch for pour-over percolation, blending styles in one brew.
In immersion mode, you close the valve, steep, then release for drawdown through a V60-style cone.
You get bright, sweet cups with good clarity, often highlighting acidity and complexity in light roasts.
The conical shape and paper filter encourage even extraction during release, and larger sizes handle multiple cups better than my standard AeroPress.
AeroPress adds that manual pressure at the end, pushing water through faster for higher extraction potential.
You achieve stronger, more concentrated brews—espresso-like shots or balanced Americans—with versatility in recipes. Inverted method lets you steep longer without dripping, and agitation feels more direct.
The Switch looks elegant in glass, great for home setups where you experiment with hybrid recipes (bloom immersed, then pour). But it’s fragile, needs careful pouring technique for percolation, and cleanup involves rinsing the cone and base.
AeroPress stays unbreakable, ultra-portable, and simpler for pure immersion. You brew consistently without waiting for gravity drawdown, and pressure avoids clogging risks with finer grinds.
If you love pour-over vibes and want immersion options in beautiful gear, the Switch excites. For speed, toughness, and pressure-driven flavor control on the go, I stick with AeroPress.
- AeroPress Versus Clever Dripper

The Clever Dripper keeps things straightforward—it’s a steep-and-release immersion brewer like a no-fuss French press with paper filter.
You add grounds and water, cover, steep, then set on a mug to release through the valve.
You get reliably clean, smooth cups that are bright and consistent, hard to mess up.
It’s forgiving with grind size and time; leave it longer without over-extracting much.
Larger capacity suits brewing for two easily, and the plastic build handles daily use without worry.
AeroPress brings more intensity via pressure—you force extraction quicker, pulling sweeter, fuller flavors with better body control. You make concentrates or dilute for variety, and recipes abound for tinkering. Brews finish faster, cleanup pops easier with the puck ejection.
The Clever shines in set-it-and-forget-it mornings—you walk away during steep, no active pressing. Drawdown takes time, though, and it’s bulkier for travel than my compact AeroPress.
AeroPress travels better, resists breaks, and offers higher extraction ceiling for nuanced beans. But if you want dead-simple immersion with minimal effort and consistent results, the Clever delivers without drama.
Ultimately, these comparisons show why I keep reaching for AeroPress—its blend of speed, portability, cleanliness, and flavor flexibility fits my life perfectly. You might find one of the others calls to you more, depending on your routine.
Also Read: My Experience With Fellow Aiden Precision Coffee Maker.
Frequently Asked Questions (FAQ)
Common criticisms include its plastic build, limited single-serve capacity, and manual operation requiring some effort.
It’s mostly for one cup at a time, manual (no automation), and needs experimentation for best results.
Its unique 3-in-1 brewing (immersion, pressure, filtration) creates smooth, low-bitterness coffee quickly, with endless recipe versatility.
Yes for taste, freshness, cost, and environment—fresh grounds beat pods, with richer flavor and no waste.
Wrapping Up My AeroPress Journey
Looking back, grabbing the AeroPress was one of my best decisions. You get exceptional coffee tailored to you, without fuss or expense. If flavorful, fresh brews excite you—whether home, travel, or experimenting—buy one today.
It’ll elevate your routine like it did mine.